Before and After: A “Really Gross” Bathroom Gets a Modern Beachy Makeover for $8,000

Beach house bathrooms are in a league all their own because they have to be extra durable, able to withstand salt and sand galore. If you’re a beach bum, check out these great tips for keeping sand out of the house and out of your clothes, and don’t miss these tips for keeping tile floors pristine — even the grout.
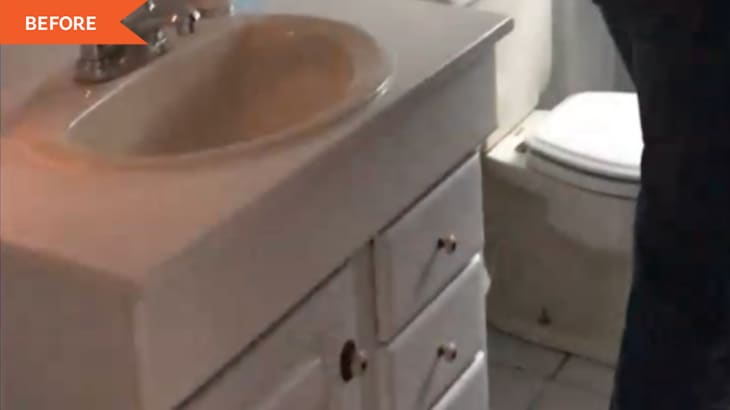
Sometimes it takes a little work to get a beach bathroom up to snuff. In Hannah and Michael Oravec’s house near the beach, the grout between their bathroom’s white tiles was “forever stained brown,” Hannah says. The ceiling was leaking from the flashing on the roof not being installed correctly, there was mold that was caulked over in the shower, and the vanity was peeling off.
“We decided to make a change to the bathroom — one, because it was really gross, to be honest,” Hannah says. And it wasn’t very functional either. There was a slippery tub, a barely-working shower head, and an overall poor layout. None of it was ideal for washing off sandy feet after a day at the shore (or for daily bathroom use).
“The bathroom was a decent size, but with the existing layout, there was a lot of wasted space,” Hannah says. Plus, the bathroom before had a bit of a cottage-y vibe, and she was going for a more modern look that still was still light and beachy.
She and Michael spent $8,000 gutting the place and giving it a head-to-toe makeover, including raising the ceilings and switching up the layout.
“To save money, we were going to use the existing plumbing,” Hannah says. “When we started demoing, we … knew that we weren’t going to be able to keep it. It ended up being a blessing in disguise because then we rotated the shower and toilet locations and were able to make the shower a whole foot bigger!”
Plus, now, the window is located in the shower. “Because we used a glass door and kept the finishes lighter, the space is still really light and airy,” Hannah says of the “after.”
It feels much larger in part thanks to the white paint on the walls (Clare’s Whipped), too.
Hannah’s best advice, post-DIY, is to be flexible. “Don’t try to fight the space if something isn’t working,” she says. “Take a step back and evaluate the situation if something doesn’t feel right.”
Hannah’s favorite part of the bathroom is the shower, where they installed 3×6 marble tiles on the walls and a pebbly mosaic selection on the ground. She especially loves the arched doorway. “It just makes the coolest focal point when you’re walking into the room,” she says. “The grout with the marble variation and custom brass trim really make the archway pop, too.”
Hannah says due to the custom details in the space, like archway, the wooden beams up above, the vanity, and the shelving, the bathroom renovation took about a year.
“My husband was doing all of the renovation on nights and weekends when he had time,” she says. The actual re-construction of the bathroom took about three months, but some of the pieces of the project required extra down time. For example, the poured concrete sink alone took a couple of weeks to fully cure.
“If we were to do this over, I would have made the sink round instead of square,” Hannah says. “It’s a little hard to clean, but we make it work!”
And the slow, custom details were worth it, Hannah says, especially the wrapped wood beam detail. “Because we raised the ceiling up a whole foot, the structural beams that were once in the ceiling were then exposed,” Hannah explains. “We took wood from our family farm, planed it down, and used that wood to clad the beams.”
Hannah is also proud of the vintage wood vanity, the low flow faucets, and the fact that they shopped small businesses to complete their new cozy, modern, beachy bathroom sustainably.
Inspired? Submit your own project here.
This piece is part of Go Slow Month, where we’re celebrating taking your time, taking a deep breath, and taking a step back from it all. From deliberate design ideas to tips for truly embracing rest, head over here to see it all.
