
This Easy $140 DIY Makes My Closet Look Custom (It Tripled the Storage Too!)
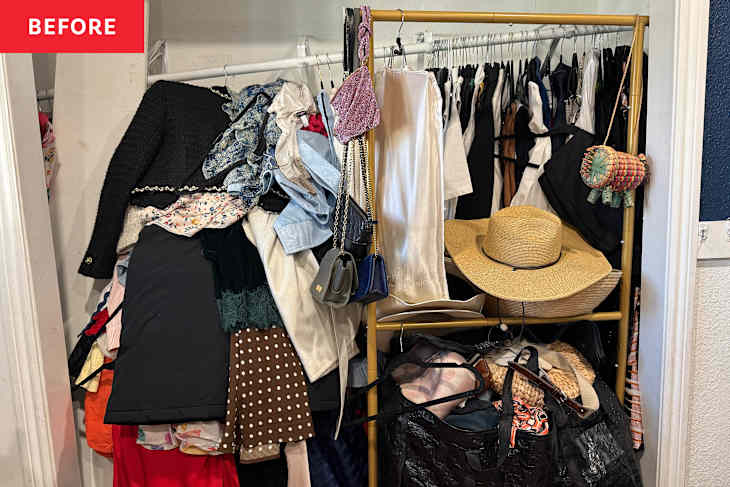
Over the years, my closet rods have failed me not once, but twice in two different houses. My years of collecting statement coats, sequin gowns, and a rainbow of shoes made the weight too much for my standard builder-grade closet rods to handle. And after the umpteenth collapse, where yet another rod ripped straight out of the wall, I knew I couldn’t commit to one more.
Luckily I came across possibly the most brilliant closet storage trick I’ve ever seen on Instagram: using freestanding shelving units as the framework for a closet.
What Is This DIY Closet Storage Trick?
Rather than investing thousands in a professionally installed closet, which I briefly considered, I decided to give this DIY closet storage trick from @prettyprovidenceblog a try. It’s easy and affordable, as it just requires you to pick up a few items from Target and a hardware store before assembling.
I made a quick trip to Target to get the supplies. I picked up a $40 5-shelf bookcase and two $26 11-inch, 3-cube bookshelves. Lastly, I ordered three adjustable rods on Amazon for $15.99 each. By the end, the entire closet renovation project cost just $139.97.


What Happened When I Tried This $140 DIY Closet Storage Upgrade
The assembly of all six items was surprisingly straightforward. Once the shelves were built and placed in the middle of the closet, I added rods on either side. On the left side, I screwed in a single rod a little higher than eye level, and then two on the right side. I slid my original ledge above the center shelf and placed the two cube organizers over the top.
Despite this DIY project’s simple concept and affordable price tag, the result looks surprisingly similar to a custom closet system. Instead of hanging everything from the wall, this hack utilizes shelving to provide dedicated storage for my shoes, the cubes became a filing system for my handbags, and the space above the cubes can hold folded items and accessories while also supporting the hanging rods. The left side provided the perfect space to hang dresses, while the right side easily accommodated tops, jackets, pants, and skirts.

Why This $140 DIY Closet Project Is So Much Better Than a Traditional Closet Rod
Before the big collapse, like many reach-in closets, mine relied on a single hanging rod and a shelf above it. While functional for the minimalist, I found myself sifting through handbags stacked on the floor, shoes tucked into a flimsy shoe rack, and accessories crammed into corners. Every inch of vertical space above and below the rod was essentially wasted — but now, items I forgot I owned are visible again. Everything is in reach, nothing is hidden or crushed, and even the very top shelves up to the ceiling have become valuable, accessible storage space.
Visually, the transformation is dramatic. What had once looked like a cramped, overstuffed closet now feels closer to a boutique dressing room. The shelving added structure and made the entire space feel intentional. More importantly, the weight is no longer concentrated on a single closet rod attached to drywall, eliminating any chance of another collapse. And most surprising of all, I realized I didn’t need a bigger closet; I just needed a new system, $140, and a free afternoon.