Sneaky Ways To Stash All Your Craft Supplies

I love having a well-stocked craft cupboard (or room, tote, or closet), but find myself locked in a never-ending battle with my craft supplies. A box from IKEA holds all my embroidery supplies except my oversized hoops, my twines are all in a tangle, and there are pompoms everywhere. Here are a baker’s dozen ways to keep your stash organized, accessible, and even aesthetically pleasing.
Turn a Door Into Craft Central
Hang a storage rack on the back of your closet door, then make the most of all the racks, rods, and hooks to keep your stash under control. The ribbon rack is my favorite part, but just the fact that you can see everything at once makes such a difference!
Wash, Fold, Stack, Repeat
This fabric storage is the ultimate goal for anyone who has ever attempted to store fabric. Paint some old shelves your favorite hue, fold all your fabric like you’re Employee of the Decade at The Gap, and you’ll finally be able to see what you’re working with. Don’t forget to remove—and put back—pieces carefully and lovingly.
Put It All on the Wall
These are perfect for storing your scissor, paint brush, and ruler collections, especially if your horizontal workspace is limited. You can also buy wall cubbies, of course, though they’ll probably be less fabulous.
Think Way Outside the Box
I tend to want my supplies to be strictly corralled in closed containers, so these cheerfully overflowing cake stands and berry baskets are blowing my mind. Pile your ribbons, tapes, twines, and yarn balls on platters and cake stands or in bowls, while your markers, paintbrushes, pipecleaners, and straws hang out in cute baskets. Once again, the key is that you’ll be able to see everything, meaning nothing is forgotten—or re-purchased.
Corral with (Candy-Colored) Cups
I am always tempted to buy colorful, summery plastic cups, even though I have no need for them… but now I do! Victoria of A Subtle Revelry keeps craft supplies in them on her desk, where they look good, stay organized, and remind you to use them.
Make Totes for (and with) Your Stash
Each of these totes calls for 1/2 yard of two different fabrics, so make them to both store and use up your stash! They are perfect for holding supplies—yarn in one, scrap fabric in another—or works-in-progress.
Build the Ultimate Pegboard
The Oh Happy Day studio is a major craft supply inspiration—craftspo?—and you can emulate it with our Modern Pegboard Shelving System tutorial. Thousands of dollars of markers not included.
Install Rods for Ribbon (and Tape)
Don’t forget to add horizontal rods to keep all your tape within easy reach (unlike mine, which are jumbled in a bin). And if you’re not able to find a vintage bottle drying rack to hold all your ribbons and twines, you can simply hang each roll on a peg.
Use a Wide Variety of Vessels
While this is perhaps a bit more styled than our craft shelves will ever be, there are some great ideas to be borrowed: kraft and wrapping papers in a jaunty floor basket; glitter, confetti, pom poms, balloons, and packing material in jars; cards in boxes; and baskets to hold tapes, twines, ribbons, party decorations, and more. I tend to want to have neat shelves with lines of identical vessels, but flexibility is key when dealing with the wackiness of craft supplies, and this method allows you to work with what you’ve got, adding more containers as you go.
Store Paints Upside-Down in Stackable Baskets
Oh man, I would love to have so many paints to store so prettily! And while they look amazing organized like this, “…the best part of it all is that I’m storing them upside-down now, so not only can you see all the colors without having to lift them out of the bin but it also means the paint is down by the lid and ready to squeeze outta there.” If you have enough paints, one basket could be neutrals, another cool colors, another warm colors, and so on.
Sort With Trays
Keeping all your supplies for each type of craft on a tray allows you to grab whichever one you need and carry it to wherever you need it to be, all while keeping the supplies sorted and looking fabulous.
Invest in Flat Files
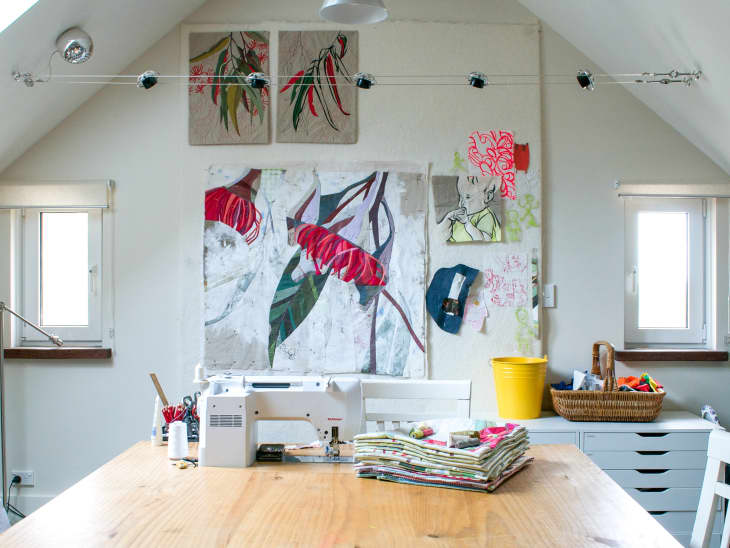
“The wall of cabinets and flat files has been a lifesaver! I store my chipboards, flat mailers, art prints that have already been printed, fine art printing paper, shipping and cutting supplies, artwork on paper and canvas sheets, and thank you cards,” explains the artist. I’ve always wanted flat files, and this just confirms that they’re rad. IKEA has a starter version for $119.
Don’t Forget to Donate
If you have yarn, fabric, paint, beads, or whatever that you’ve been moving from home to home for years, take this moment to decide if you’re ever going to actually use any of it. If you’re not, give your art and craft supplies a good home by donating them. Find out if the public schools in your area accept donations, bring them to a place like San Francisco’s SCRAP, see if your local domestic violence shelter could use any of them, or just drop them off at your nearest thrift store. Someone will make something beautiful out of them, and you’ll have a tidier home!