
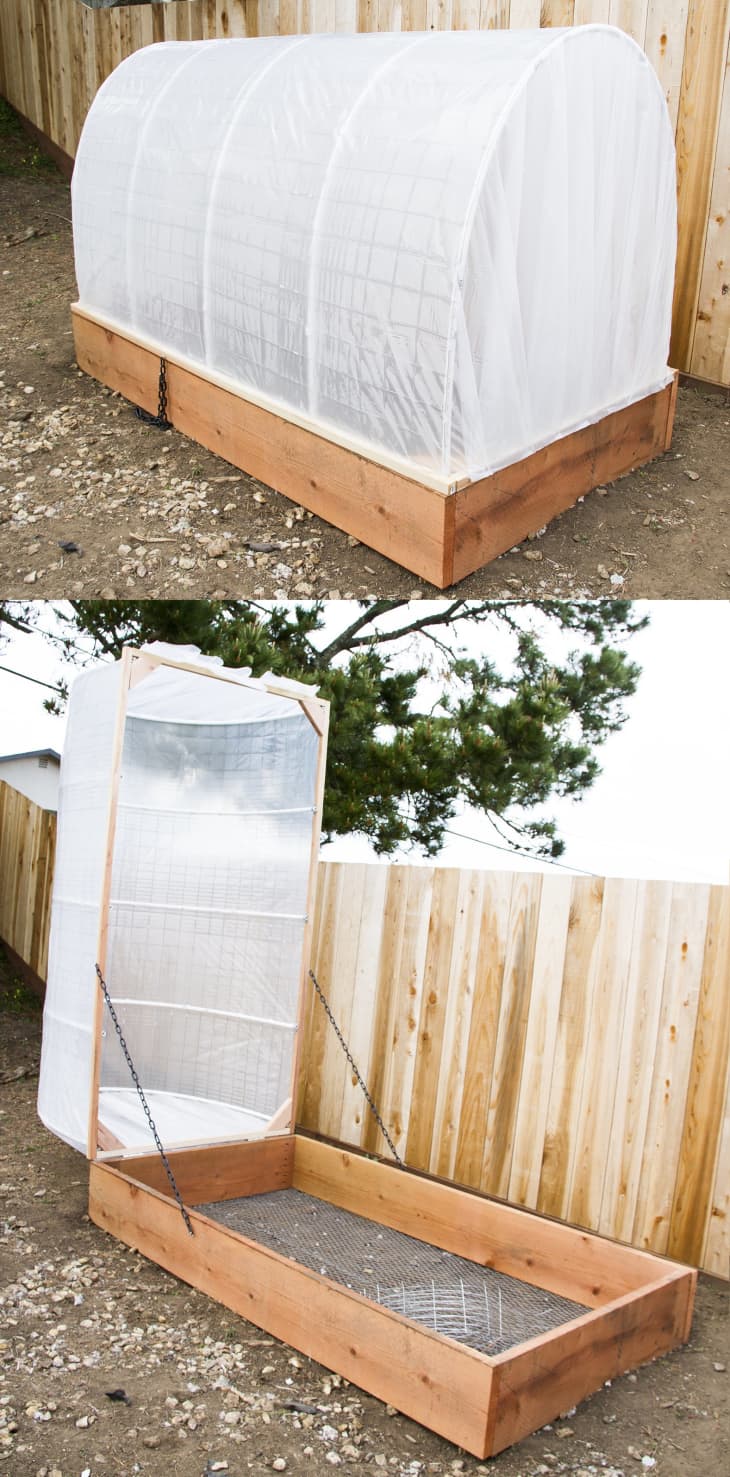
DIY Covered Greenhouse Garden: A Removable Cover Solution to Protect Your Plants

Planting season is upon us, so let me tell you a little story of how this garden came to be. When we bought a house last year, I failed to inquire about the summer weather, thinking it would be just as warm and clear as it was on our open house day. NOPE. Instead, I encountered summers full of chilly fog and harsh winds, much to the dismay of my aspiring green thumb. Determined to keep home-grown veggies on our plates, I put my thinky-brain to work and thus, this covered greenhouse garden was born.
Materials
- 2x6s in redwood (or 2x12s, which are significantly more expensive) cut to desired lengths
- 2x2s for cover frame (cut to match your 2×6 lengths)
- 2x4s for corner bracing
- Wood screws (coated for weather resistance)
- 10′ 1/2″ PVC pipe
- Pipe clamps
- Large weave wire mesh
- Chicken wire or other small weave mesh
- Zip Ties (for securing mesh to PVC)
- Plastic sheeting or garden cloth (at least 12′ wide and twice the length of your garden)
- Staple gun + staples
- 2 Hinges
- 2 Eye hooks
- 6 ft chain cut into 3 ft lengths
- Miter Saw
- Drill
- Staple gun
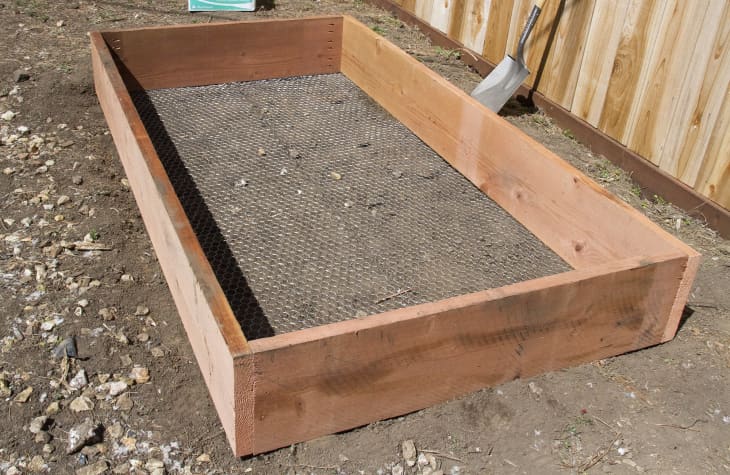
Step 1: Assemble a raised garden frame with 2x12s (or stacked 2x6s to keep costs down) and staple a small-weave mesh to the underside to protect from burrowing pests. I totally unnecessarily used pocket holes for the joints, but a simple butt joint is fine. My garden is 4′ x 8′, and I don’t recommend going wider than 4′, otherwise your arches will be too low.
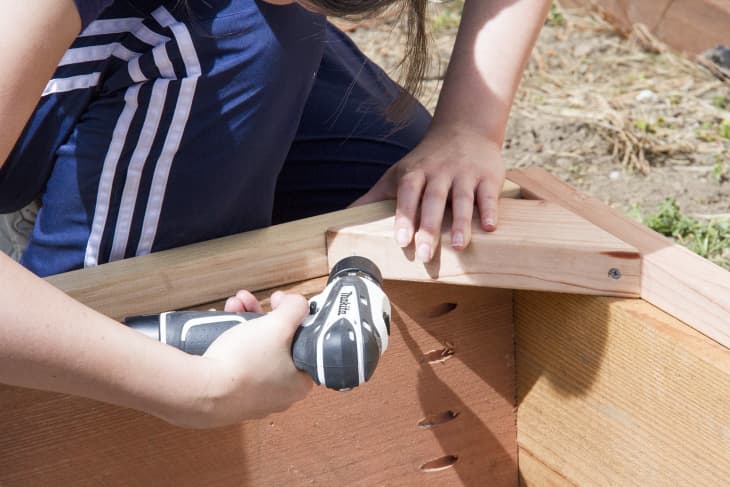
Step 2: Create the frame for your cover using 2x2s, with 2x4s for corner bracing. The frame should be the same length and width as your raised garden frame.
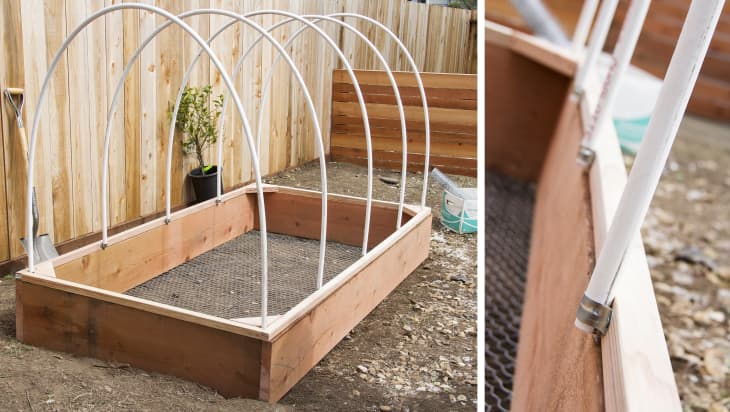
Step 3: Bend 10-ft PVC pipes to create the arches and attach them to the cover frame with pipe clamps. Tip: drive a screw directly through the pipe into the frame to keep it from slipping out of the clamp.
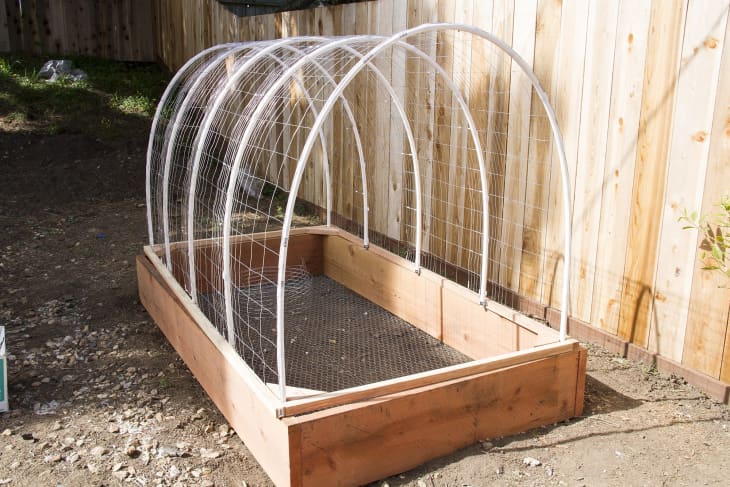
Step 4: Tie a large-weave wire mesh to the PVC arches using zip-ties, wire, or electrical tape. This adds a nice layer of structural support. Alternatively you could forego the wire mesh and use 2x2s for bracing.
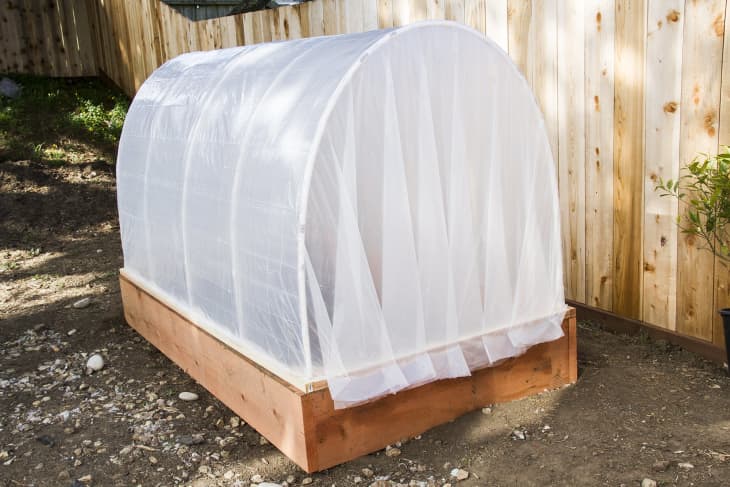
Step 5: Staple plastic or a medium or heavy weight garden fabric over the frame. I initially used plastic, but after finding that temperatures got too high, I switched to fabric. I used “Garden Quilt” from Gardener’s Supply online in the 12′ x 20′ size.
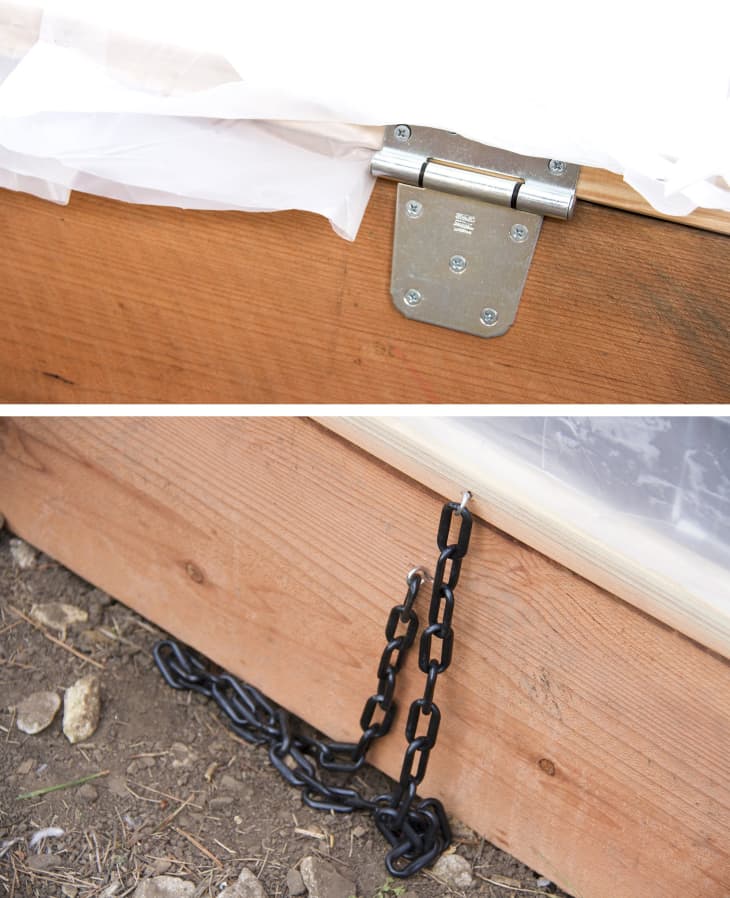
Step 6: Determine which side your cover will hinge from (Tip: make sure you will be able to access your plants easily when the cover is open). Attach two hinges between the cover and the base on this side, and about 3 ft of chain to each side, perpendicular to the hinged side.
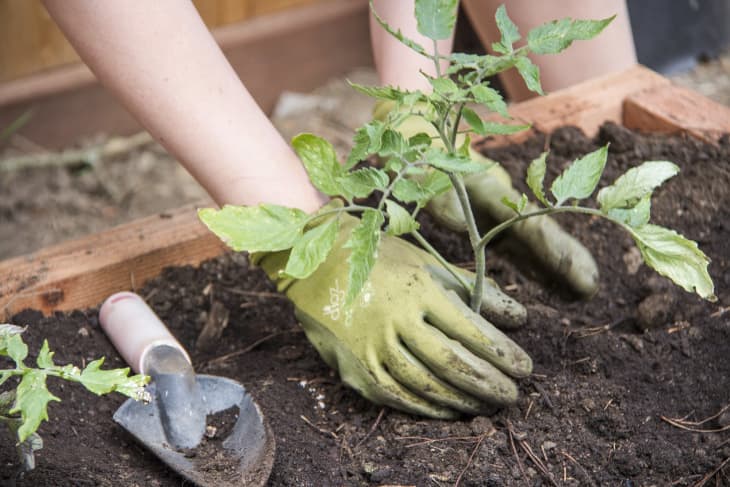
Step 7: Fill the bed with your favorite soil mix and plant those plants! Bonus points for adding in a soaker hose or drip system hooked up to an automatic timer.
So how did my garden do over the chilly summer? See for yourself!
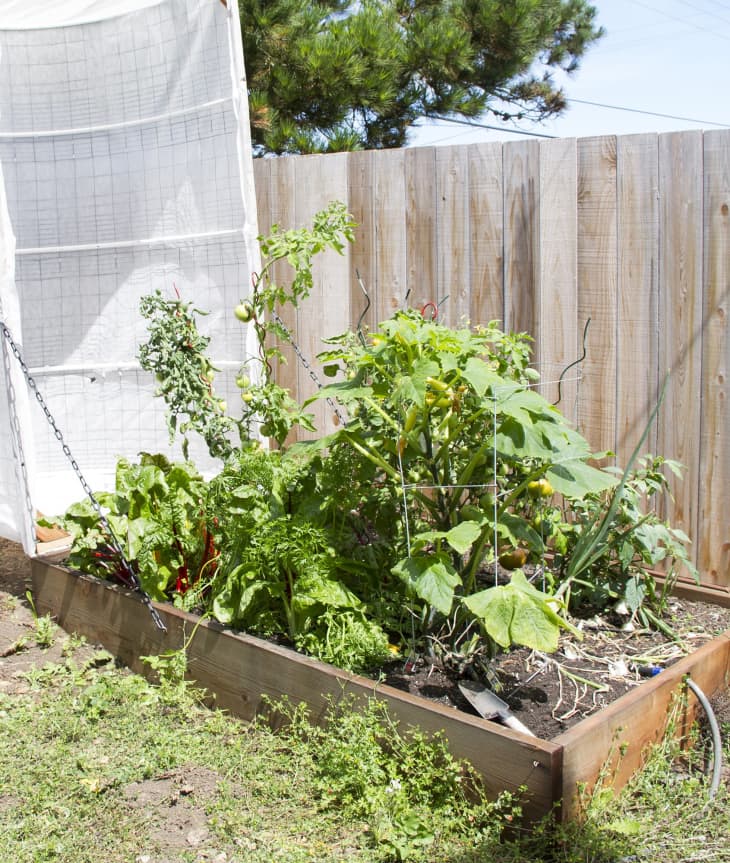
I’ve had this garden for over a year now, and as you can see, it did pretty darn well! I’ve learned quite a lot, so I brain-dumped it into a pros-and-cons list for you.
PROS of a covered greenhouse in a cold and foggy summer:
- Plus 10-15 degree temperature increase.
- Large critters (birds, squirrels, etc) are a non issue.
- Harmful bugs are kept at bay (I got some slugs later in the season, but some Sluggo took care of them).
- Protection from heavy winds.
- Plants seem to thrive overall.
- Yield is potentially greater than a non-covered version.
- Ability to grow certain heat-loving plants that you normally wouldn’t in my climate.
- Extended growing season (I had a sprinkling of tomatoes all the way until January, and my Swiss chard continued strong through the winter and is now HUGE!)
CONS
- Not enough sunlight (though this might be less about the cover and more about the fog).
- Beneficial bugs are kept away, requiring manual pollination.
- Less flavorful crops due to reduced sunlight.
- Leaves are more mold/mildew prone.
- Fruit/veggies tend to rot faster after ripening.
- Height restriction for certain plants (tomatoes had 4′ growing space max).
I was so happy with the results last year that I think I’m going to add a second one in the next few weeks. I’m thinking strawberry towers and watermelons, yum!
For a complete tutorial and lots of Q+A goodness, visit my original post here. For a full plant-by-plant report on how the crop did over the summer, click here.