
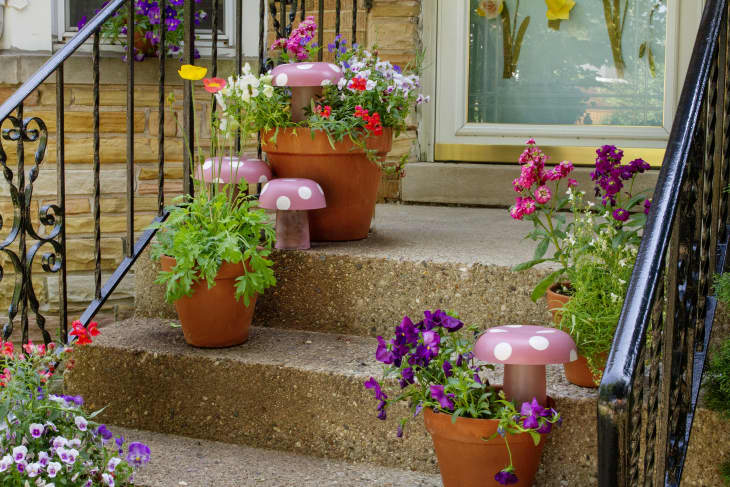
These DIY Faux Mushrooms Turn Any Outdoor Space into an Enchanted Garden
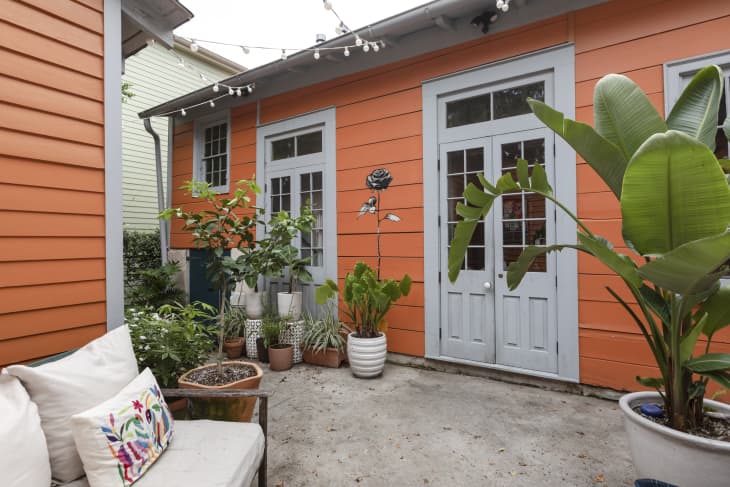
If you’re looking to give your outdoor space a new look, there are plenty of large-scale things you can do. Fresh furniture, newly painted patios, outdoor string lights, and container gardens all go a long way toward transforming your outdoor space. But if you just want a little spruce-up — because you don’t have a lot of space, or just because you don’t want to spend much money — then I have the perfect whimsical DIY to add to your to-do list. This faux mushroom lawn ornament is made with easy-to-find and low-cost materials and comes together in an hour or less.
I recently came across these very cute DIY mushroom yard ornaments from TikTok account @sillylittleplants and was so impressed that they were made using inexpensive dishware from a big-box store (each mushroom cost just $1!). The DIY seemed quick and easy enough, requiring only glue, paint, and dot sponges. I love mushroom decor (and I’m not the only one, judging by all the available mushroom-themed home decor) and already had all the craft supplies on hand, so of course I had to try it. I’m happy to report back: This is an extremely easy, cute, and clever DIY that anyone at any experience level can pull together. I made just a few tiny tweaks to the method to help my mushrooms stand out. Here’s how I did it.
What You’ll Need for Your Faux Mushroom Lawn Decor
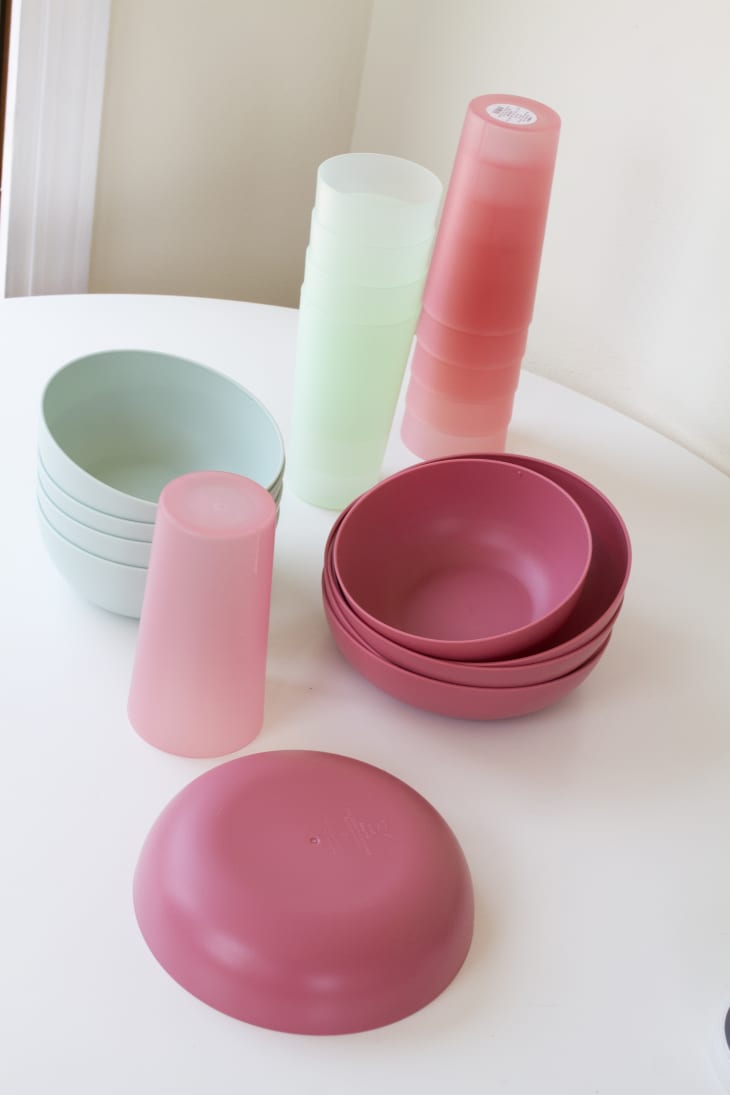
- Plastic dishes in your preferred color: You’ll need both cups and bowls in equal numbers
- E6000 craft glue
- Craft paint
- Paint daubers
- Acrylic sealant
Although I loved the look of the red-and-white toadstools from the original video, my local Walmart no longer carried those specific dishes — so off to Target I went. There, I found a similar set in different color options (no red and white, foiled again!) so I settled on a monochromatic mushroom scheme: one in light pink and the other in light green.
I DIYed a few different versions of this mushroom lawn ornament, all of which are worth copying: the “original,” a cute little glowing mushroom lit with fairy lights, and some that I filled with concrete to help them stand up to wind.
The Original Faux Mushroom
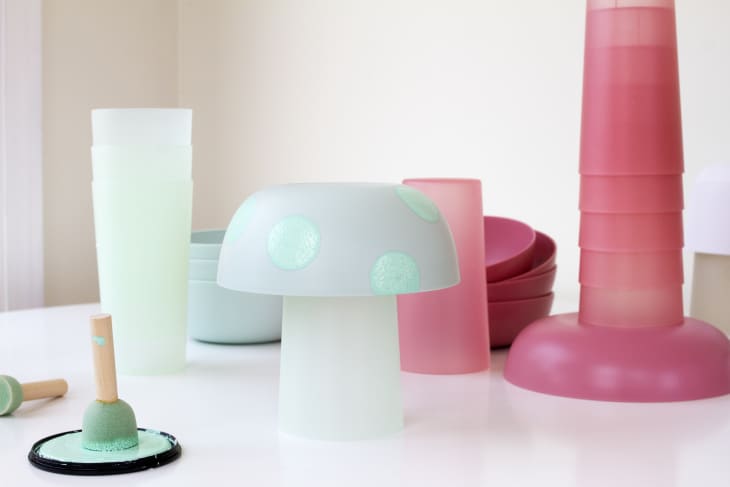
All you need to do to create these mushrooms is to purchase the appropriate dishware, turn them over, and glue the inside bottom of the bowl to the bottom of the cup using craft adhesive. You’ll quickly notice a silhouette that looks very obviously like a mushroom. Halfway done!
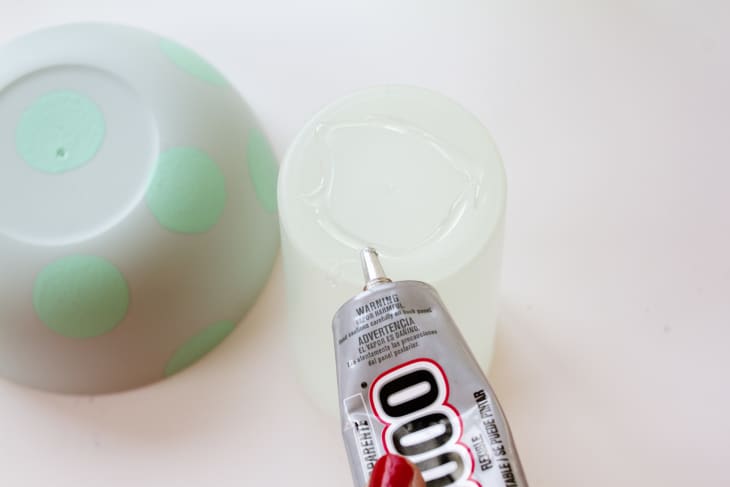
Next, grab a paint dauber and add some cute little painted polka-dots over the mushroom cap. You can do a contrasting color, like white, or mix up a hue that matches the color of your plastic dishes but is slightly lighter or darker. Finish up by spraying the painted tops with an acrylic sealant. Let them dry, and they’re ready for the great outdoors! You can nestle completed mushrooms into your garden or containers by pushing them slightly into the soil.
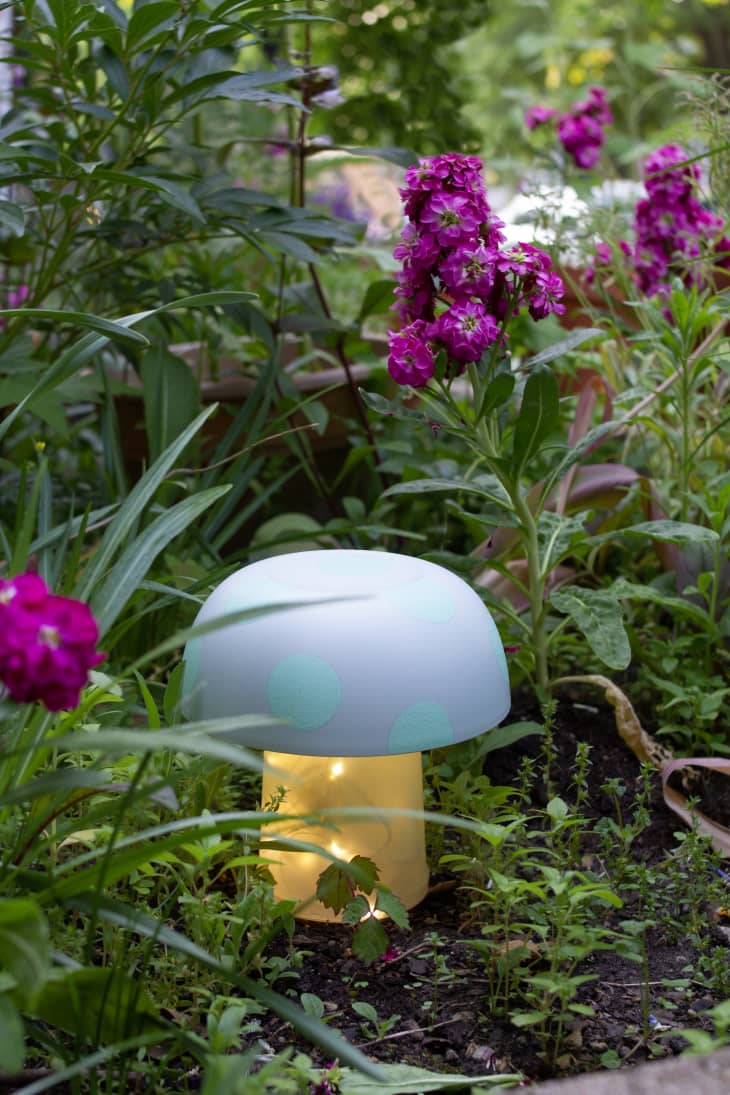
The Fairy Light Faux Mushroom
The lighted mushroom was also really simple. Start with the same steps as above, but make sure to pick up some battery-operated fairy lights (the thin copper wire kind). When your painting and sealing is done, slip your lights into the base of your mushroom (i.e., the overturned cup).
To protect the lights, I recommend gluing a 3.5-inch lid to the bottom. This can be one that you have leftover from a food container, or you can buy lids online that fit the diameter of your cup. If you glue the lid down, just be sure that you’re using lights you can turn on and off using a remote control!
Because these lights are battery-operated, you shouldn’t expose them to moisture. It’s safest to bring these fairy light mushrooms in if you’re expecting rain.
The Weighted Faux Mushroom
If you plan to use these faux mushrooms in your garden, it’s easy to just dig down a bit with the cup to give them a good foothold. But if you want to set them on concrete, or in a smaller planter, you’ll need to add some weight to the cups so they don’t immediately blow over.
I found that the easiest way to do this was with ready-mix concrete (I used Quikrete, which you can buy in a 60-pound bag for under $5). Make a small batch of concrete in a bowl or bucket, then fill your cup all the way to the top with the mixture. Tap the cup on a flat surface a few times so all the concrete can settle in place. Add more if needed.
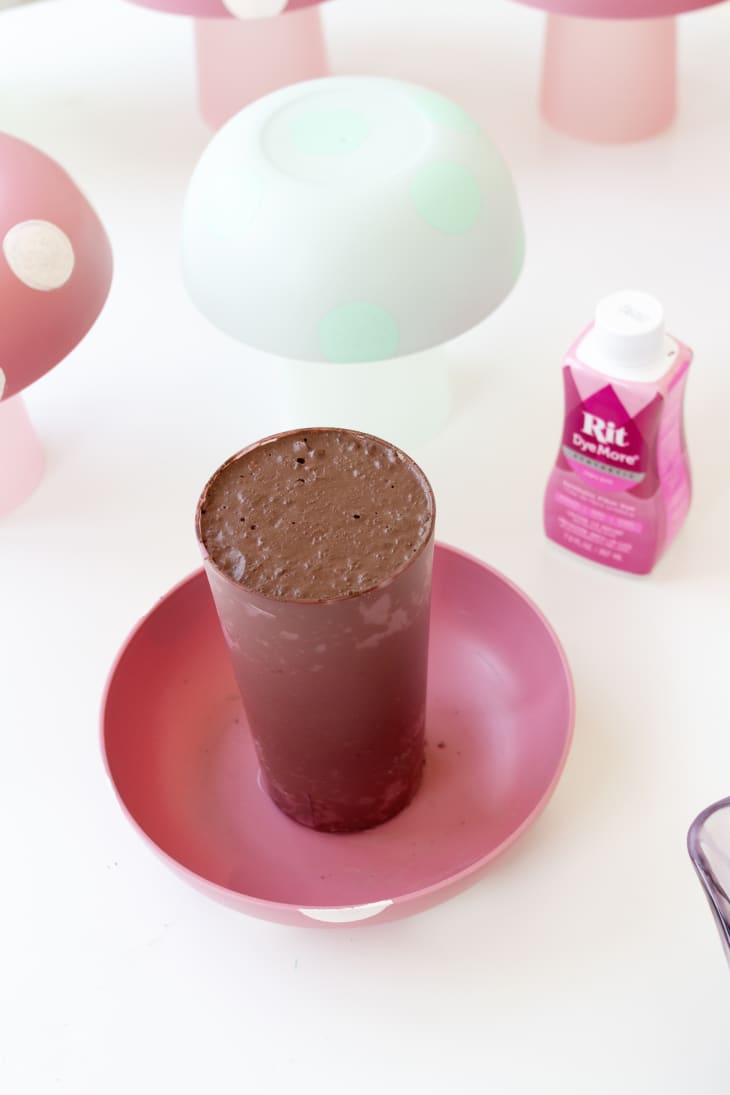
Because the cups are translucent, the concrete will darken the stems, so I tried adding some pink RIT dye just to see if it made a difference in the finished look. It was a fun experiment, but didn’t really make enough of a difference to make this step anything other than optional.
Once the concrete dries, the mushroom will sit level on your hard surfaces and won’t blow away in the elements!
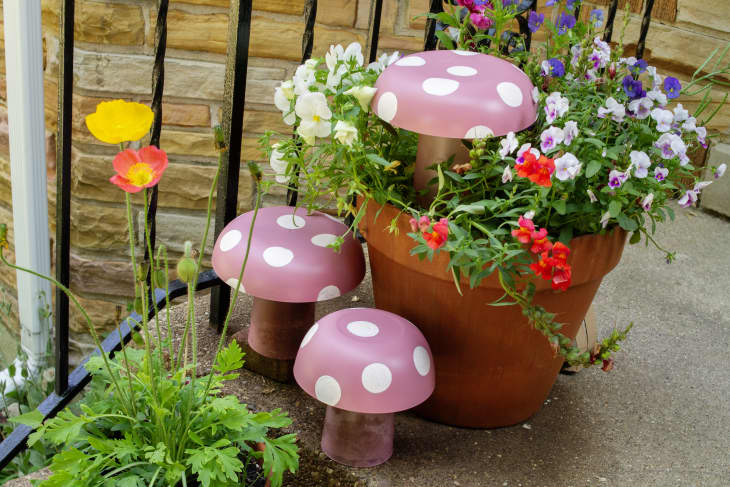
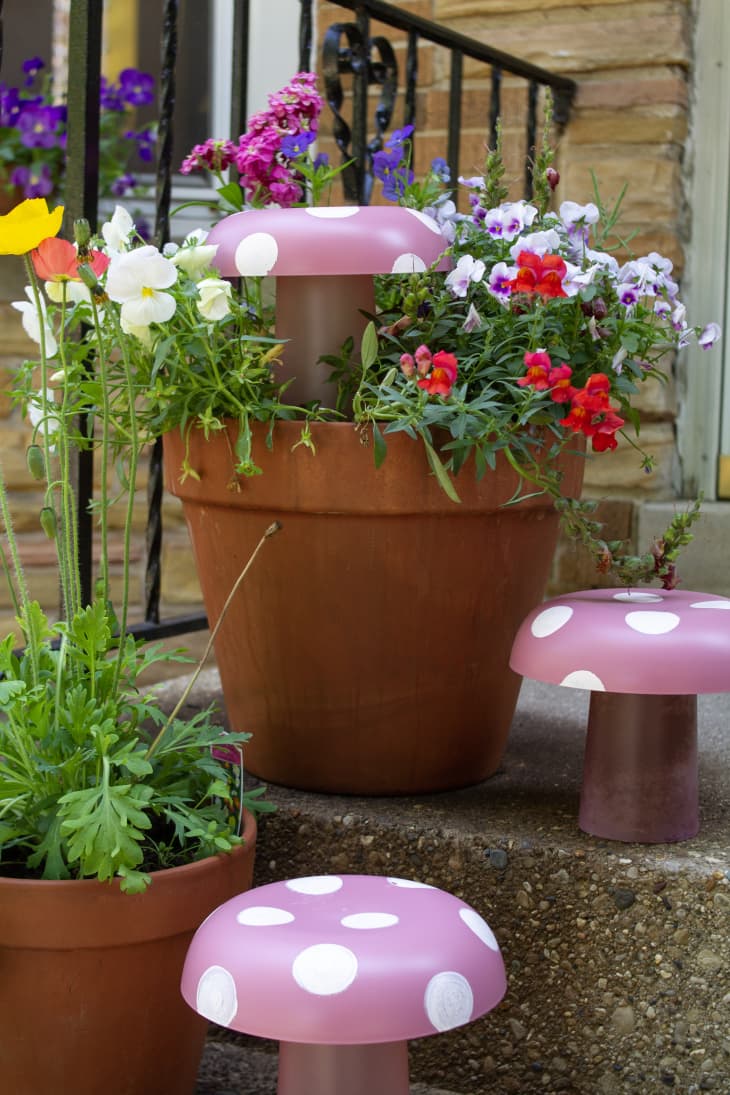
I love these little mushrooms for lining a sidewalk, staggering on a stairway, or popping up at the bottom of a tree. Any way you decide to use them, they’ll add instant charm and whimsy to your space! Not bad for a DIY you can do in two steps and for as little as a dollar.