
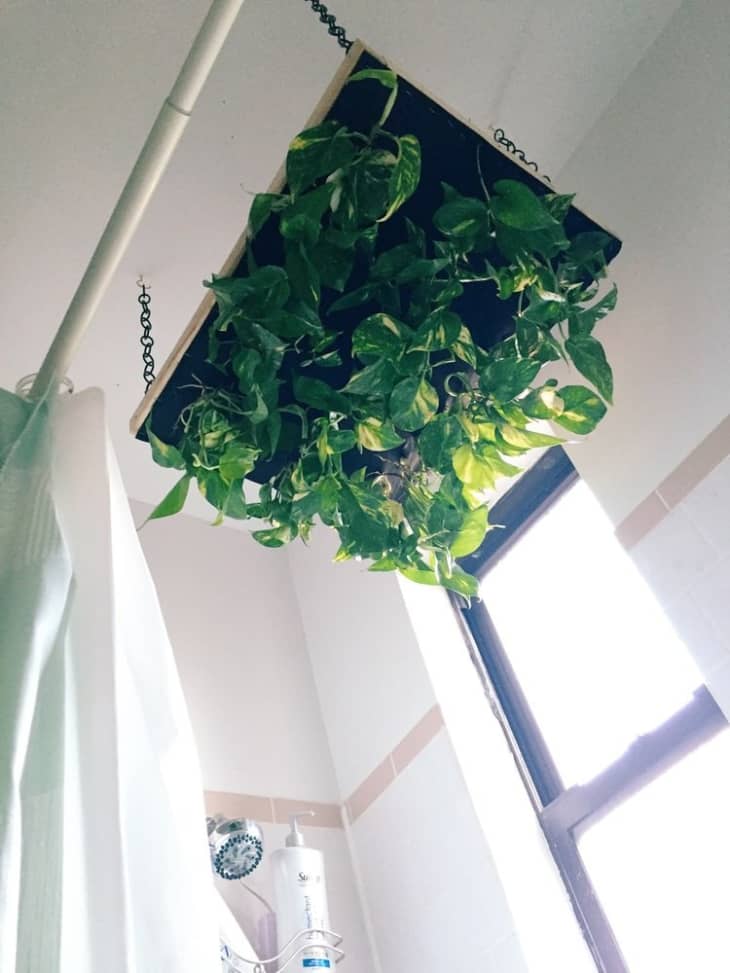
DIY Hanging Shower Planter
Add Us
See more Apartment Therapy stories when you search on Google.
We independently select these products—if you buy from one of our links, we may earn a commission. All prices were accurate at the time of publishing.
(Image credit: Submitted by Madalyn)
It’s no secret that we are huge plant proponents and Madalyn’s clever shower planter is a super fun way to add a little green to your bathroom.
Skill Level: Easy
Time Required: 1 – 2 Hours
Project Cost: $100-$200
(Image credit: Submitted by Madalyn)
What You Need
Materials
- (1) 1’x1’x8′ board
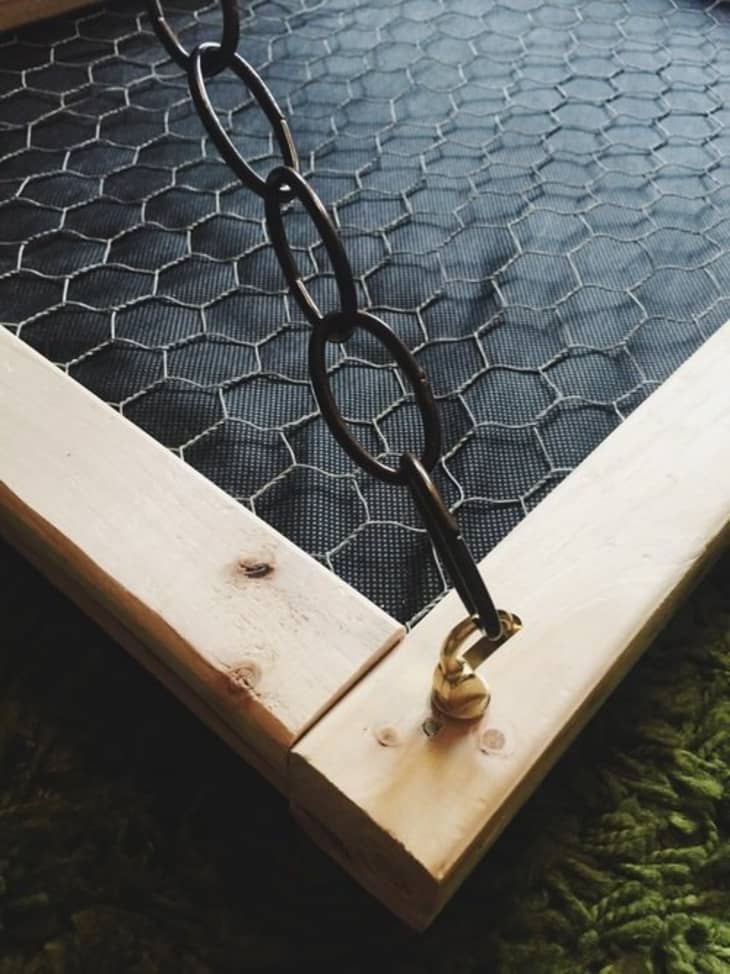
- Chicken wire cut to 1’x2′
- (1) Roll fiberglass screen
- Staple gun and staples
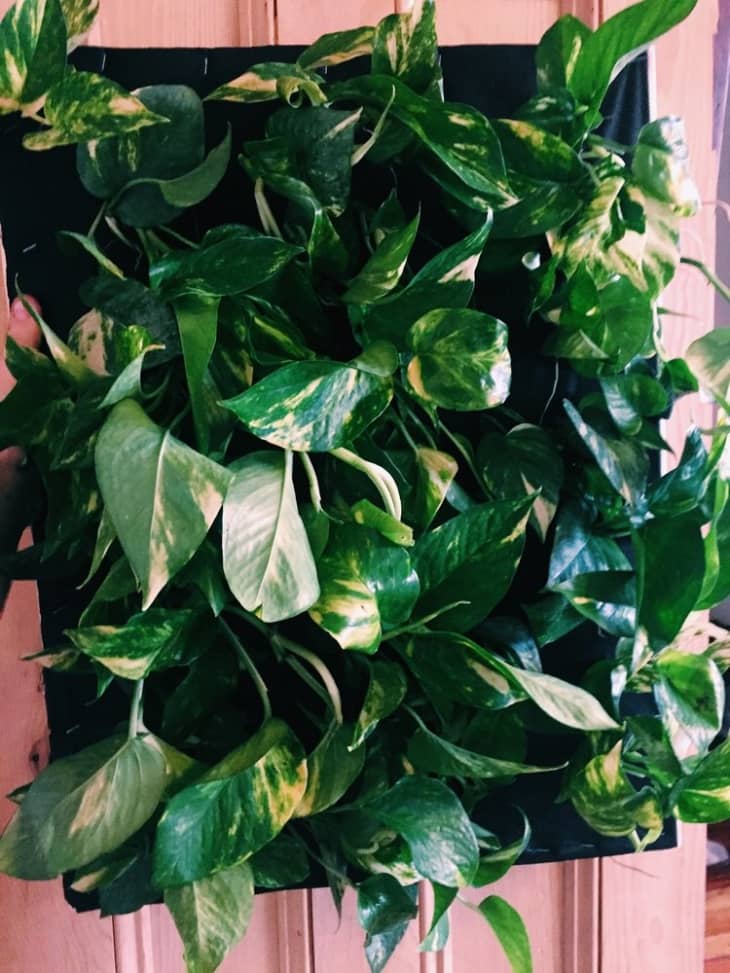
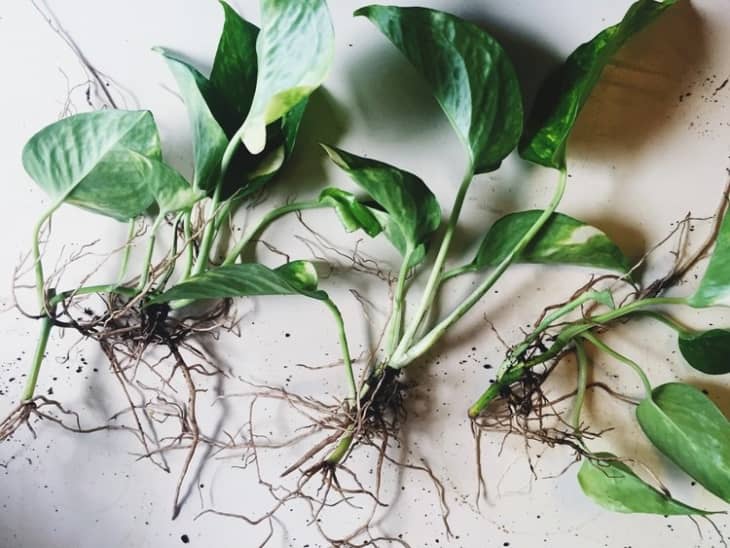
- Plants
- Small gauge chains
- Metal hooks
- Soil
Tools
- Wire cutters
- Needle nose pliers
- Wood Screws
- Drill
Instructions

(Image credit: Submitted by Madalyn)
(Image credit: Submitted by Madalyn)
(Image credit: Submitted by Madalyn)
(Image credit: Submitted by Madalyn)
- Go to your local hardware store (we went to Lowes) and pick up your supplies. If you don’t have a saw, ask the wood department to cut your board into 2 pieces: (2) 2′ sections and (2) 1′ sections
- Layout your boards in the shape of a rectangle and pre-drill the holes so your wood won’t split when you screw them together. Screw all 4 boards together.
- Cut your chicken wire with the wire cutters to fit the rectangle and then staple around the edges so it’s tightly secured. Cut off the excess chicken wire around the edges.
- Fold over your fiberglass mesh 4x so it’s thick. This will keep your soil from falling out. Staple it around the edges, right over the top of the chicken wire layer, so it’s tightly secured.
- Add your hooks to the corners of your planter. Our hooks had clamps, which made them easier to hang. Then screw your 4 regular ceiling hooks into the ceiling, after you have measured the right distance.
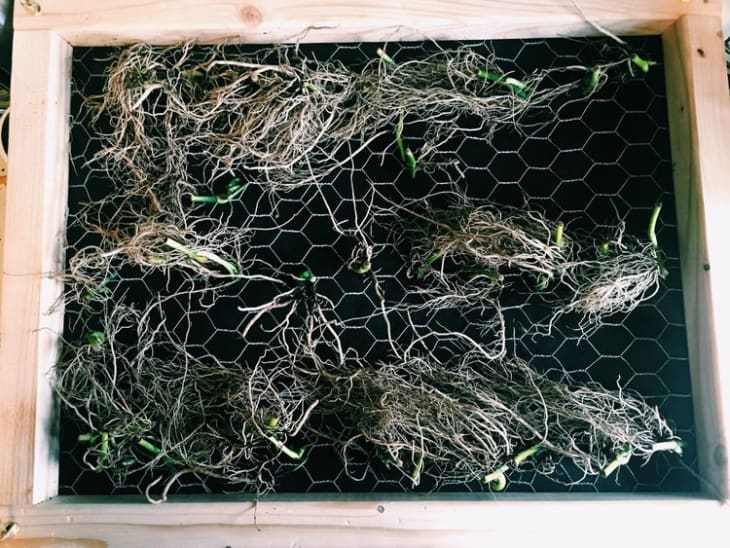
- Take your plants and separate them by gently breaking apart the soil and dividing them by the root.
- Measure out where you want each plant to go on the black mesh (this is where you will make holes for the plants). We made holes 2 inches apart using a ruler. You can use a knife to make each hole.
- Gently feed the roots through each hole and add a layer a soil that completely covers them.
- Moisten the soil so you can see the roots and layer with more soil. You can continue to add more soil wherever needed.
- Hang your planter above the shower and get ready to enjoy!
For more photos swing by Madalyn’s blog Peaches + Salt.
Thanks, Madalyn!
Have a really great DIY project or tutorial that you want to share with others? Let us know! We love checking out what you’re making these days, and learning from our readers. When you’re ready, click here to submit your project and photos.