
I Tie-Dyed My Sofa, and I’m Shocked at How Good It Looks
For roughly 48 hours earlier this week, my bathtub was occupied by wet tissue paper-covered slipcovers. When we began planning for tie-dye week a few months ago, I casually offered to tie-dye my sofa.
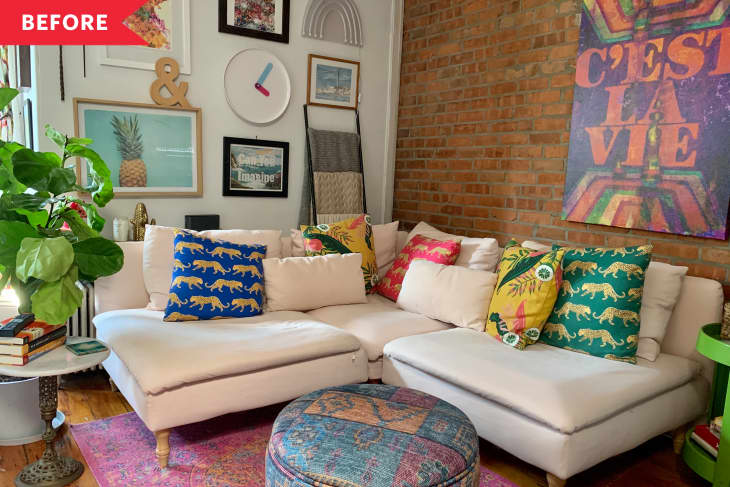
I bought this three-section IKEA SODERHAMN a few years ago, mostly because it’s one of the only truly flat-pack sofas out there and my building’s staircases are twisty and narrow. I love pink, but I learned pretty quickly that a hue this pale does not work for my snacking-on-the-couch, parent-of-two-fluffy-cats lifestyle, and I mostly kept it covered with throw blankets. I’m someone who loves color and pattern, so I was excited for the end result. But I did have reservations about the method: how on earth would I tie-dye all these slipcover pieces in my small apartment?
Since I live in 520 square feet with no proper outdoor space or a washer/dryer, I decided on the no-mess tie-dye method using bleeding tissue paper. I got six packs of bright and six of assorted Spectra paper from Michaels; I was looking for a limited color palette and didn’t want to run out of them mid-project. For the sake of time and my sanity, I decided to leave the covers on the backrests and bases untouched and focus on the seat cushions and pillows.
Like most tie-dye methods, the tissue paper method works best on natural fabrics, but my IKEA slipcovers are polyester and nylon. So as with any dye project, it’s important to do a test area first to see if you like the results. I started with one of the lumbar pillows:

I liked the pastel vibe, one that I achieved with just a water soak without the white vinegar recommended. I felt okay skipping the vinegar, because I don’t machine-wash these covers (because I don’t have a machine washer) and I like to live on the edge. Writer Ashley Poskin gives thorough instructions on this method, but here’s what I did:
- Soaked each piece in hot water for 30 minutes to an hour
- Lined my bathtub with a plastic drop cloth and laid each piece flat (though the seats were too wide so they just… wrapped up the sides of the tub? It worked out fine)
- Ripped up pieces of tissue paper and placed over the wet covers (sometimes with gloves, sometimes not—my fingers were purple for only a day, not a big deal)
- Sprayed the paper with hot water and let it sit for 90 minutes to two hours
- Removed the paper and let air dry completely before putting back on the cushions
- I skipped the ironing (I hate ironing, and the seat covers have a backing that cannot be ironed)
- Repeat until all pieces are done
This will obviously be less time-consuming if you have a yard or a deck or a garage to spread out all your pieces. But if all you have is a tub, here’s your proof that you can make it work. Now, the results:
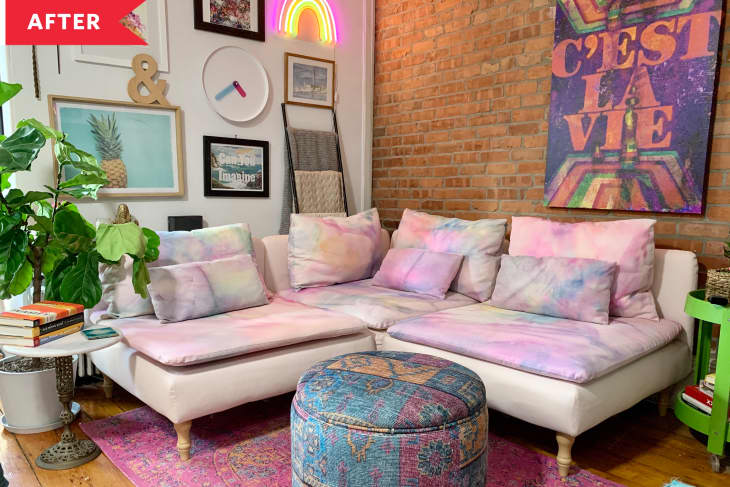
I’m thrilled with how it came out! I love that it’s still mostly pink but with some blue, purple, orange, and green to bring in other colors from the art, rug, and furniture. I’m also cautiously optimistic that a stray cat hair or crumb won’t stand out as much in between vacuuming. Speaking of cats:
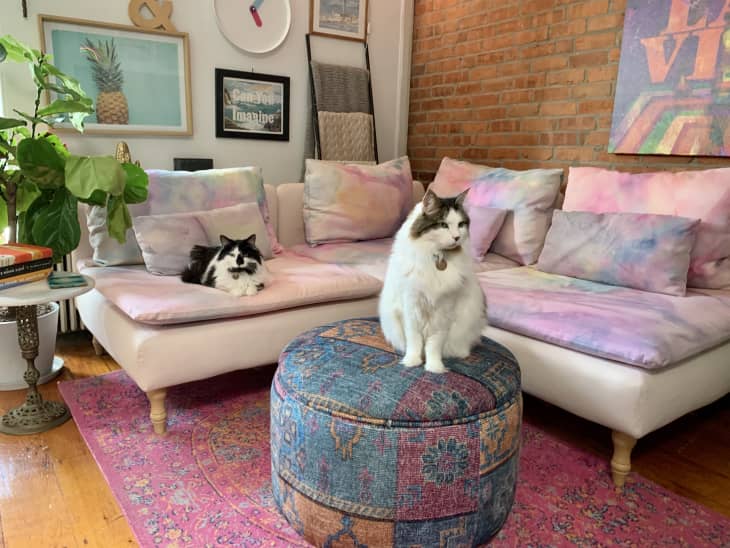
Virgil (left) and Dante (right) seem unfazed by the new look. They also were of no help. Thanks, guys. Enjoy your on-trend seating.