
A $400 Secondhand DIY Made a Patio Feel Like a Mediterranean Escape
When you update any space in your home, especially the outdoor area, you want to have the foundation in good condition before you start renovating or designing. Sarahli Wilcox, a DIY and home influencer, “decided to focus on improving the basics” first before making any decor updates to her and her husband’s patio and gazebo.
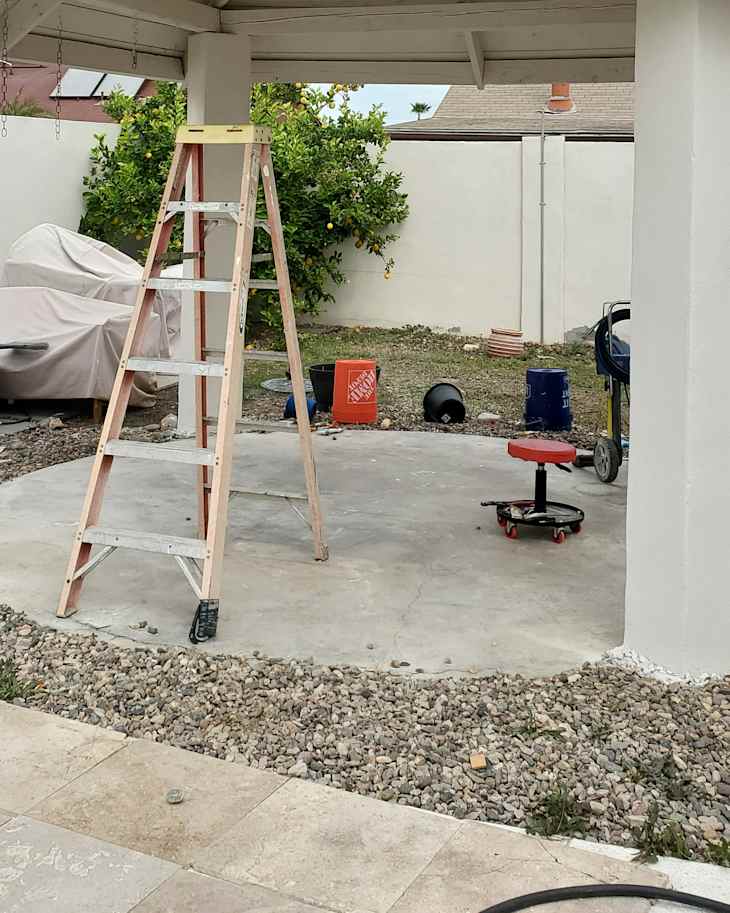
“The concrete floor under the gazebo was in pretty rough shape — covered in rust stains, cracked in places, and generally unattractive,” Sarahli shares. “It was clear to me that adding new pieces on top of that wouldn’t have the impact I was hoping for.”
Tiling Over Concrete Was The Fix
Sarahli wanted a solution that was “affordable, relatively easy to execute, and visually striking.” Her fix: tiling over the concrete floor. But since it was her first tiling project, she browsed ideas on Pinterest and researched how-tos.
Finding Her Footing with Flagstone Flooring
“'[When I was] growing up, my childhood home featured a similar flooring style using flagstone, so the look always felt familiar and inviting to me,” Sarahli shares. When she came across designs similar to those surfaces during her Pinterest scrolling, she was inspired by the Mediterranean-style homes.
“That’s when it clicked that I could re-create a similar aesthetic in my own space,” Sarahli says. After researching more, she realized that the style was found in a “wide range of interiors, from wabi-sabi to Southwest and even more traditional homes,” Sarahli explains. It was more versatile than she originally thought and could “be easily adapted to suit almost any aesthetic.”
But since this was Sarahli’s first time tiling, it was difficult to find anyone online who had done a similar project and shared clear steps on how they did it, along with the materials and supplies used.
“I researched and put together all the best materials I could find at the time, and I’ve been improving that list to teach others,” Sarahli explains. As a DIY influencer, her goal is always to show others how to transform their home and share her tips and experiences.
Secondhand Materials Practically Paid for Themselves
When Sarahli looks back on the space, it “wasn’t being used to its full potential and felt a bit dull overall.” The gazebo had been there since they bought the house, but it desperately needed an update.
Sarahli first painted the structure Sherwin-Williams’ Shoji White, and then got to work on the concrete floor. However, she wanted to be mindful of the costs as projects can add up quickly. Sarahli recommends checking out secondhand marketplaces to find materials to save a bit while still getting high-quality finds.
“More often than not, you’ll find homeowners or contractors who overbought materials or never used what they purchased, and they’re usually eager to sell at a much-lower price than what they bought it for to make room in their inventory or home,” Sarahli shares.
In Sarahli’s case, she picked up roughly 200 pieces of flagstone for $150 from someone’s backyard. But since she only used 40-60 tiles for the project, she was able to sell the rest. “[In] girl math, the materials practically paid for themselves,” Sarahli says.
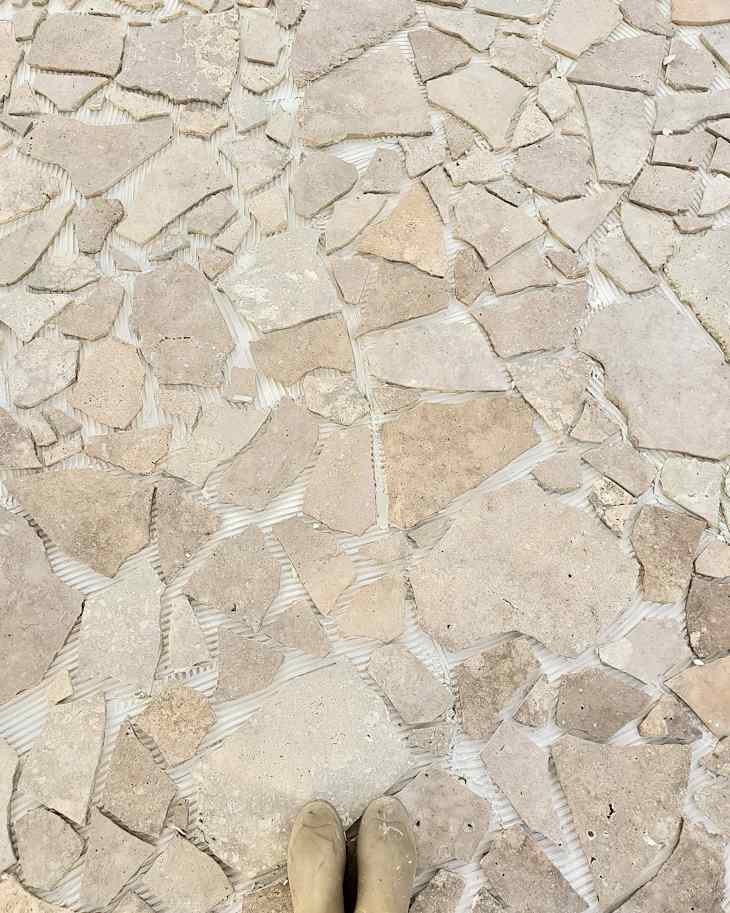
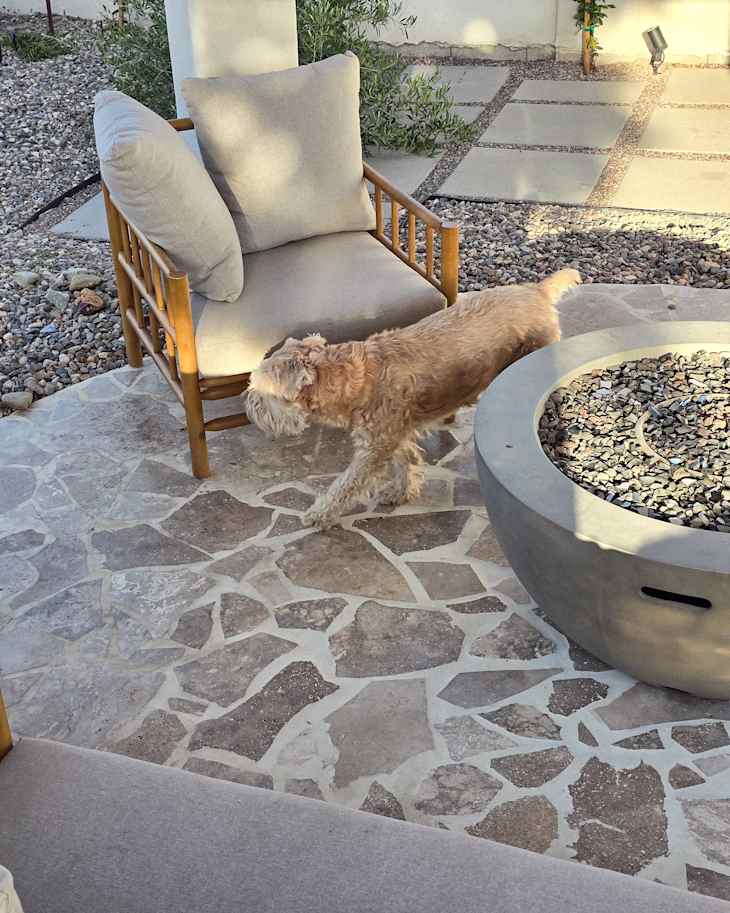
The stones Sarahli found were 18”x18” travertine square tiles that she broke apart with a hammer into smaller pieces for her mosaic-style floor. She didn’t exactly have a “plan,” but simply eyeballed the size as she broke each piece. “The imperfections are what make it perfect,” she says.
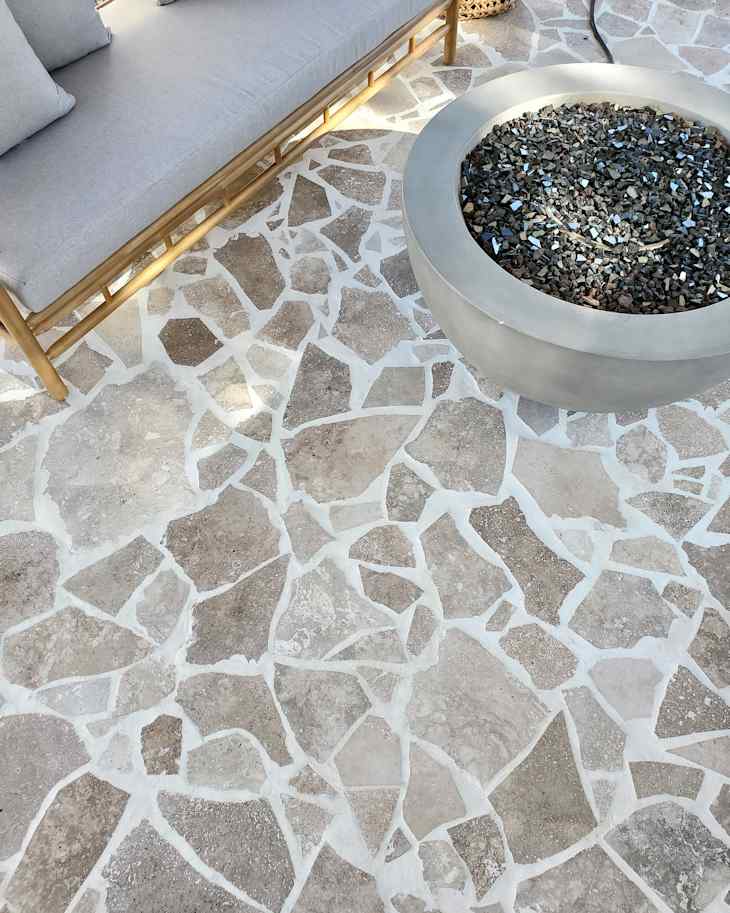
After that, Sarahli laid everything out and fit pieces together like “a giant puzzle.” When it was just how she wanted, she used a grout bag (basically a big piping bag) to spread the grout between each piece, which made the project go faster and stay cleaner.
Then, Sarahli used a tile and grout sealer to prevent dirt and stains — a must for an outdoor floor that gets frequent use and tends to be swept daily.
The Gazebo Was Always the Focal Point, but Now It’s Part of Their Daily Lives
“I wanted to brighten [the gazebo] up and bring in some new furniture, but the condition of the area held me back from doing so,” Sarahli says.
Originally, the project was intimidating, but after finishing Sarahli realized that “these are just big versions of craft projects. They’re doable, they just take an extra labor of love, elbow grease, and of course, a lot of research to make the effort long-lasting,” she explains.
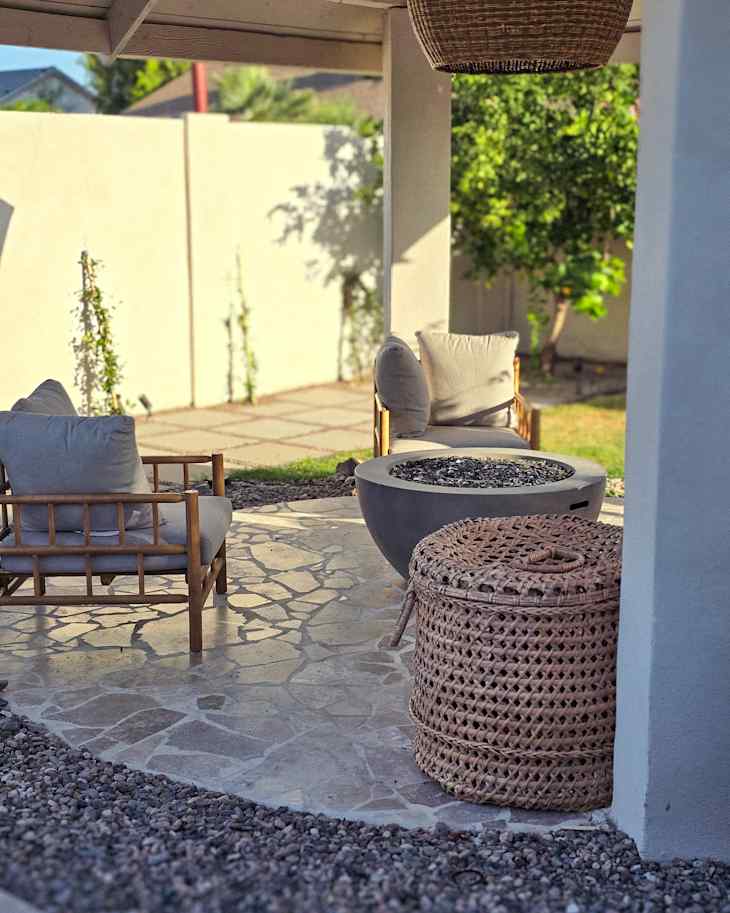
And while the gazebo has always been the focal point of their backyard, after refinishing the concrete floors, it now feels worthy of being the centerpiece.
“Since completing the project, it’s become part of our everyday routine. We’ve shared meals here, hosted movie nights, and spent evenings lounging around the fire pit just chatting,” Sarahli describes. “The work we put in has paid off tenfold.”
Inspired? Submit your own project here.