
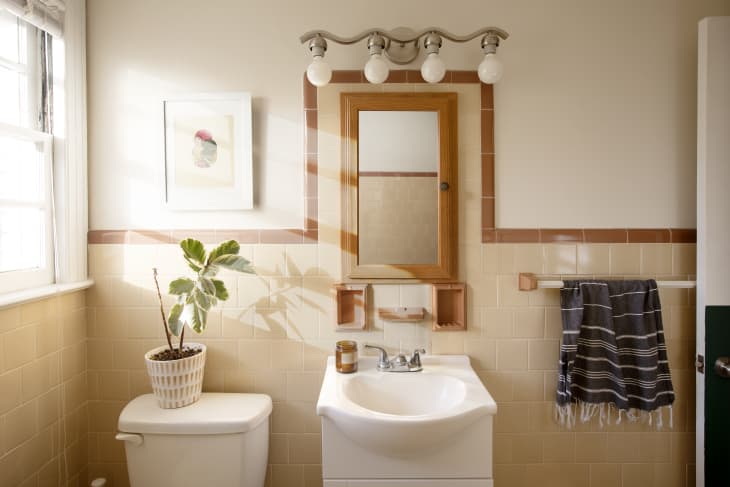
How to Grout Tile Like a Pro (Even If You’re a Total Tile Newbie)
Whether you’re sprucing up your tiny bathroom or giving your kitchen a full-scale renovation, there’s one task you’ll likely find on your to-do list: tiling. Even if you don’t replace your own tile, you might be motivated to re-grout old tile to give it a fresh look (without having to pay for all-new tile). The project can feel more intimidating than simple DIYs like painting, but it’s totally doable for beginners.
If you’re a beginner looking to grout new or old tile, here’s the good news: Grouting is way less tedious than actually laying tile, and takes a lot less time, too. You’ll just need to follow a few essential steps to make sure that your grout lines (and your tile) lasts as long as possible.
Tools and Supplies Needed to Grout Tile
- Grout (you’ll have the option of sanded or unsanded; more on that below)
- Grout sealer
- Cheesecloth
- Trowel
- Rubber grout float
- Razor blade
- Old toothbrush
- Small paint brush
- 3 buckets (one for grout, two for water)
- Sponge
- Rubber gloves
Types of Grout and How to Choose
Grout, the material that fills the gaps between your tile, comes in two options: sanded grout and unsanded grout.
Sanded grout is used for spaces larger than 1/8 to 1/2 inch. Sanded grout ensures that the grout won’t shrink and crack within wider joints. But it’s hard to force into thin seams, can scratch some surfaces, and needs to be sealed. For those reasons, pros recommend you use unsanded in every other instance.
Unsanded grout is easier to push into small seams. It’s also better than sanded grout on vertical surfaces.
There are a variety of color options available for grout; choose your favorite! Color has no impact on the performance.
What Is a Grout Float?
A grout float is kind of like a big stamp. It’s the best option for pressing grout in between tiles, as the rubber material is soft and won’t damage tiles.
How to Grout Tile
1. Allow adhesive to dry, then prep.
Before you get started, wait at least 24 hours for your tile adhesive to cure before you grout. Then, clean any residual adhesive or dirt from your tiles. You don’t want any debris in your grout lines.
2. Scrape any remaining adhesive.
Using a razor blade, carefully scrape off any cured adhesive (from the tiling process) that might protrude through grout lines. Clean off any particles with an old toothbrush.
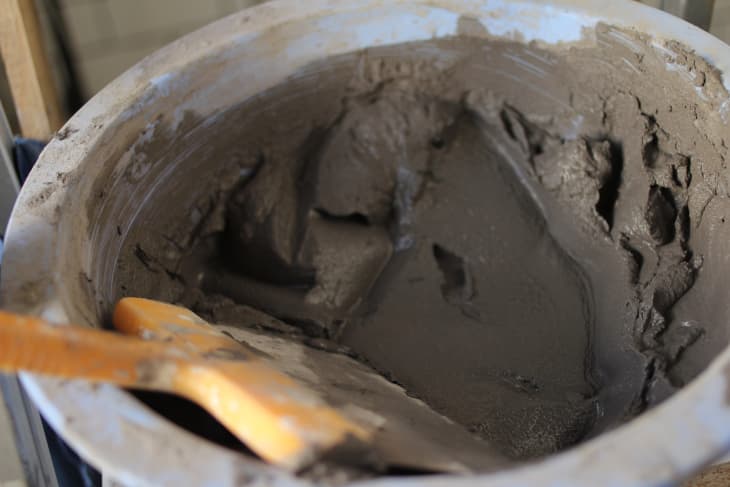
3. Prep grout mixture.
Prepare your grout mixture so it’s a mashed potato-like consistency. Only mix what you can use within an hour.
Tip: Work in small sections at a time. Grout one area, then while waiting for that area to dry, start grouting another area. When finished, the first area should be dry enough to start sponging (see below).
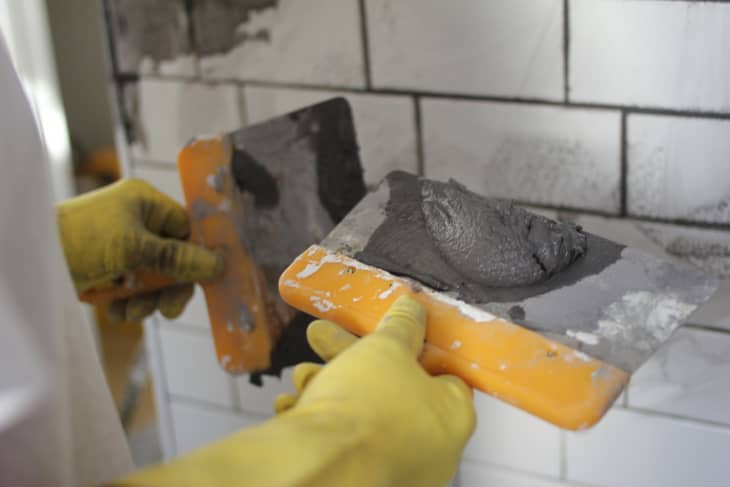
4. Apply grout to the surface.
Scoop some grout out of your bucket using a trowel or putty knife. Then, put the grout onto your grout float and spread over the wall. Apply in an arc-like motion, holding your grout float so that it’s tilted at a 45-degree angle. That angle helps force grout into all the spaces between the tiles.
It’s best to start with a small section to test before continuing with the whole area.
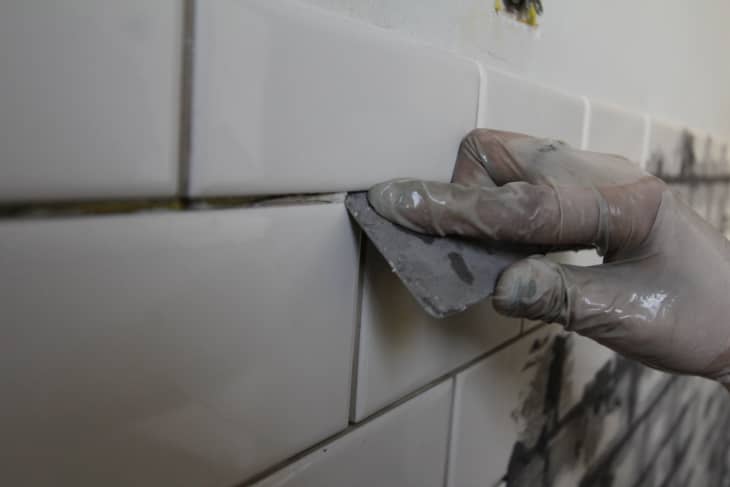
5. Press the grout into the joints.
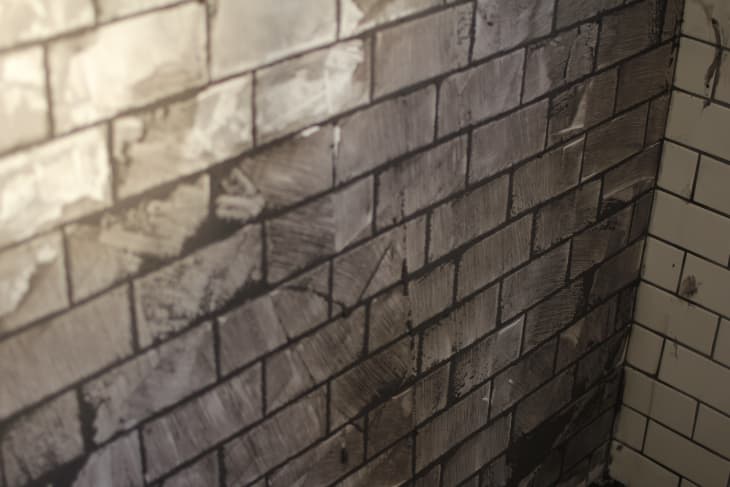
Press the grout mixture firmly into joints. Pack it in with lots of pressure, making sure every void is filled. Remove excess grout as you go.
Grouting is super messy, so don’t worry if you notice more grout on the floor than on the walls.
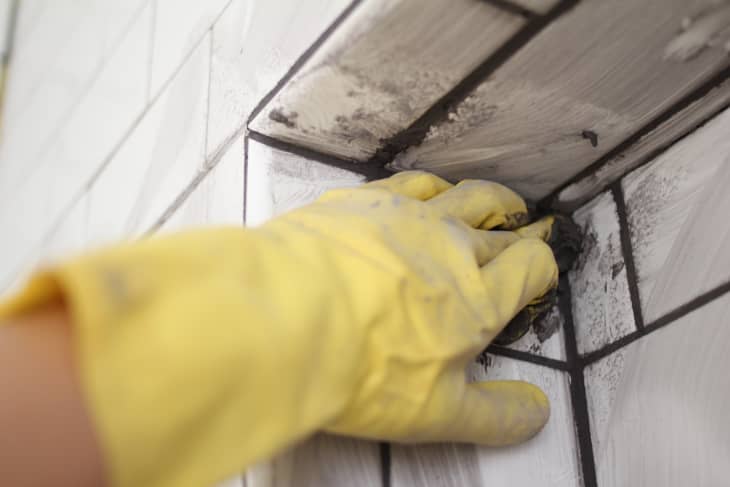
Use your finger to apply grout in small corners and hard-to-reach places.
After all your tile joints are filled with grout, save any extra grout by covering it with a plastic bag. You may need to fill any spots you missed later.
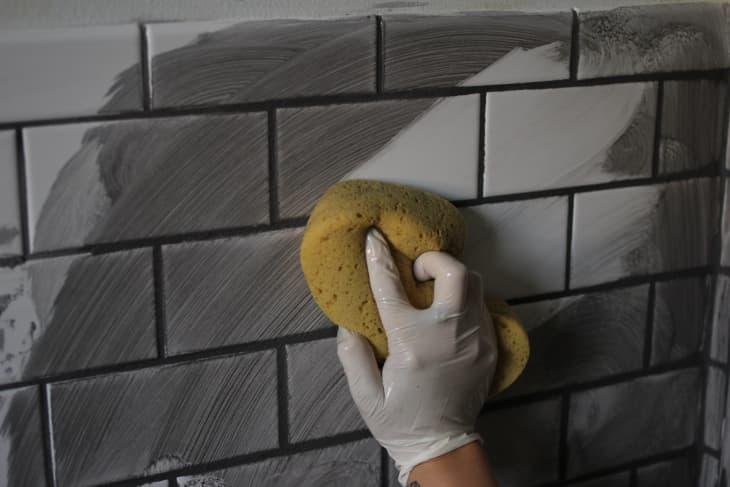
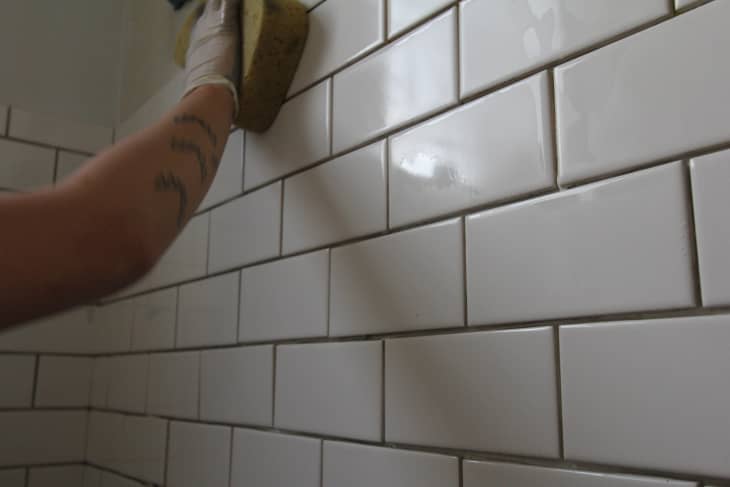
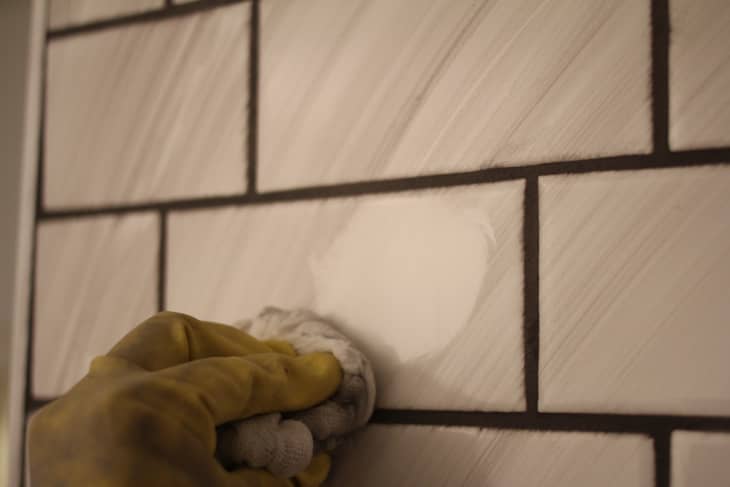
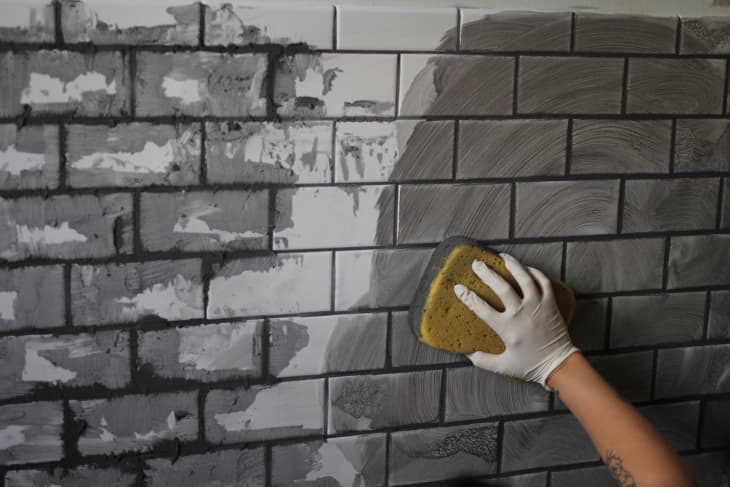
6. Clean up the tiles.
After the grout has set for 15 to 30 minutes, clean the face of the tile with a damp sponge.
Work in light circular motions, taking care not to drag out any grout in the corners. Don’t scrub grout lines too hard or the tile corners will protrude. You’re not only cleaning the tile by sponging, but also ensuring clean, smooth grout lines.
Tip: Sponging the grout too soon may pull the grout out of the joints, so test a small area first.
Use two buckets of water during this process: one to rinse and wring out dirty sponges, and the other for clean water and sponges. You will have to change the water often.
Repeat this sponge process two to three more times. Don’t worry about getting the tile super white. When it dries there will always be a haze of grout.
7. Do any cleanup.
After you are done with the sponge, wait about 30 minutes, then buff your tiles with a dry cheesecloth until they shine.
8. Address any touch-ups.
Go back and touch up any grouted areas that aren’t completely filled.
9. Seal your grout.
After 24 to 48 hours, you have the option to seal your grout. Sealing grout helps protect your grout lines from stains and makes it a bit easier to clean.
To seal, take a small paintbrush and paint in the sealer along the grout lines. Apply a liberal amount, and work it into the grout. Wipe any excess sealant off the tiles within 5 minutes. Sealants can leave a stain so be careful of any spills.