
DIY Home Renovation: How To Tile Your Bathroom Shower
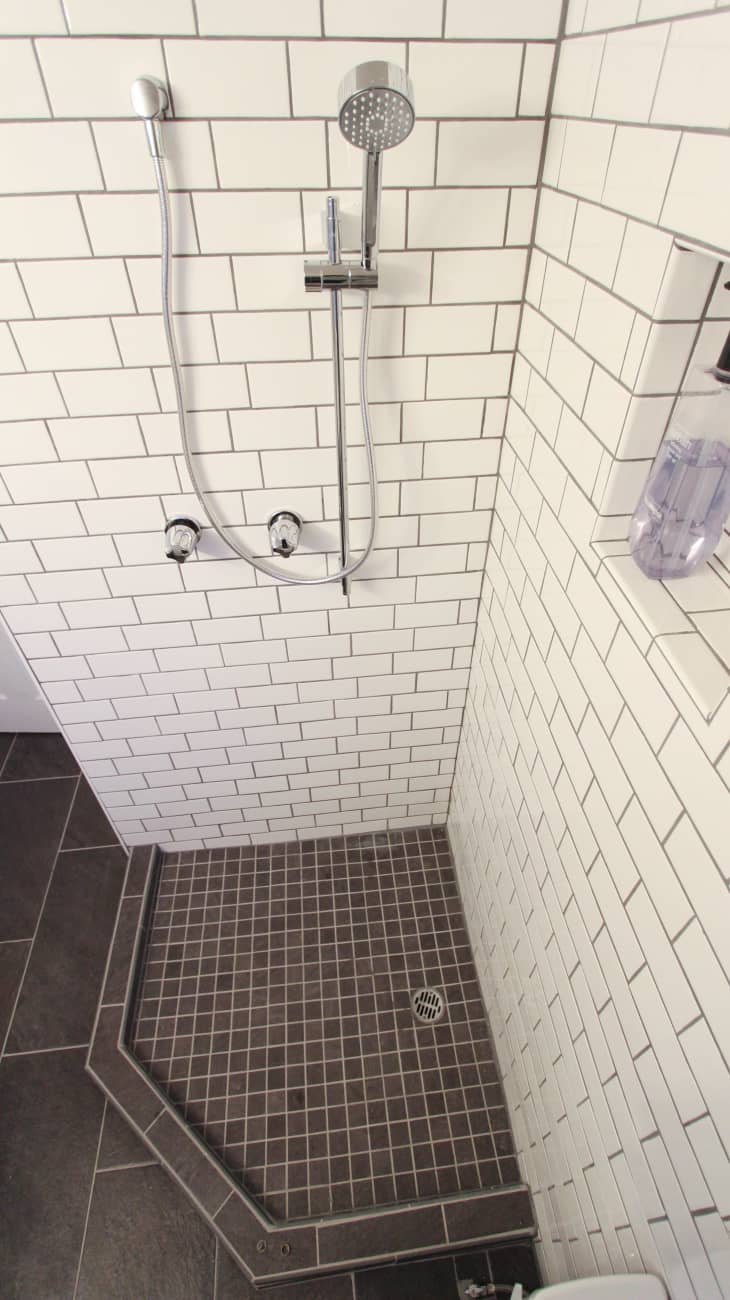
Unlike painting, tiling isn’t as quick and easy as it looks. Tiling is for those who enjoy tedious, repetitive perfectionism. And I can’t say that I do, but in the end, the three days that turned into three weeks (seriously) was all worth it. Clean white subway tile transforms spaces — all in such a timeless way. So, before you start mixing the thin-set, check out the lessons I learned about how to tile your bathroom.
What You Need
Materials
- Subway tile
- Thin-set mortar adhesive (I used grey, so it’s not as noticeable if it shows between the grout lines)
- Sandpaper (optional)
Tools
- Wet Saw (you can rent one)
- Safety glasses
- Notch trowel (check thinset directions for directions on what size notch)
- Bucket of water
- Sponge
- Rags
- Flathead screwdriver (to pry up tile during errors)
- Level
- Painter’s tape
- Rubber mallet
- 1/8″ Spacers
- Sharpie (to mark cuts)
- Measuring tape
Instructions
Before you get started, make sure your walls are ready for the tile. For example, if for any reason your walls are wavy and not leveled (like mine), start by leveling them with patches of thin-set. Or, be sure to scrape off any loose wallpaper or paint, or lightly sand glossy finished walls. Lastly, remove any switch/outlet plates.
Tip: Your walls should be clean and dry before you start tiling.
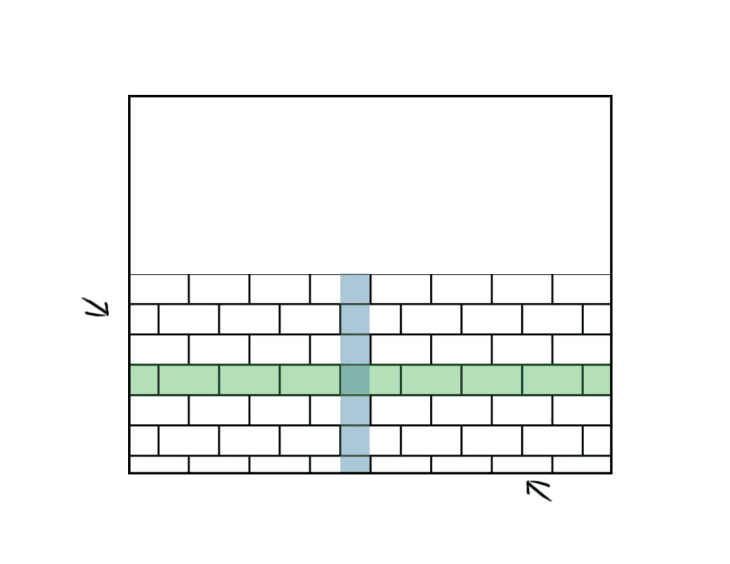
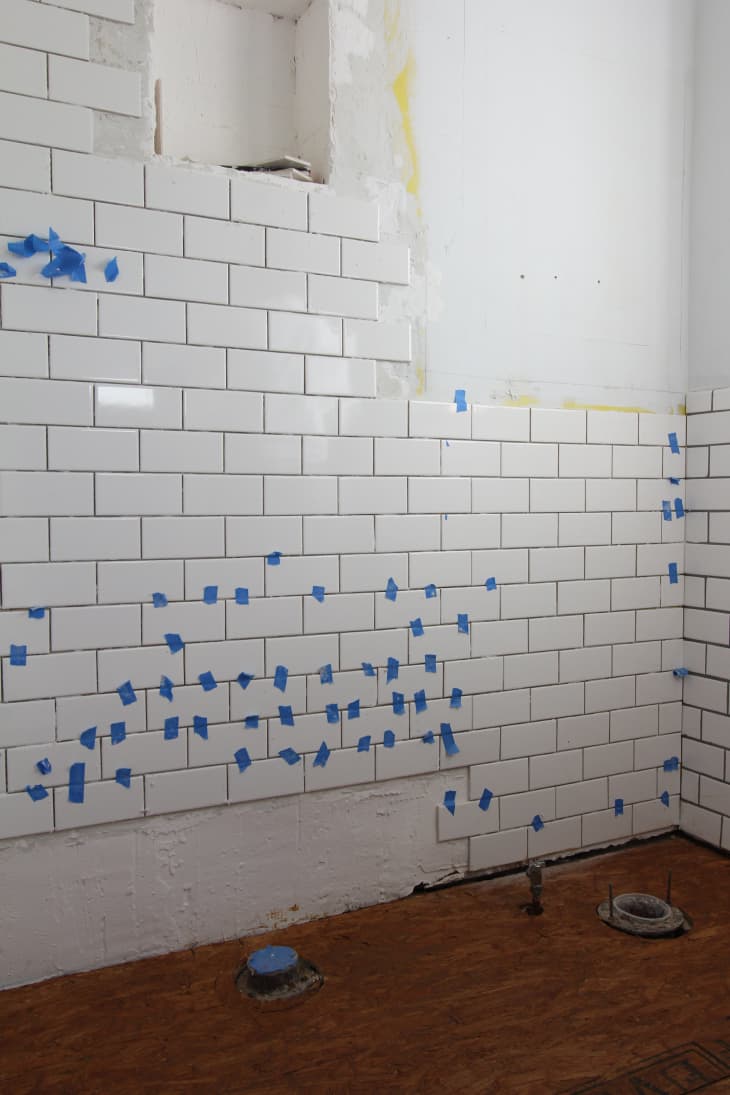
1. Plan your wall out. The main objective is to avoid any small pieces and awkward slivers of tile along the edge of the wall and the floor. In my diagram, I’m only tiling half my wall — 42″ from the floor, so my center would be 21″.
2. Without any mortar, dry-lay a horizontal row (green) and vertical column (blue) to determine the layout. Place the tiles in front of the wall you are planning to tile. Use spacers in your test lay, so you know exactly where your tiles will end. Reposition rows until you find the best layout.
Tip: You want to end up cutting tile to half its size or larger. Plan your wall to avoid cutting tile less than 2″ wide.
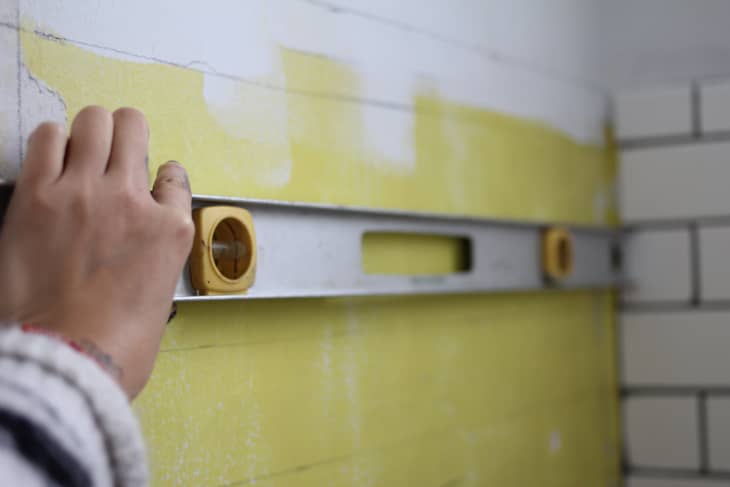
3. Mark your layout on the wall. The wall’s edge or the floor can be crooked, so never use it as a guide. Use a level instead.
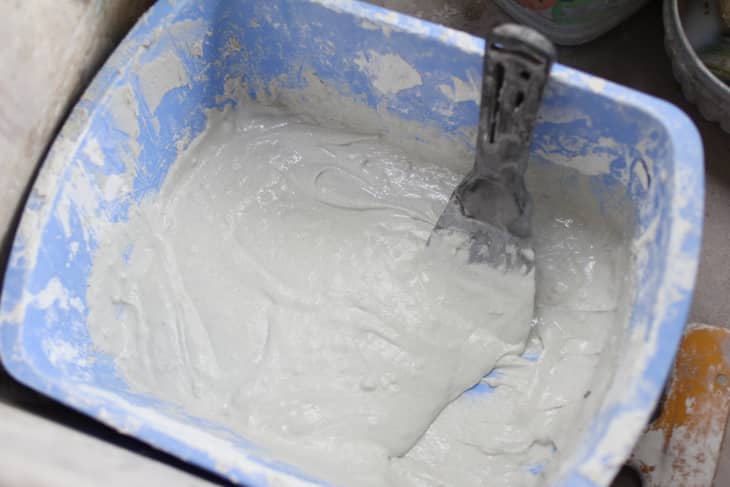
4. Mix your thinset according to the directions.
Tip: You want your thinset to have a smooth peanut butter-like consistency. Too wet and your tiles will droop, but too dry and they won’t stick properly. I start with a little bit of water and add the dry thinset powder to it. This also helps prevent lumpy mixtures.
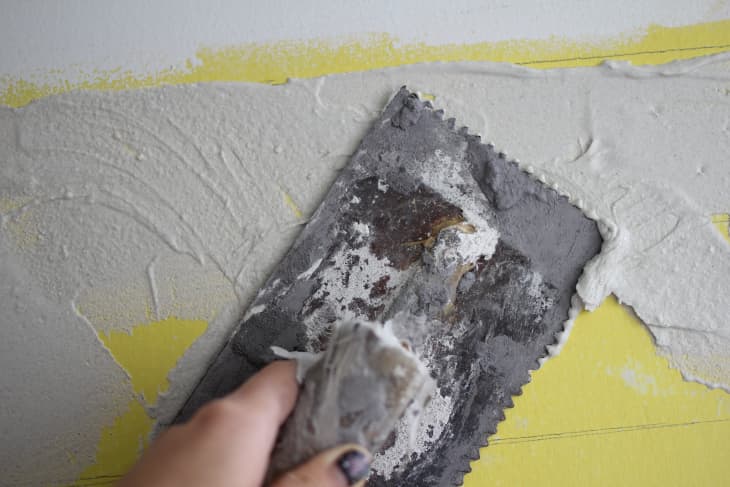
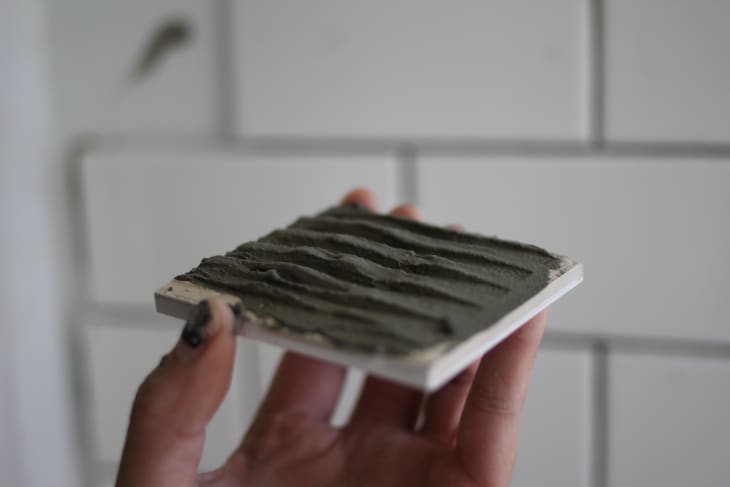
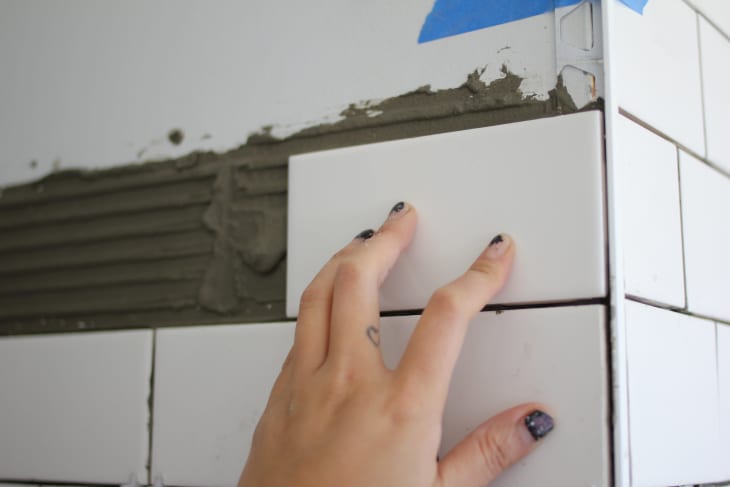
5. Using your trowel (a margin trowel would be easier to use) apply about 1/8″ of thinset to the wall. Use the flat edge at a 45 degree angle, and smooth over the area so it’s thin and even.
Tip: Only apply enough for an area you can tile in 5-10 minutes. Some thinset dries even faster.
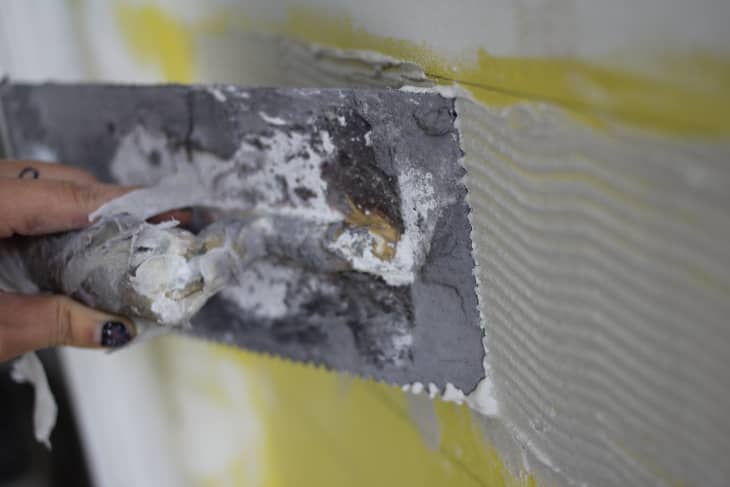
6. Now with the notched side of the trowel, apply light pressure at 45 degrees to create long grooves. These grooves will help remove any excess thinset. It also helps suction the tile against the wall and keeps it in place.
Tip: The thinset label will tell you what notch size to use, depending on the size of the tile. I used this v-notch trowel for my 3×6 subway tile, and a 1″ notch for my 12×24 floor tiles.
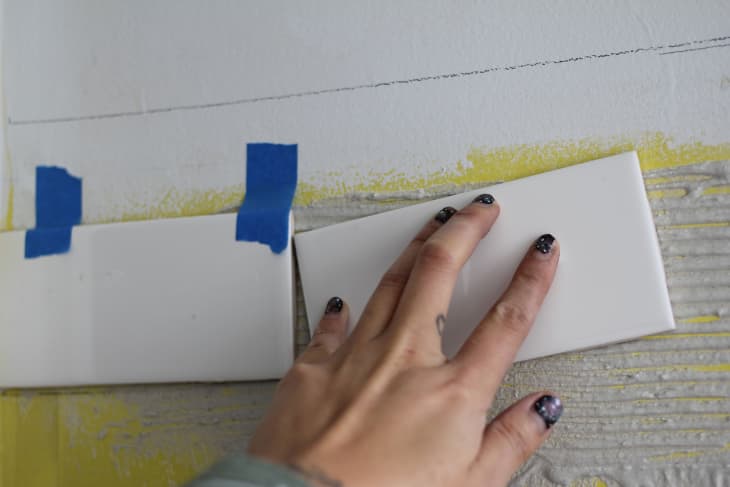
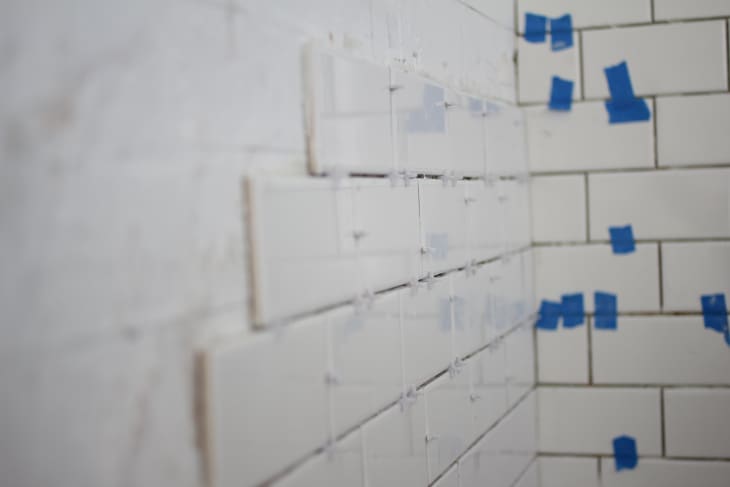
7. The first tile installed should be where blue meets green in the diagram above. Set the tile at a slight tilt, and twist with firm pressure into place. For the first row, use painter’s tape to make sure tiles stay in place.
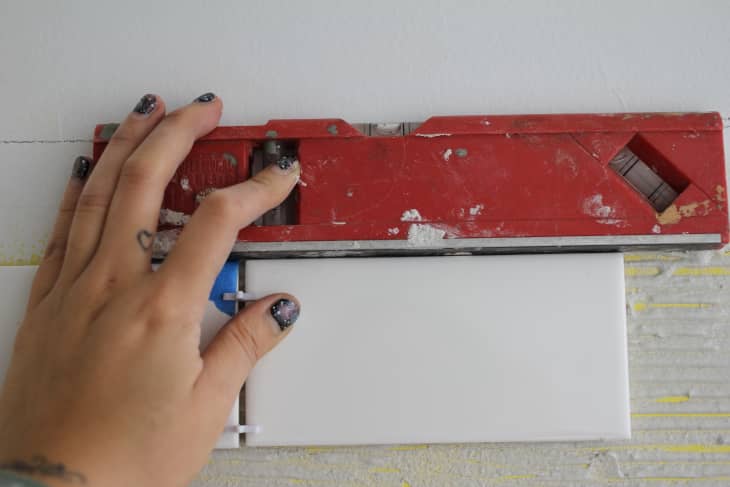
Tip: Once you set the tile, double-check again to make sure it’s level.
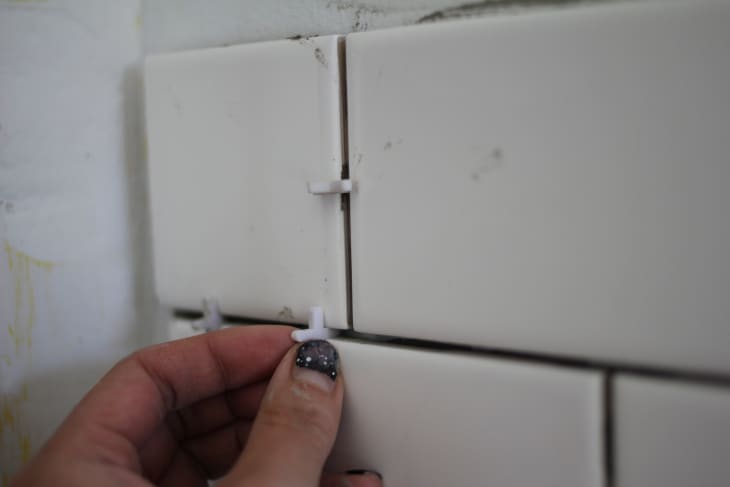
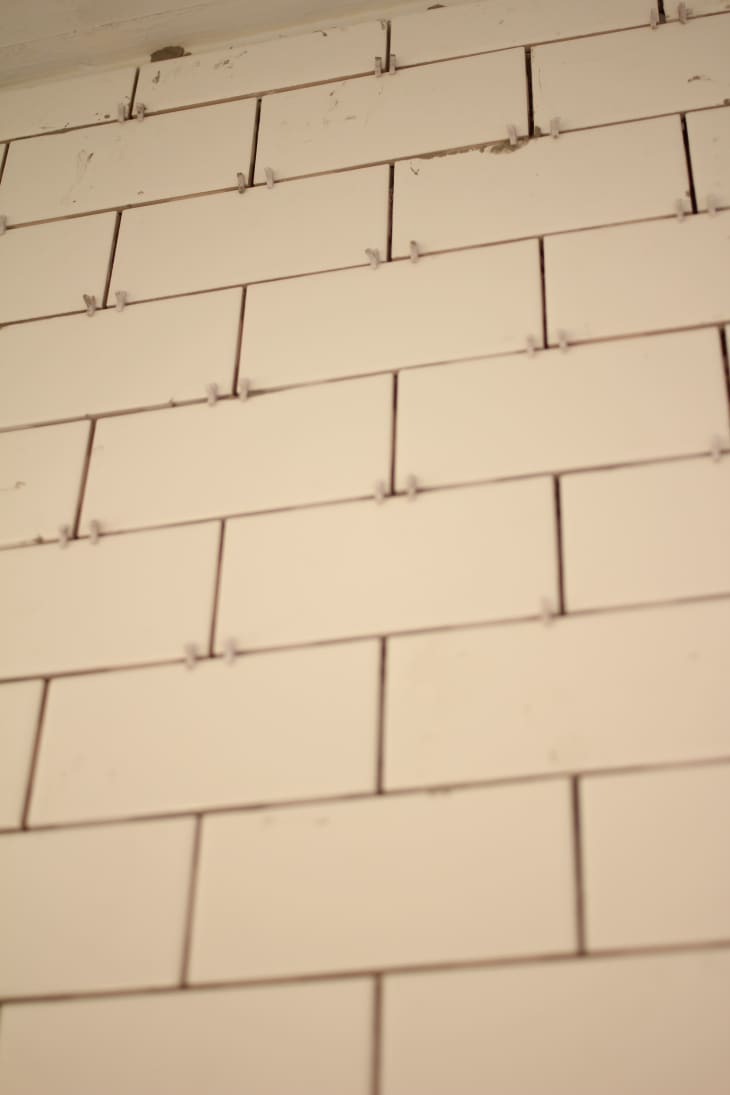
8. Insert spacers on each corner of each tile to get even grout lines.
Tip: Some tiles have little nubs or an irregular shape that may affect the spacing. Make sure to stand back and take a look at your work to check if tiles are even. If some are protruding out more than others, use a rubber mallet to softly tap the tile into place.
9. Continue this process across the wall.
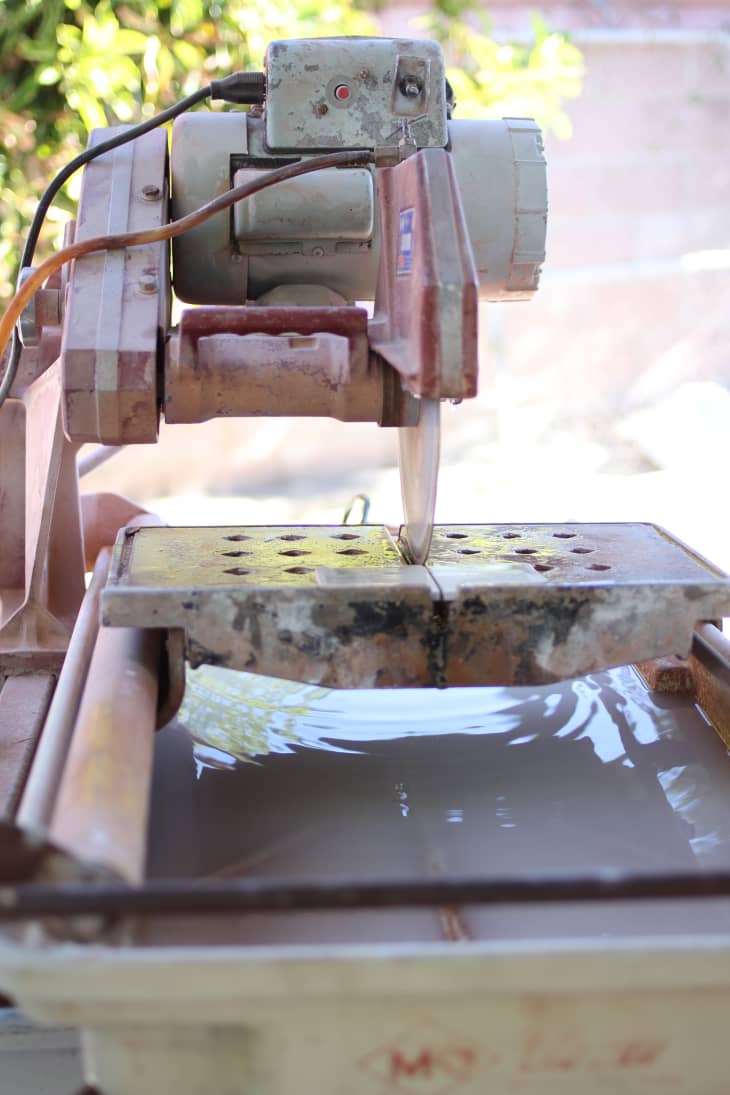
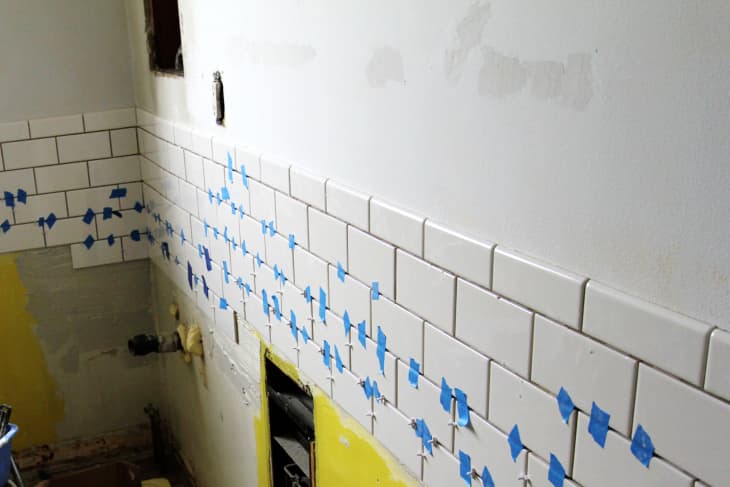
10. Measure, mark, and cut tiles to fit along edges, and around electrical outlets, corners, and windows. Remember: measure twice, cut once.
11. Once you have your tile cut to size, apply thin-set directly to tile for those corners and small, hard-to-reach spaces.
12. Before the thinset dries, clean the excess thinset between the grout lines with a screwdriver or spacer. It’s a lot easier cleaning while it’s wet than chipping at it with a razor later.
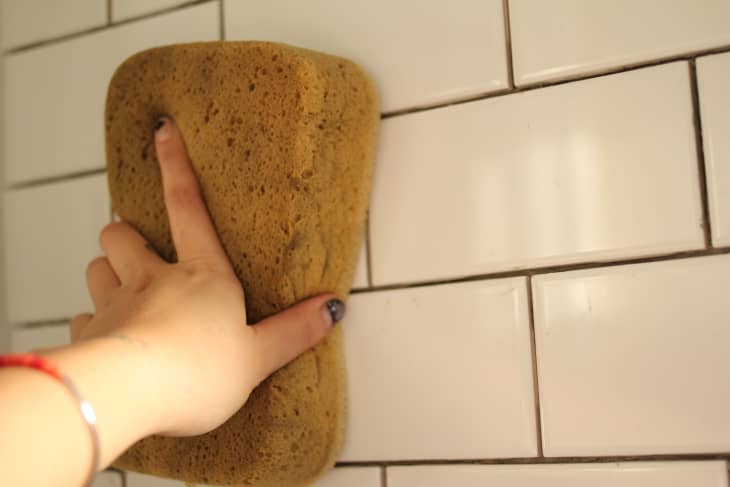
13. Using a damp sponge, carefully wipe any thin-set off the face of the tile.
14. To finish off the top row of tiles, I used a simple bullnose trim to finish off the wall.
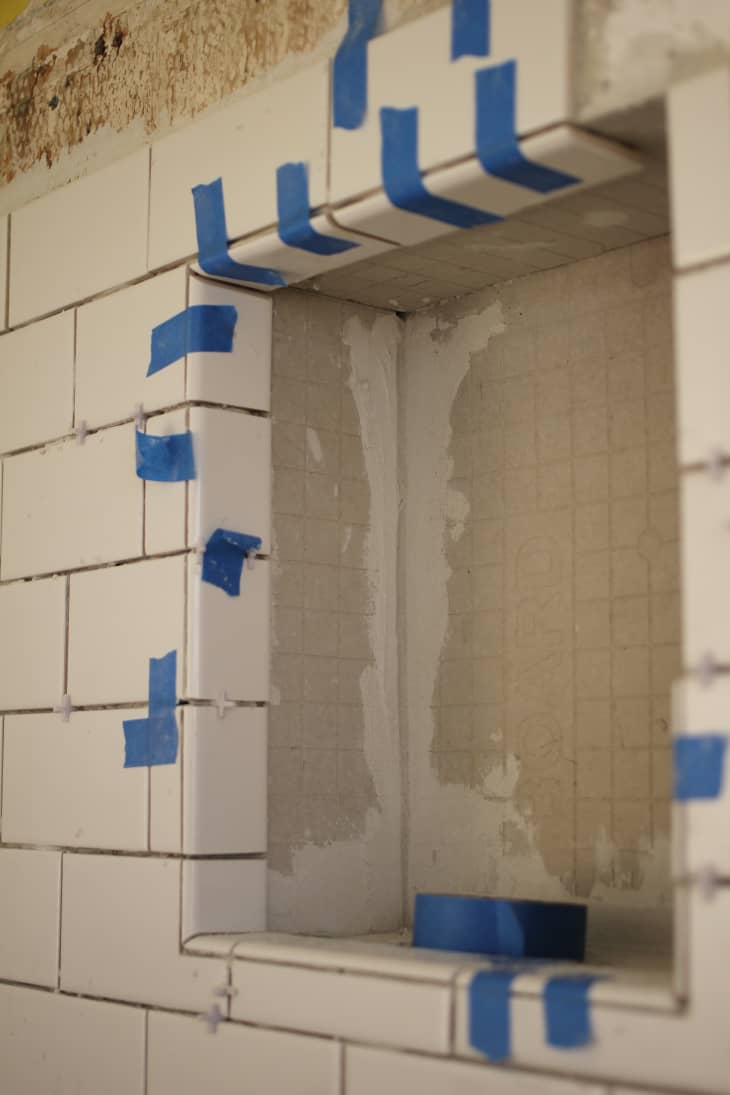
15. When you get to intricate nooks (like this shower shelf), cut 45 degree corners into the tile. For wall to wall corners, leave enough room so caulk joints are the same width as grout joints.
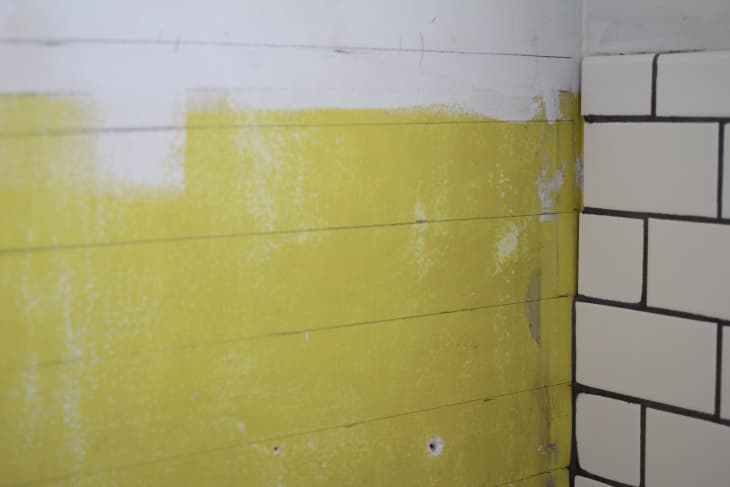
16. If you have an outside corner, there are many ways to finish them off, depending on your tile design. Bullnose, double bullnose, quarter rounds… I found this nice white metal edge finishing at a local tile shop. (I really wanted to avoid turning the bullnose vertical and having a frame on this corner.) The metal finish was perfect for a straight-edge finish, and serves as a corner protector as well.
More Tips
- Try to line up your corners. Buy a laser level. I drew lines that I thought might help, but they only got covered by thin-set. Laser levels can even bend around corners.
- Once thinset becomes too thick and dry, throw it away and make a new batch. Trying to extend the life of thinset by adding water will make it less adhesive.
- Don’t just place tile onto thin-set. Press firmly, twist, and wiggle it so it’s really on there.
- Watch for tipped corners. Pressing on one corner can lift another. It might not be noticeable now, but once you add grout, corners can look higher or lower than neighboring tiles.
- Use a screwdriver to pry up tiles that are in the wrong place. Once the tile is suctioned onto the thin-set, it’s really on there. The screwdriver would have saved me from a few days of sore fingernails.
- Open a few boxes of tile and mix them up. One box can vary slightly in color from another.
- Make sure you plan accordingly. Buy finishing trim pieces by the same manufacturer, so you don’t have to try to match whites later.
Has anyone ever given tiling a try? Please share any tips you have with us! Also, be sure to check out the next step in my bathroom renovation — everything you need to know about grout.
Have a really great DIY project or tutorial that you want to share with others? Let us know! We love checking out what you’re making these days, and learning from our readers. When you’re ready, click here to submit your project and photos.