
I Transformed This Blank, Boring Wall with a $200 Faux Fireplace
I’m a sucker for a fireplace. And while this is an architectural feature that’s hard to come by as a renter, my third Seattle apartment did come with one. Then my eighth apartment in Seattle (yes, I moved a lot) had a faux fireplace — or, I suppose it probably was real at some point, but it was not functional by the time I got there. Then the only thing that could have made my ninth Seattle apartment perfect would have been a fireplace, but no matter how many different furniture configurations I dreamed up, I concluded that there just wasn’t a good spot for one.
Cut to moving into my current (and final) apartment in May, and there was a perfect spot to put a faux fireplace: a huge blank wall in my living room. In fact, my guests are shocked once they realize the fireplace was not there when I moved in. Here’s how I did it.

The first step was finding the perfect mantel.
I was surprised how easy it was to find a mantel — there were actually two at my local salvage store. I only paid $20 for mine, though I would have spent up to $100.
My dad helped me give it a fresh coat of paint with Behr’s Ultra Pure White, but luckily that’s all that was needed to get it shipshape. My mantel was relatively light, so I just used two small corner braces to secure it to the wall. (If yours is more than 20 pounds or so, consider using screw anchors.)


I made a DIY hearth out of wood boards and fabric.
I looked at a lot of fireplace photos to figure out how — or if — I wanted to include a hearth. I ultimately decided to add one because I wanted to place my TV in the center (where the fire would be located for a real fireplace), and I wanted to set it on something to give it a height boost. I made it wide enough so it extends out further than the mantel by about 6 inches on both sides, which I like the look of, but you could also make it the same width.
To create the hearth, I stacked some boards together and wrapped them up (not unlike gift-wrapping a present) in a red-orange fabric that feels like a cross between a velvet and a corduroy.

Peel-and-stick tiles make the fireplace look real.
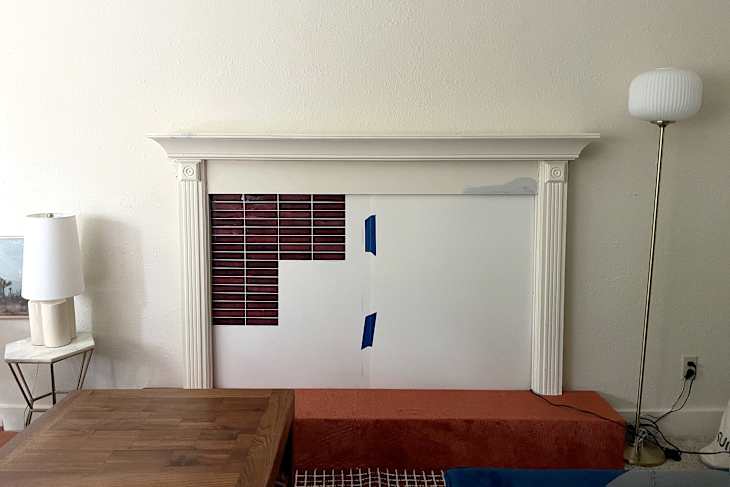
To finish off the look, I used these maroon peel-and-stick tiles behind the mantel. (They are meant to look like subway tiles, but I think they look pretty brick-ish, too, kind of like a real fireplace). I put a piece of cardboard behind the mantel before I secured it with the corner braces, then stuck the peel-and-stick tiles on. Doing it in this order, I was able to line the tiles up with the lines in the mantel to make sure everything was straight.
Alternatively, you could also get creative with the backing and use fabric or a peel-and-stick wallpaper. So many possibilities!

My project cost under $200.
Once the backing was completed, I styled the hearth and mantel and placed my TV in the center on an adjustable stand. And that was it! I turned this huge empty cold wall into a very convincing faux fireplace for under $200.
Next up? Firing up the Netflix Yule log. If you need me, I’ll be doing literally everything and anything “fireside” until the foreseeable future!
Inspired? Submit your own project here.