
The Only Guide to Reupholstering Dining Chairs You’ll Ever Need
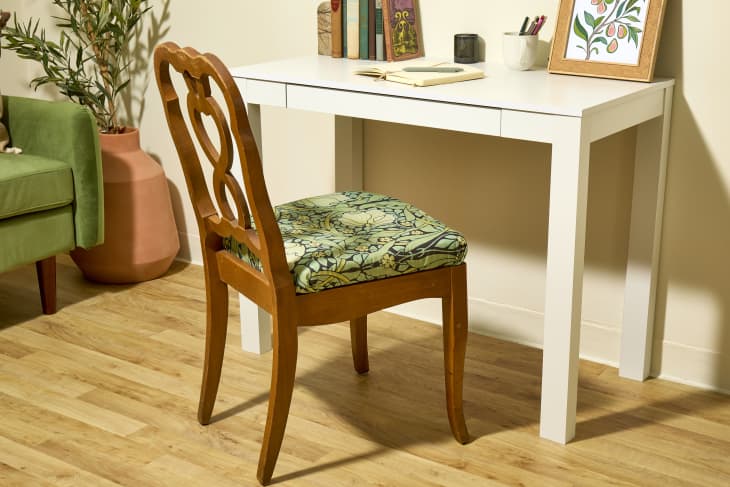
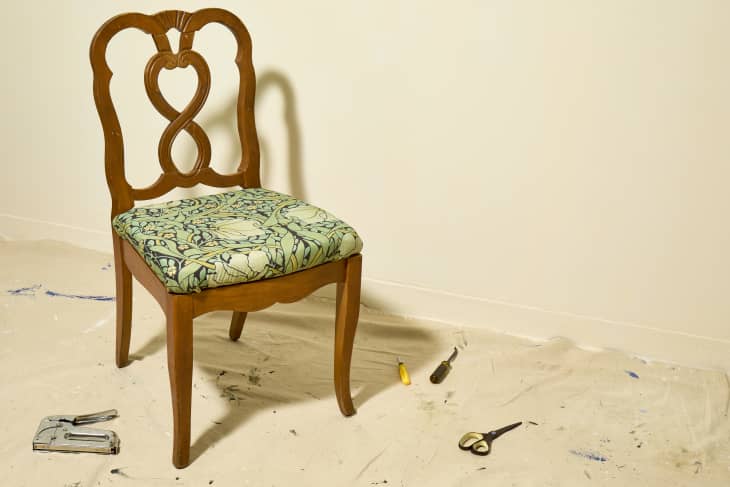
You’ve probably found yourself at more than one thrift store (or garage sale, or estate sale, or Facebook Marketplace listing) that sold dining chairs that looked sturdy and functional but a little past their prime. You might have looked at the solid wood frame and thought, these would be a great addition to my home. But then after one look at the dated, dirty, and sometimes even decayed cushions, you sprinted away in the opposite direction. After all, reupholstering a chair is too hard for a beginner — or so you thought!
Re-covering the seats of old dining chairs is actually a really beginner-friendly upholstery project, and learning how to reupholster a dining chair will free you up to a world of thrifting possibilities. The great part about learning how to reupholster a chair is that you can reuse the skill practically infinitely — once you get tired of the fabric on your current dining chairs, you can simply swap it out for something new. Reupholstering a chair seat can give a completely fresh look without having to buy new furniture! How’s that for a bargain?
Ready to learn more? Follow these instructions to learn how to reupholster a dining chair, even if you’re a total upholstery newbie.
Tools You’ll Need to Reupholster a Dining Chair
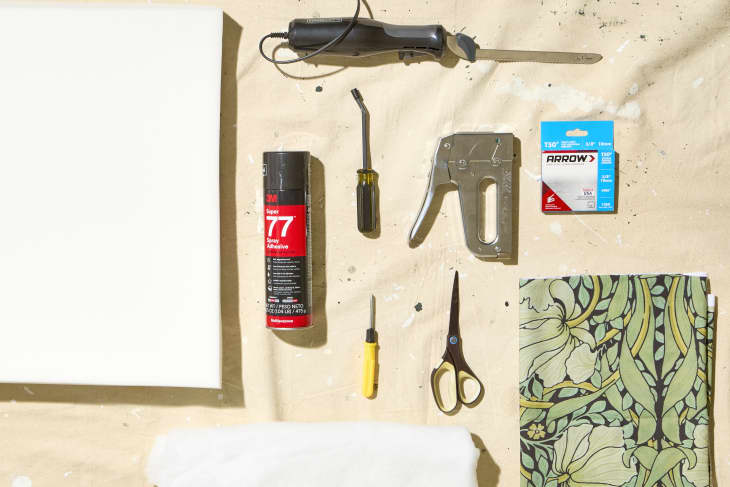
You will need to invest in some tools to reupholster a dining chair, but the good news is twofold: They’re all affordable, and once you’ve mastered this task you’ll be unstoppable and will likely reupholster every seat in your house (and after that, you can share your tools with friends and neighbors so they can do the same). Here’s what you’ll need.
- Staple gun
- Tack puller
- Screwdriver
- Serrated knife, sharp scissors, or an electric carving knife
- Seat foam
- Upholstery batting
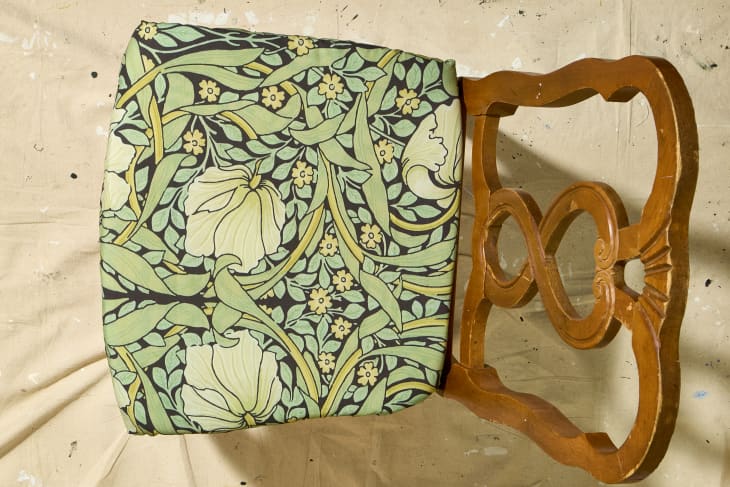
- Upholstery fabric (we used this one); you’ll need about a half-yard of fabric per dining chair
- Spray adhesive (optional)
How to Reupholster a Chair
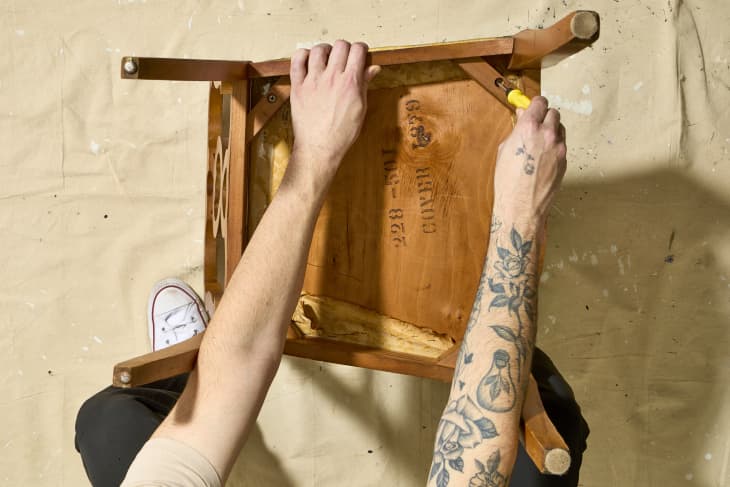
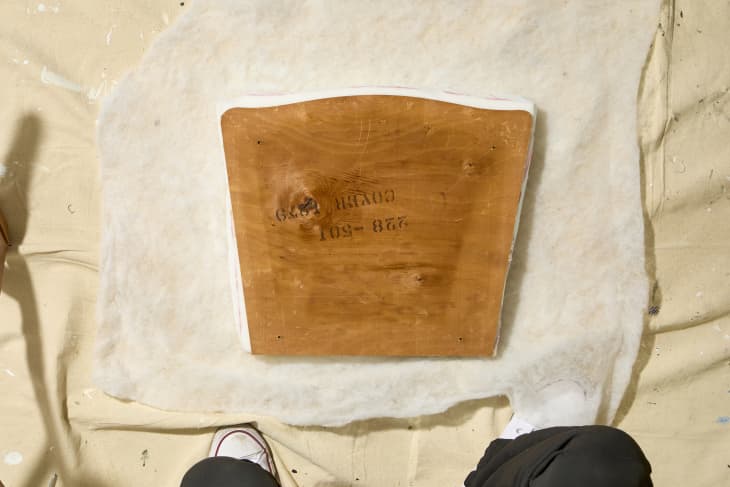
1. Remove the seat from the chair.
To get started, turn the chair over and unscrew the seat pad from the frame. Place the seat pad on a sturdy work surface
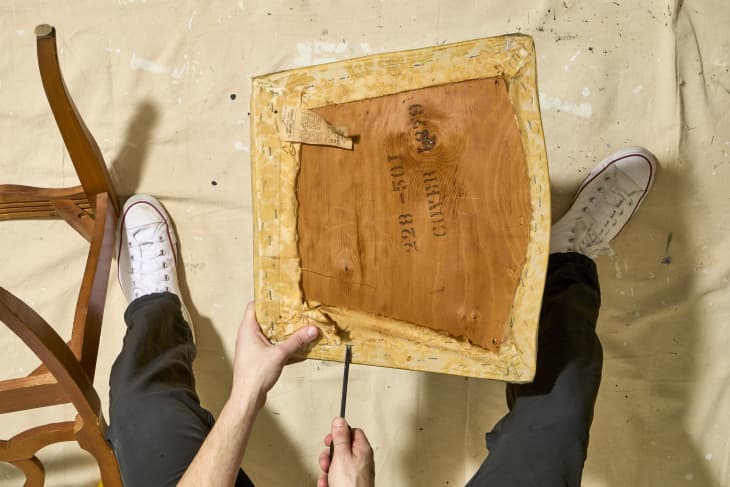
2. Pry up the old staples.
Using the tack puller pry up any tacks or staples attaching the old fabric to the underside of the chair.
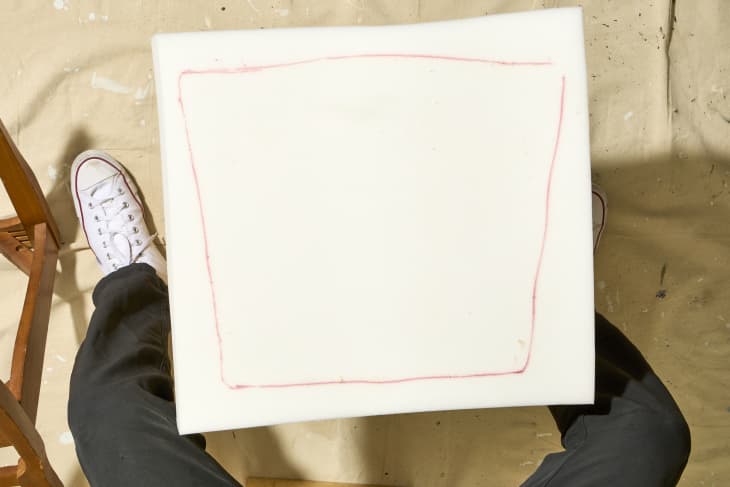
3. Create the new cushion.
Once you’ve removed the fabric and discarded the staples, check the seat foam to see if it needs to be replaced. If it’s flattened and doesn’t have much bounce, or if it’s crumbling, you’ll need to replace it. Look for a firm foam that’s 2 to 3 inches thick.
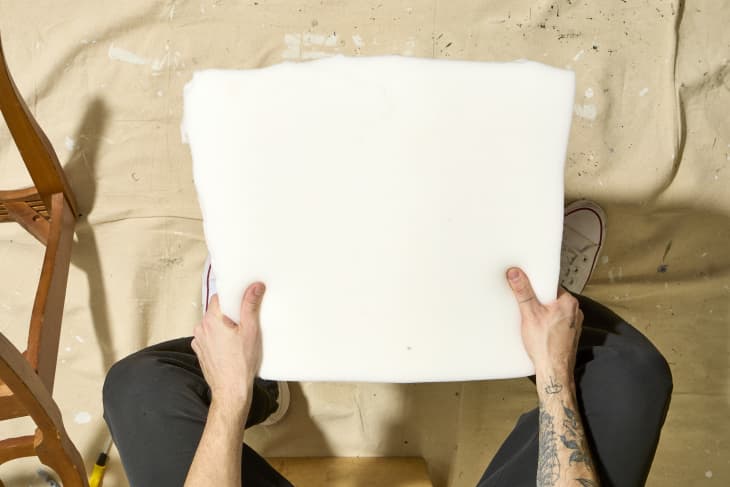
Set the old foam on top of the new foam sheet, trace around it with a marker, and cut it out. You can use scissors or a serrated knife, but an upholsterer’s trick is to use an electric carving knife, which makes quick work of cutting foam.
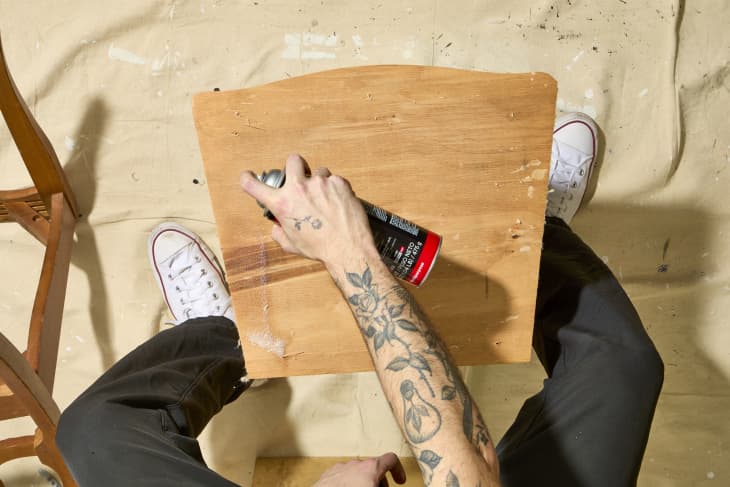
4. Adhere the cushion to the seat pad.
Using spray adhesive, attach the cushion to the seat pad.
5. Attach the batting over the cushion.
Turn the pad upside-down and lay it on top of a large piece of upholstery batting. Holding the seat pad in place with one hand, bring the sides of the upholstery batting up around the sides, encompassing the foam so that the batting stretches over the back of the pad by at least 2 inches.
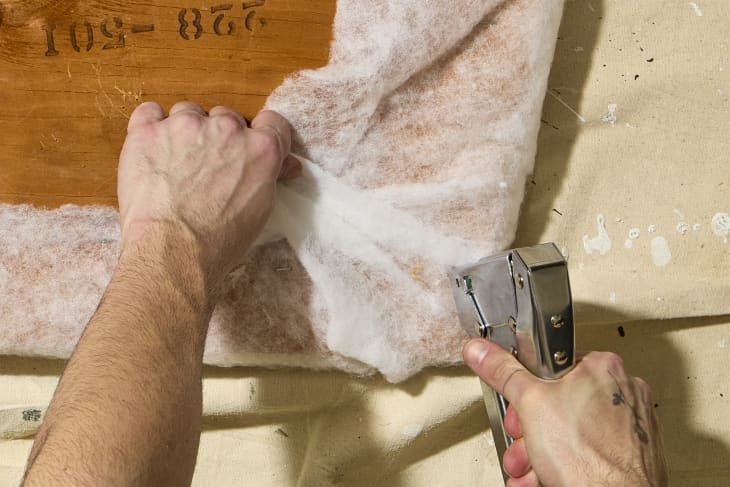
Pull the batting taut and place one staple in the center of all four sides of the pad. Then continue to pull the batting, working your way out from the center on each side until all sides have been stapled down. Stop stapling a few inches before you reach the corners. Repeat these steps on the remaining sides.
To secure the corners, pull the batting towards the center of the seat pad, staple, then continue pulling and stapling on each side of the corner until the batting is secured and you have a crease-free corner. Trim any excess upholstery batting.
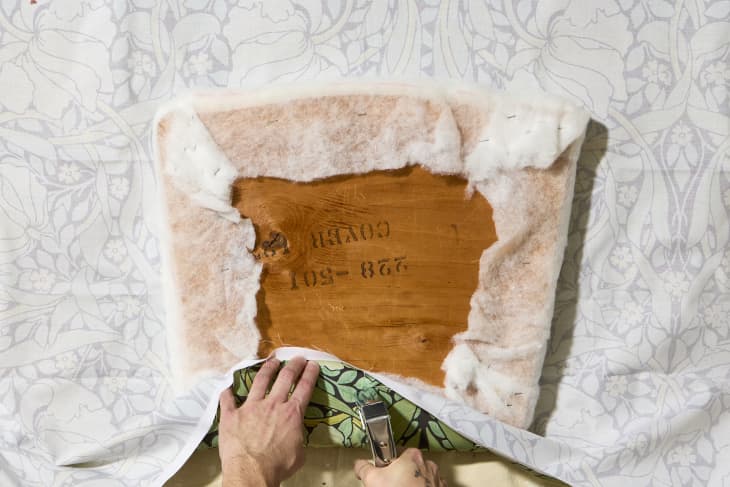
6. Staple on your upholstery fabric.
Lay your uncut fabric face-down on the workspace, then place the seat pad upside-down and set it on the fabric. Place the seat pad so that you can pull the fabric up and over the sides to the back, with an excess of at least 4 to 6 inches.
In the same way you stapled the upholstery batting, staple the fabric to the back of the seat pad by placing one staple in the center on all four sides, pulling it taught as you go around to each side.
Keep the fabric taught, working your way out from the center on each side, turning the pad over and back, smoothing the fabric on the seat to keep it tight as you go. As with the upholstery batting, you’ll want to stop stapling a few inches before you reach the corners.
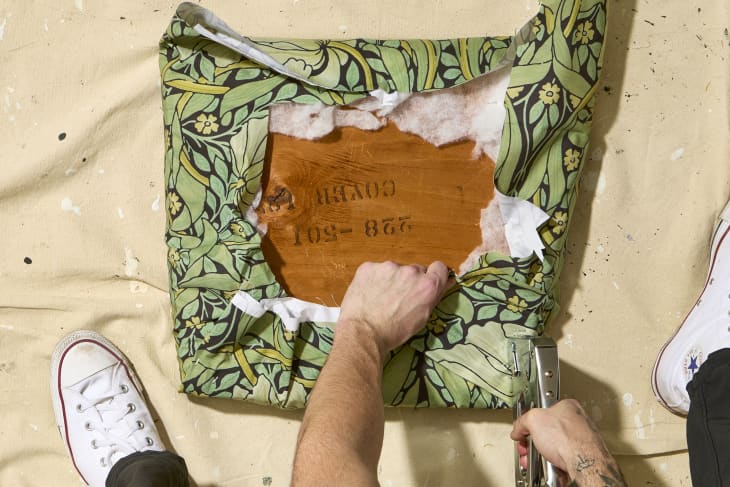
To create a pleated corner, pull the middle of the corner fabric to the center of the seat and staple. Pull the excess fabric from the left side and fold it back over the center towards the right side and staple.
Do the same on the right side, folding back over the center towards the left side and staple.
Repeat this on all corners, then trim the excess fabric. If you end up with some wrinkles in the corner fabric, you can work them out by pulling on the fabric and stapling it in place once the wrinkle smoothes out.
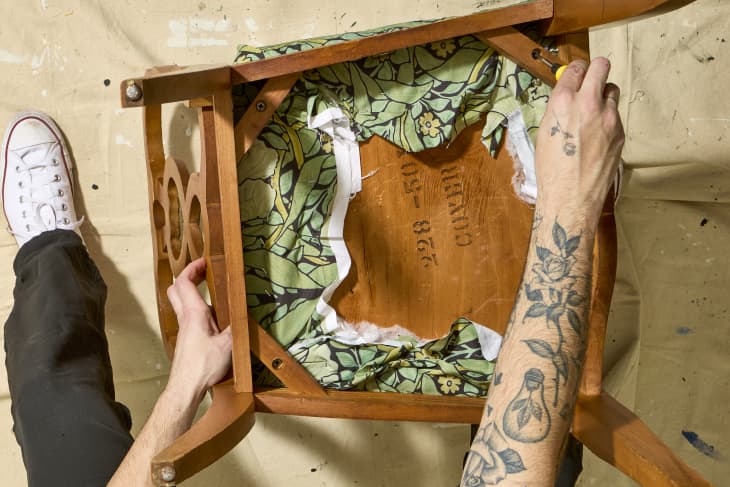
7. Reattach the seat to the chair.
Use a screwdriver to reattach the seat to the bottom of the chair.
Tips for Reupholstering a Dining Chair
Your first seat pad might take a while, but your speed and accuracy will improve as you go. The biggest risk is cutting your fabric so that it’s too short to wrap around to the back side of the seat pad. You can avoid this by purchasing an extra few yards of upholstery fabric and making sure you leave an additional 6 inches on each side as you cut each piece.

The best way to gauge whether or not you’re ready to upholster a whole set of dining chairs is to start off with one single chair first: Grab a desk chair or a decorative chair from another part of your house. If you get through that process unscathed, move on to the dining room. The whole process is actually pretty simple once you get the hang of it — and it can even be fun!