
An Easy $100 Hack Made an IKEA RAST Dresser Look Unrecognizable
Cane dressers, consoles, and nightstands look incredibly high-end but often come with an incredibly high price tag. Luckily, there are several DIYers who have served up the expensive designer look for a fraction of the price by adding cane webbing to basic IKEA furniture.
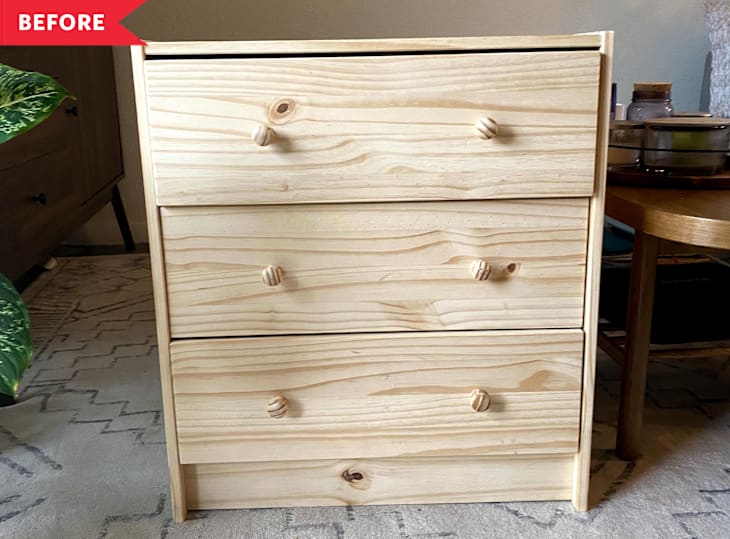
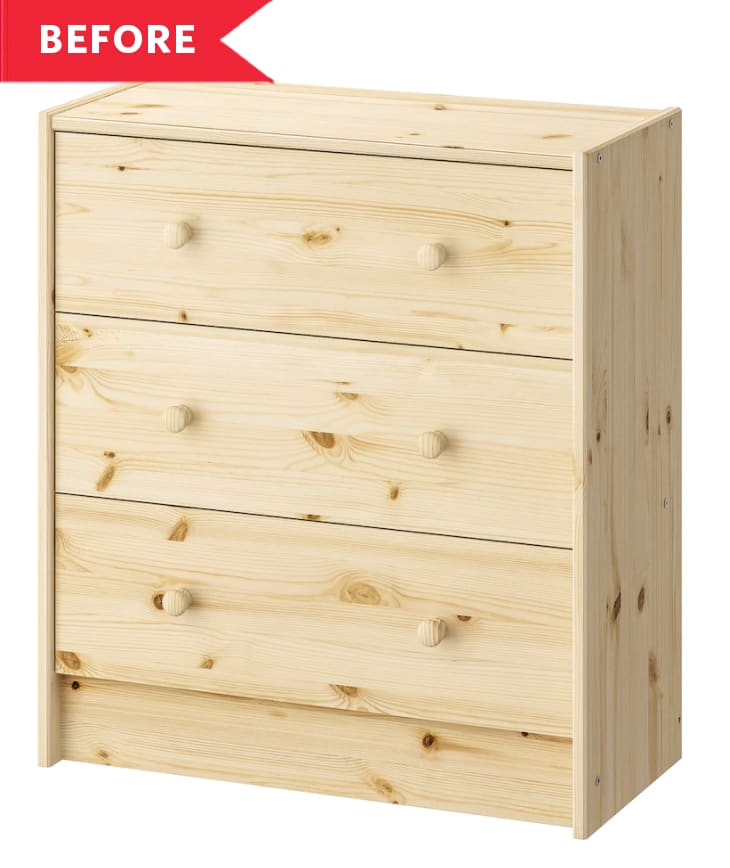
Meghan Wheeler (@MWHomeGoods) shows how it’s done with the Swedish retailer’s RAST, which, out of the box, is $50 — though you might be able to find one secondhand for less. (Or, Meghan says, “I swear almost everyone has one sitting in the back of their closets.”)
Whether you’re upgrading a brand-new RAST, a hand-me-down one, or a similar dresser you already own, you’ll want to take notes from Meghan’s DIY.
Additional Details and Finishes Made It Look Modern and Expensive
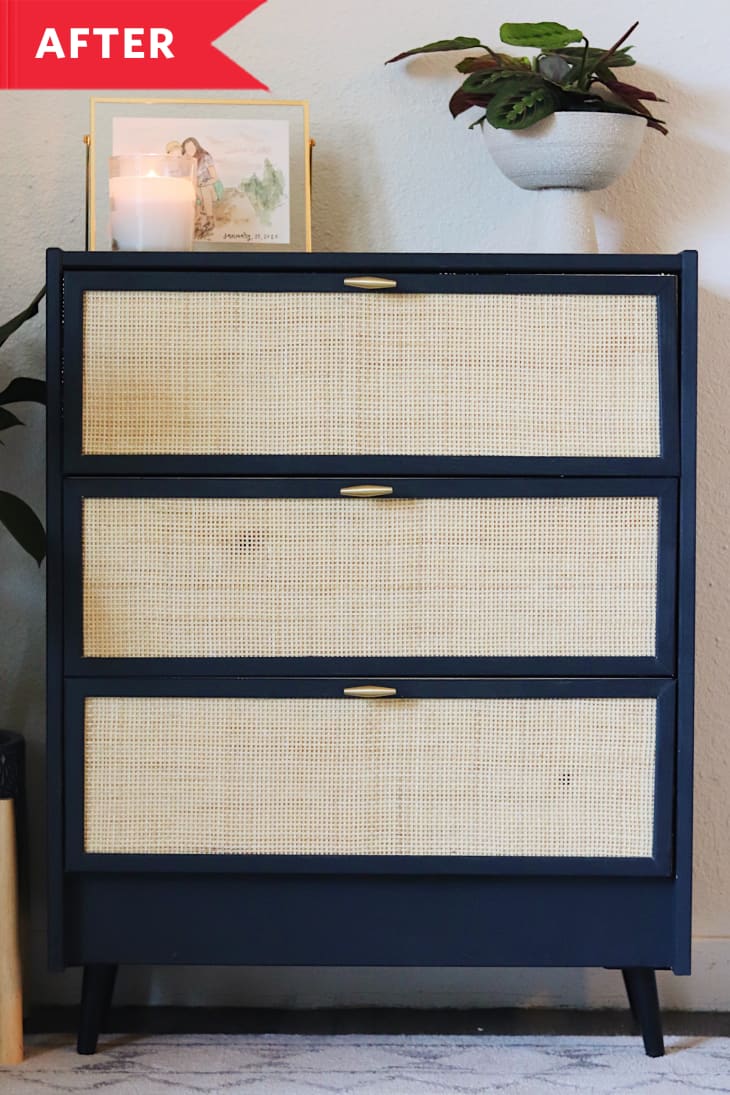
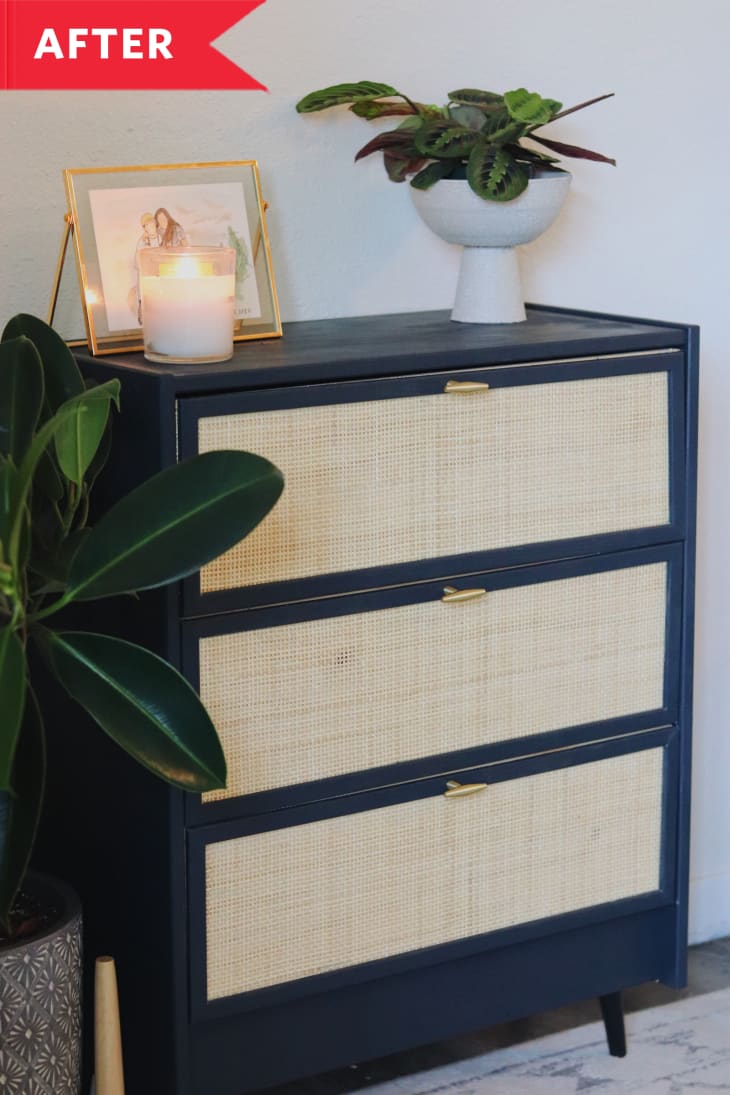
First, she added a base to the bottom of the three-drawer chest using MDF board leftover from another project in her garage. Then, she attached a set of mid-century style legs to the base. Next up was black paint, then stapling cane webbing to the drawer fronts. “I am so proud of the cane drawer fronts,” she says. “They turned out SO good, and it was my first time working with cane webbing.”
To hide the edges of the webbing and create a more finished look, Meghan added trim (painted the same color black as the body of the dresser) to each drawer’s perimeter. “I used some fancy multi-angle shears to cut the trim, which made it super fast and easy,” she adds.
Lastly, she added new, more modern hardware. “It looks so modern and expensive,” she says of the after. “I have seen several cane nightstands and dressers like this online, but they are so expensive! So I made my own affordable option.”
Should Have DIYed Two of These Modern, Inexpensive Dressers
The only thing she’d do differently, she says, is make two instead of one (now that’s a sign of a successful, efficient, and inexpensive DIY. For all of her materials, including the dresser itself and the tools, Meghan spent under $100.
Thinking of jumping on the cane bandwagon yourself? Read our editor’s picks for affordable cane finds — or go the DIY route like Meghan. Don’t forget to read these tips for working with the material first!
Inspired? Submit your own project here.
Get all the IKEA UPDATES
Sign up for The IKEA Edit, our twice-weekly newsletter with the latest IKEA finds, deals, and hacks.