
The “Basement with Potential” Bathroom Makeover
Renovation by: Sofia
Location: Toronto, Ontario
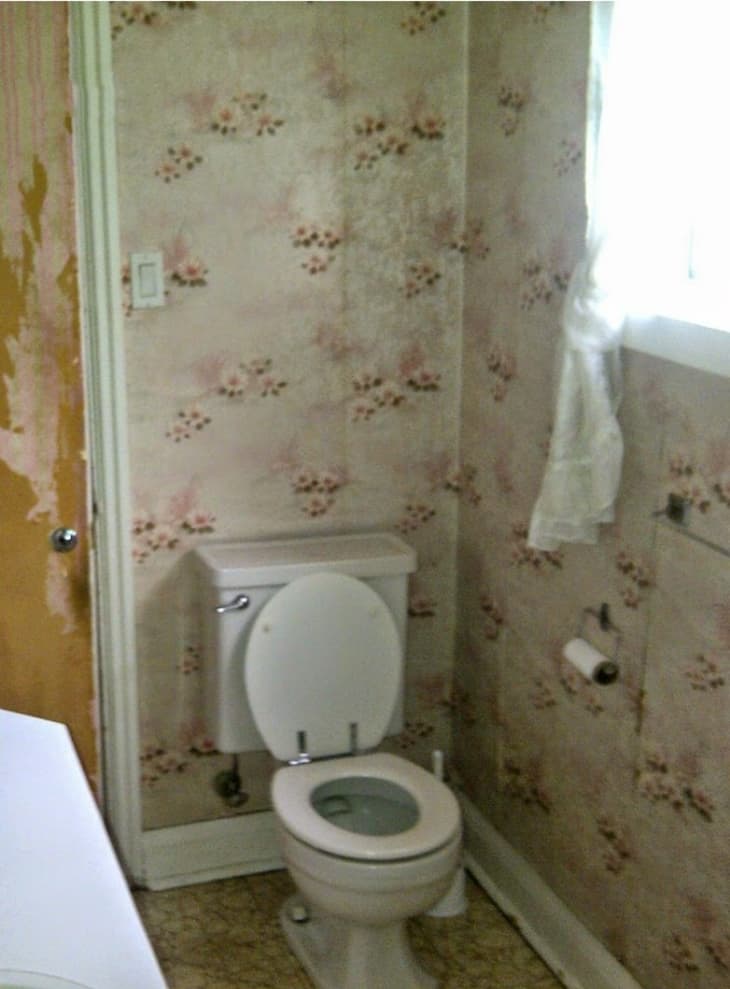
When we purchased our house 4.5 years ago, our basement had a lot of potential with large windows and a beautiful backyard view. The operative word here is “potential” as the space was completely unlivable at the time. The primary objective of the entire basement renovation — and especially this bathroom — was to do it stylishly on a budget. Considering that the renovation was a full gut job, the majority of the budget went on things that you don’t even really see: insulation, new drywall, framing, HVAC, and electrical.
Our approach was to hire a contractor to do all those wonderful “behind the scenes” things. Then, we were responsible for sourcing the finishes: tiles, vanity, mirrors, etc. Most of the contractors give you a budget within their quote for these items and you then need to source them from their suppliers. We avoided that, which gave us more options and the ability to find cheaper alternatives. At the same time, our contractor also offered his discount at certain places (i.e. 40% off) in case we wanted to shop there. We felt that we got the best of both worlds. The only downside is needing to source materials yourself, have it ready on time, and not to delay any work.

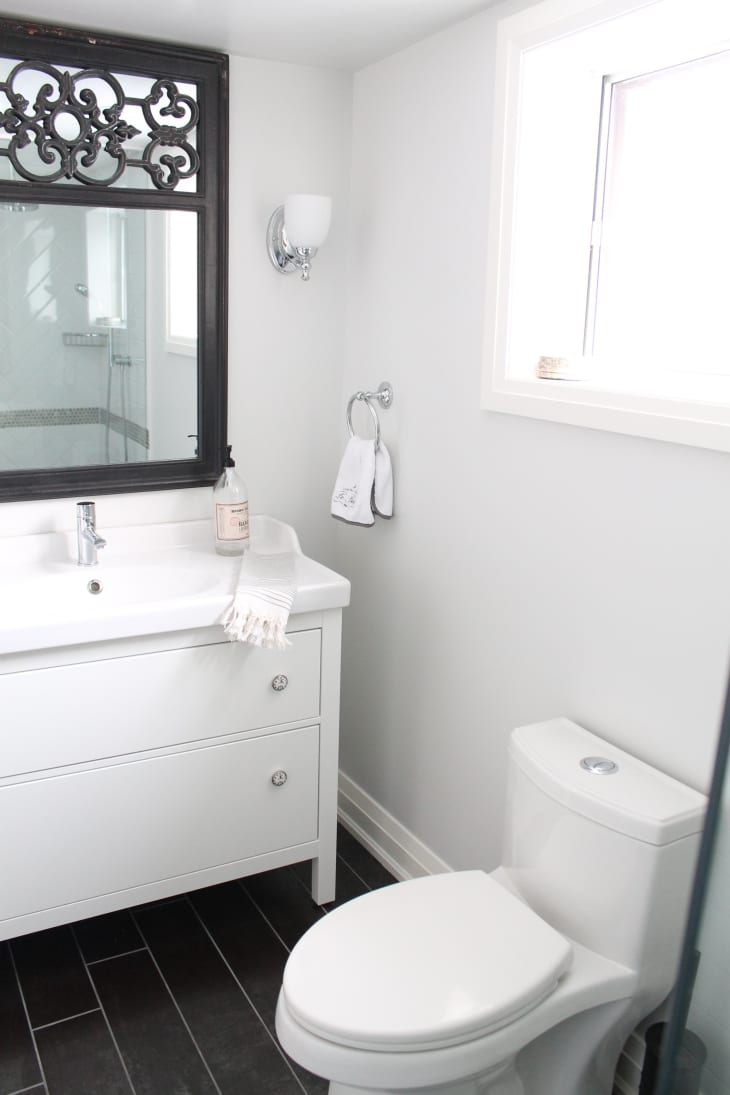
The big ticket items were the vanity, tiles, and shower system. Vanity is HEMNES with ceramic sink. We really like this combo for kids – not only is the sink raised (which avoids the need for backsplash) but it also tilts allowing for all the excess water to drip back in the sink – an absolute savior with kids. We ended up personalizing the vanity by replacing the knobs with Chronograph ones from Gingers (Anthropologie carries the same/similar ones). Floor tiles are from Tile Shoppe and wall ones from Home Depot, with stainless steel penny rounds being the most expensive ones per square foot. The rest of the tiles were $2 or $3 per square foot. For the shower system and faucet we used our great contractor discount.

Since we gutted the whole bathroom, we decided to make a few changes to make it more usable and to fit rest of the space better. That meant changing the door, toilet and vanity placements. It was doable, did not add too much to the budget, but made all the difference. At no extra charge we added pocket glass doors instead of regular ones allowing for more light into rest of the space and making the bathroom appear spa like. We decided to forgo the tub as we have one in kids bathroom and to maximize the height of the shower by not including the threshold.
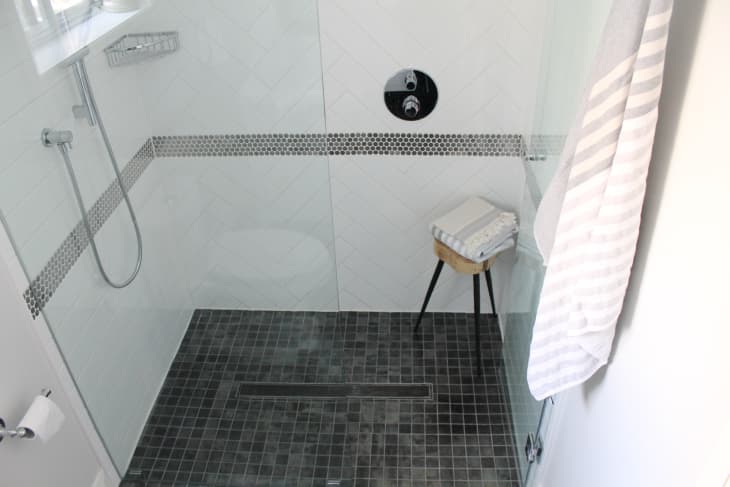
When we purchased the floor tiles, we hadn’t decided on a zero-threshold shower at that point. Once we decided to go with seamless entry we could not find more floor tiles to buy, so opted to purchase similar tile instead. (At one point we almost wanted to rip all the floor out and purchase new tile for the whole bathroom floor – but reason and budget prevailed!) Now we love the different tiles separating the space, not to mention that having smaller mosaic tile is better to ensure no slips.
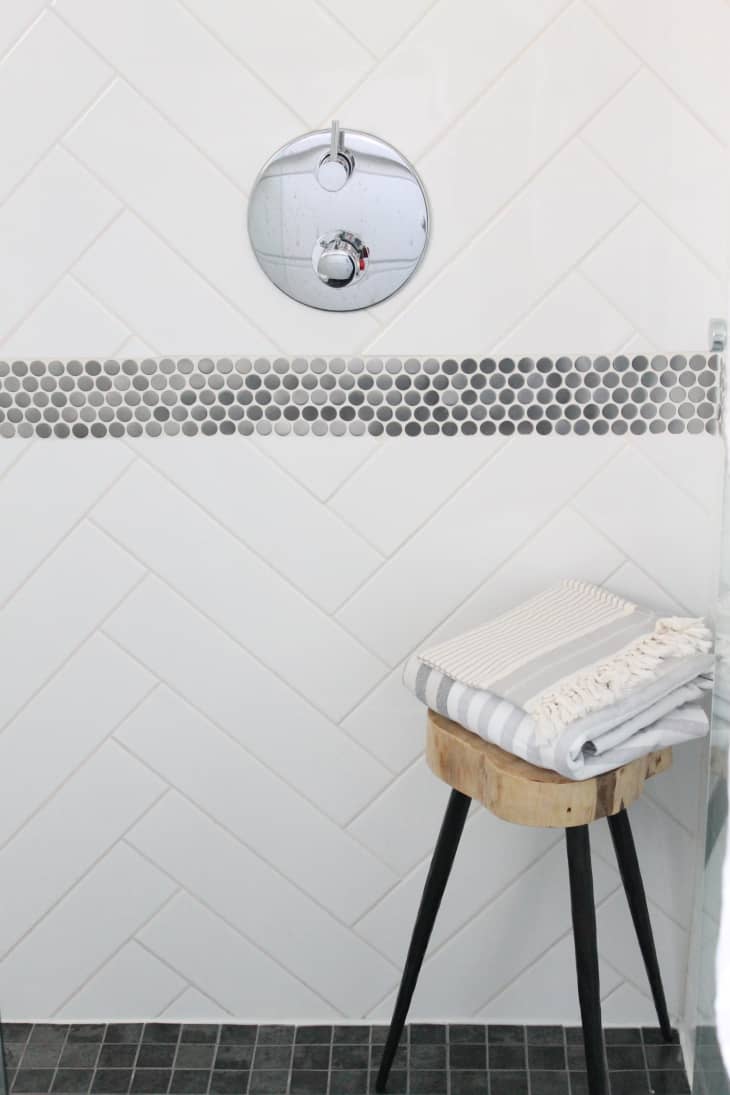
Our approach to this bathroom was to work from a budget and making all the elements appear more interesting in the way we used them (i.e. herringbone pattern using white subway tiles). To make the space even more special, we went with really decorative ‘as-is’ mirror from Bombay that looks like a flea market find. The plan was to use a black marker to fix it up – which we started and never finished, as we don’t mind it looking scratched to contrast the rest of the space. We also included natural wood element to warm the space through that interesting stool.
More info about the project at: Design. Style. Decor.
Thanks Sofia!
• Are you interested in sharing a decorating or renovation project with Apartment Therapy readers? Contact the editors through our Makeover Project Submission Form.