
The 38 Best Kitchen Cabinet Organization Ideas of All Time
The kitchen is known as the “heart of the home” for a reason. It’s seen you through your first dinner party, many culinary or baking experiments, big celebrations, and maybe even a heartbreak or two. It’s important that this space is a reflection of you and the way you like to live and cook, and your kitchen organizational methods can make or break your experience as a home cook.
Your kitchen cabinets are a great place to start organizing thoroughly because they hold so much potential. Check out these brilliant kitchen cabinet organization ideas that’ll help you make the most of the space you have.
How to Organize Your Kitchen Cabinets
Organized kitchen cabinets are the cornerstone of any efficient kitchen. What you have should be where you need it and easy to get, to ensure that kitchen activity isn’t frustrated by having to look for what you need or dig it out. Here are some simple steps for decluttering your kitchen cabinets (always start with this decluttering overview) and figuring out your organizing strategy:
- Consider your kitchen zones — what you do in which parts of the kitchen — when you set up your space. For instance, put cooking oils and spices in a cabinet near where you cook and store dishes near the dishwasher.
- Eliminate duplicates with the “best, favorite, necessary” rule.
- Go through your kitchen to get rid of the items from this list (and don’t forget these eight things too!).
- Use the ODT Method to make your way through all your cabinets.
- Remember to consider “prime real estate,” the idea that your most frequently used items should go in the easiest-to-reach spots.
For Small Spaces
Yes, you can still have a streamlined, organized kitchen if you’re short on square footage. These simple ideas require minimal investments of your time and money to help you maximize every square inch of your cook space.
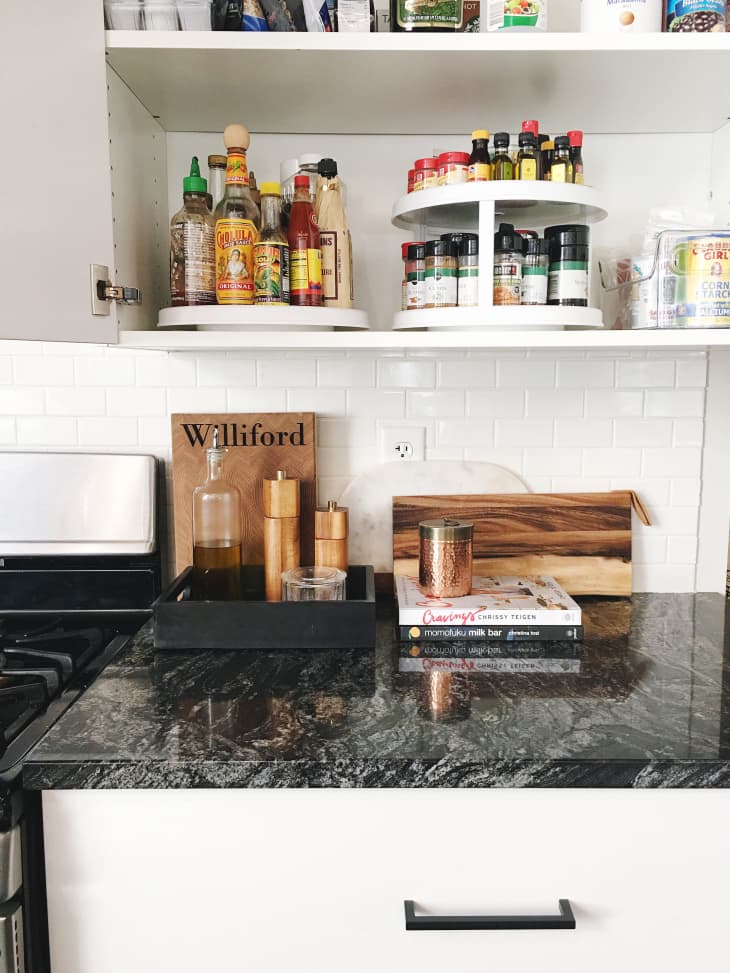
1. Use turntables inside your cabinets.
Turntables are key kitchen storage secret weapons when it comes to making any dead space more functional. Use them to make spices accessible, or so that you can see and grab exactly the right hot sauce from your collection. They’re also great for organizing bottles of oil and other condiments that you keep near the stove, for easy access while you’re cooking.
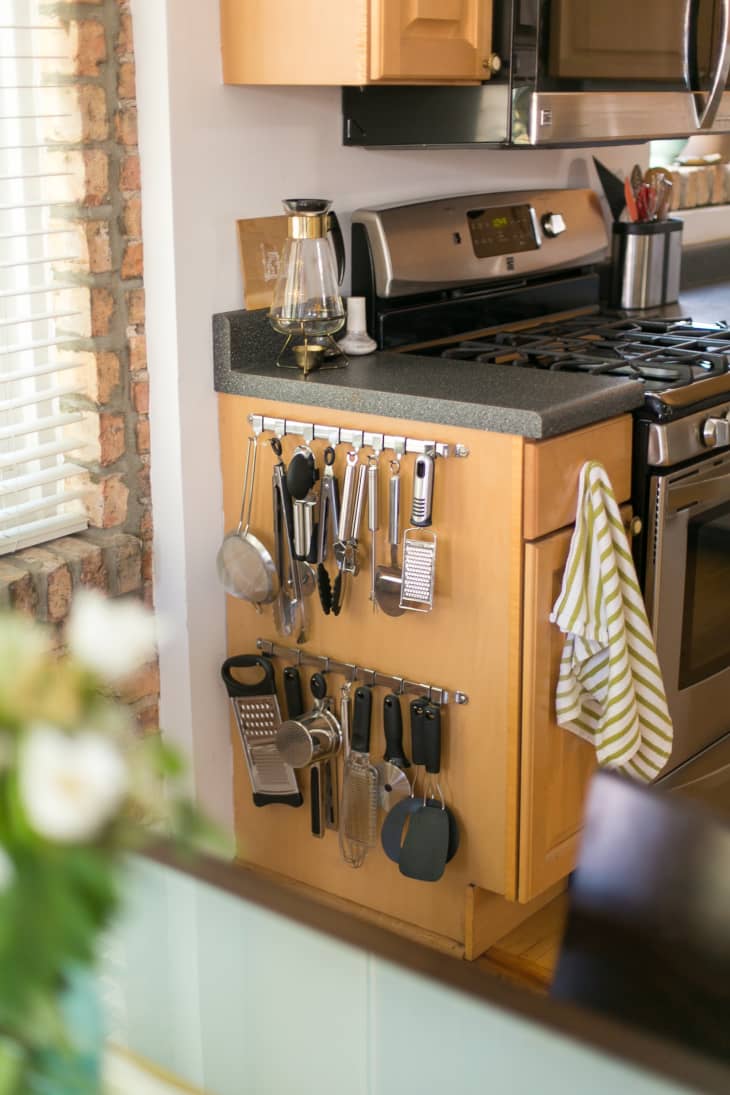
2. Make the most of the sides of your cabinets.
It’s amazing how much space goes wasted when you stop to look around your kitchen. If you have cabinets with exposed sides, use them! Add a rail, hooks, or even shelves to maximize your square footage.
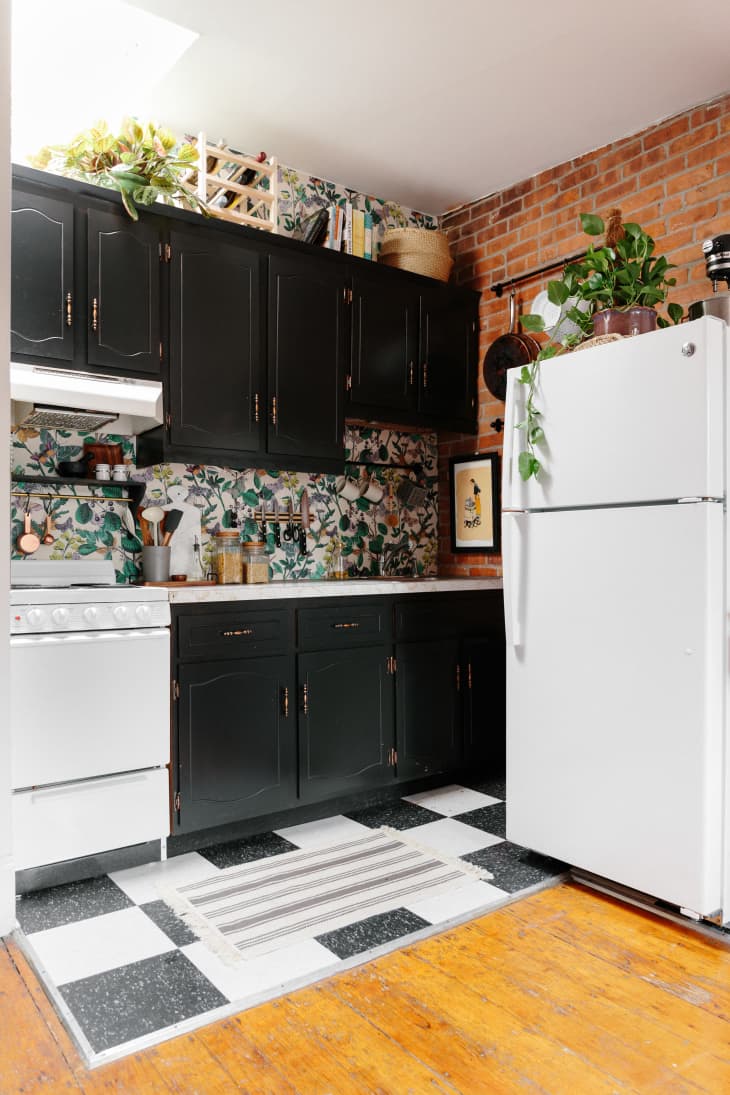
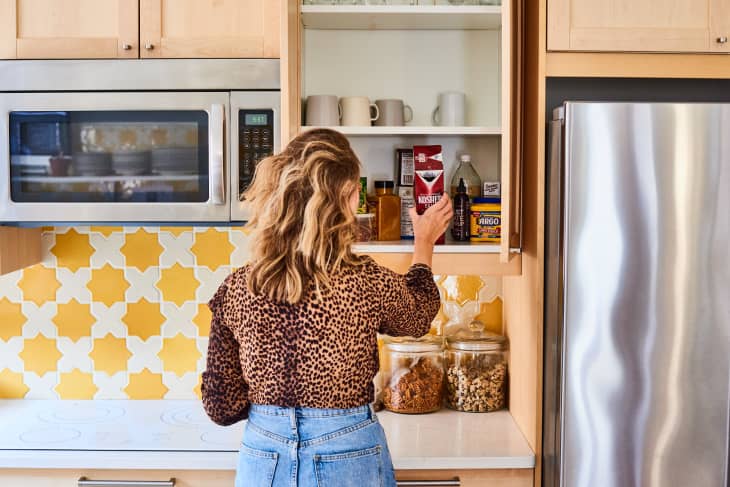
3. Use the space above the cabinets, too.
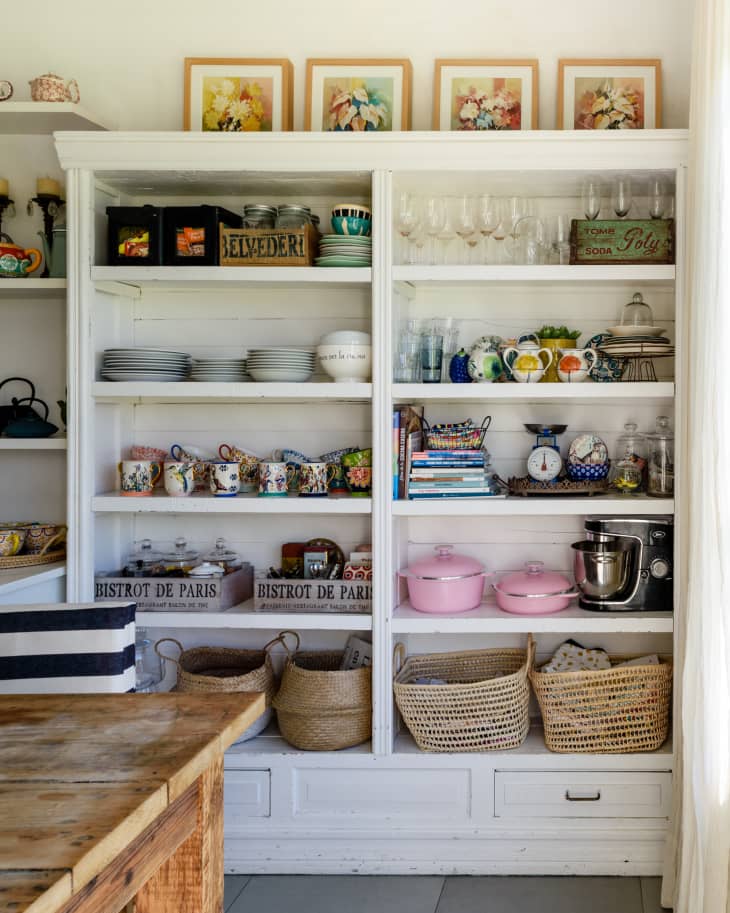
If your cabinets don’t go all the way up to the ceiling, you can still capitalize on above-cabinet space for extra storage. Turn it into your new home for bulky, lesser-used pots, cookbooks, extra ingredients, or even as a spot to show off a collection of vintage kitchenwares.
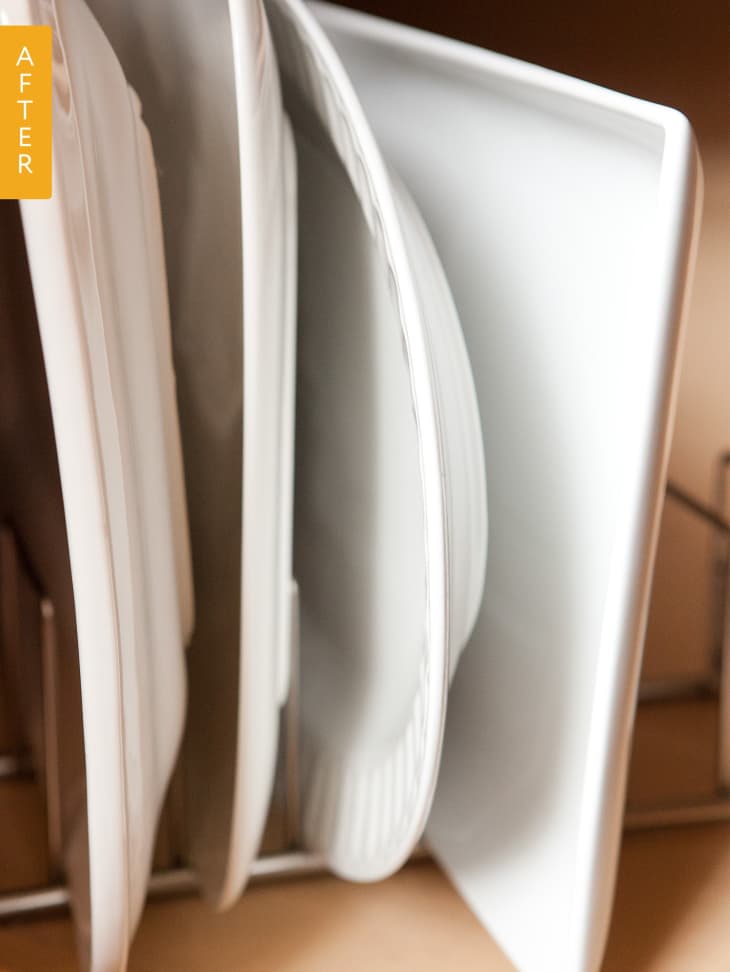
4. Store serving platters vertically.
Use a cutting board organizer to store your serving platters on their sides. This way, you can pull exactly what you need without having to sort through a stack in a high cabinet.
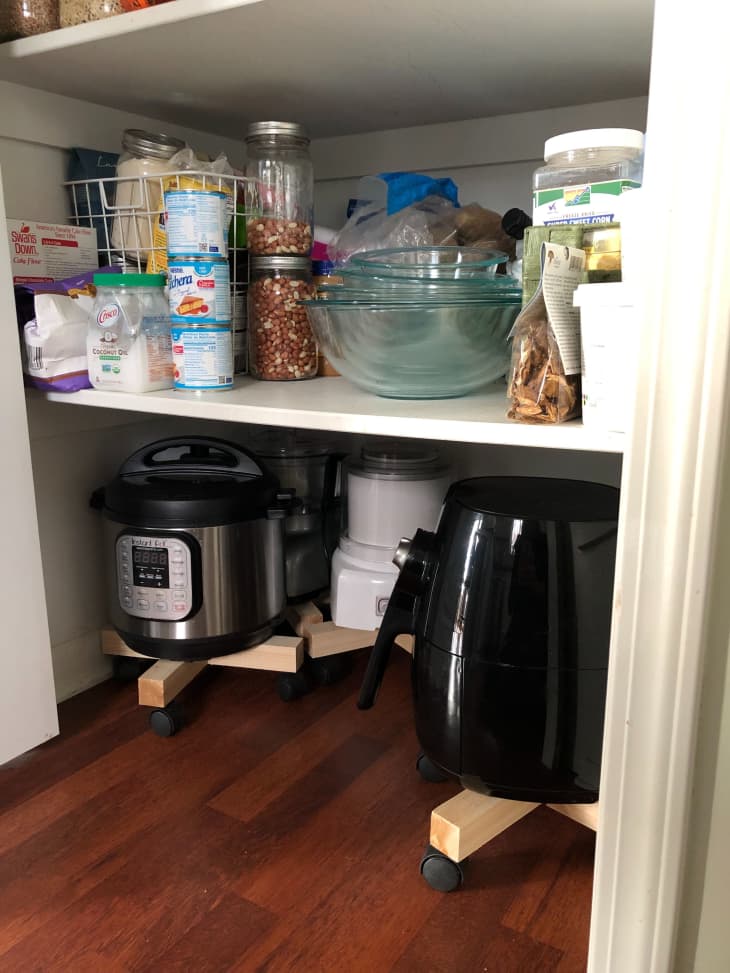
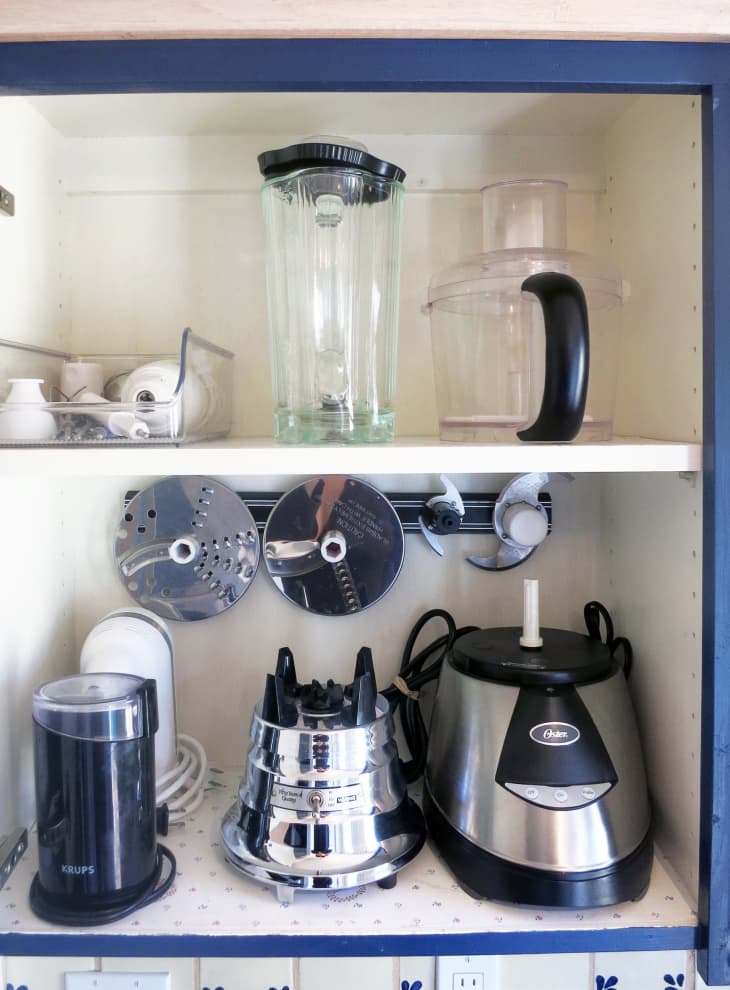
5. Store small appliances on rolling plant stands.
You might actually use your ice cream maker if you don’t have to haul out two rows of small appliances to get to it. Inexpensive rolling plant stands will turn your pantry floor into a functional appliance garage to expand and simplify storage.
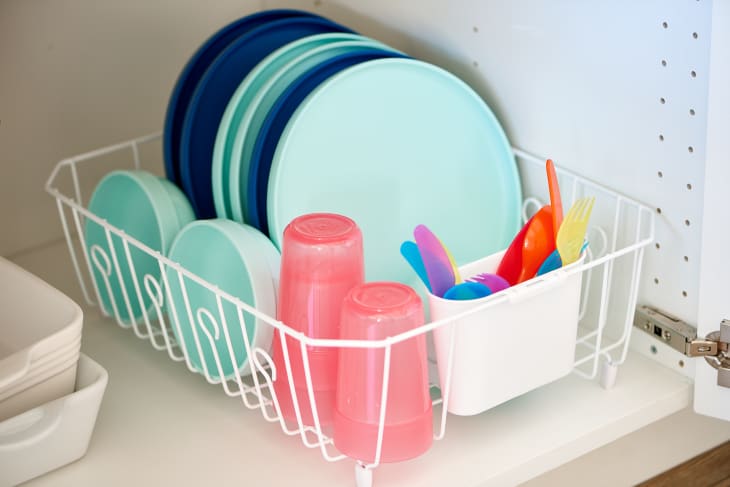
6. Use a dish rack to organize kids’ dishes.
A dish drying rack is perfect for storing and organizing dishes, cups, and utensils that you want to keep within reach. Plus, it allows your kiddos to have easy access.
7. Add shelf risers.
Shelf risers can double your usable cabinet space. To maximize the vertical space in your cabinets or pantry, add shelf risers. They allow you to store items on top of each other without having to stack them haphazardly.
8. Adjust the height of your shelves.
Sometimes the most simple solutions are also the most elusive. Realizing that you can adjust your shelves can transform the inside of your cabinets into spaces that work for you and your personal kitchen cabinet storage needs.
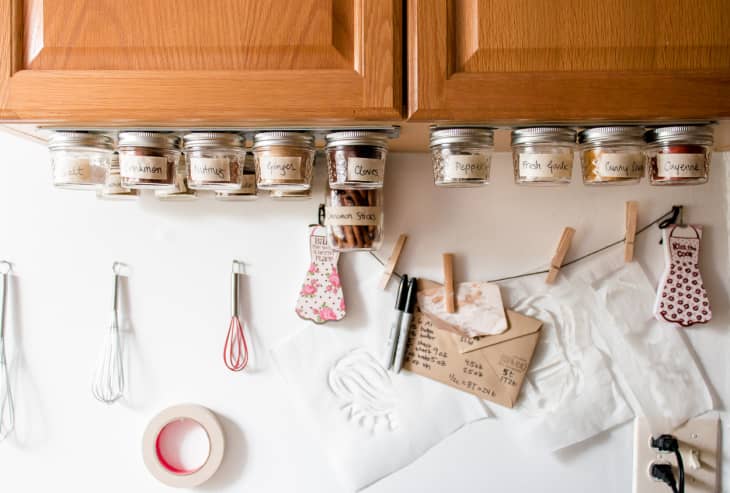
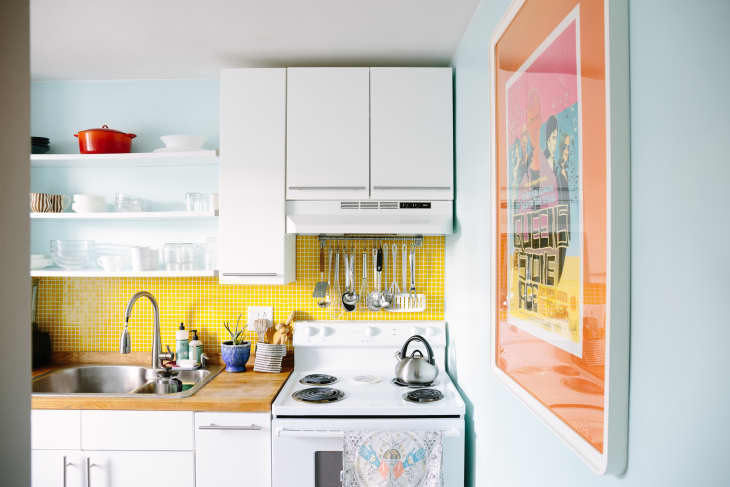
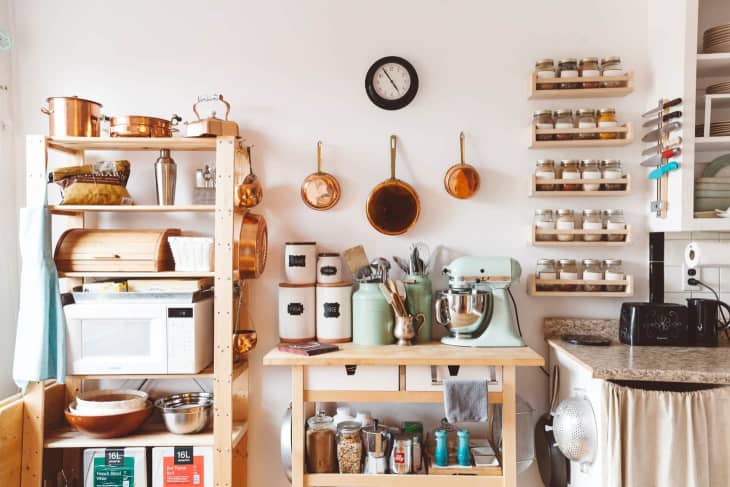
9. Use magnets on the undersides of your cabinets.
The surface underneath your cabinets can also be used to keep items organized and off of countertops. Here, spices are stored in jars and affixed with magnets to a strip on the underside of cabinets. Not only is this a great storage solution for spices, but it frees up interior cabinet space for housing other items.
For DIYers
Love a weekend home project? Whether you have a whole day or 30 minutes, these ideas will inspire your next kitchen venture.
10. Add drawers to your cabinets.
Installing cabinet drawers will transform them into orderly storage units that will keep you better organized. Simple drawers, like the ones above, can house small, light items, while heavy-duty drawers can accommodate larger, heavier items, such as pots and pans. If you can’t install your own, find a free-standing drawer unit that will fit inside your cabinets.
11. Cover glass cabinet doors.
Glass cabinet doors can be a beautiful component of kitchen cabinetry — except when what you see through those doors is in disarray. If you need to make utilitarian use of a glass-fronted kitchen cabinet, consider covering it with attractive paper.
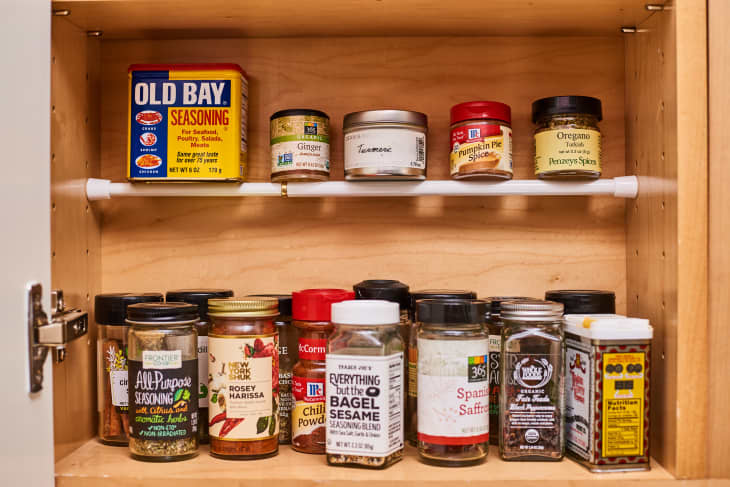
12. Add a “shelf” with a tension rod.
Tension rods to the rescue again! Create an instant shelf for small items by placing one across the length of a cabinet. It’s perfect for housing spices, small jars, and boxes of specialty seasonings.
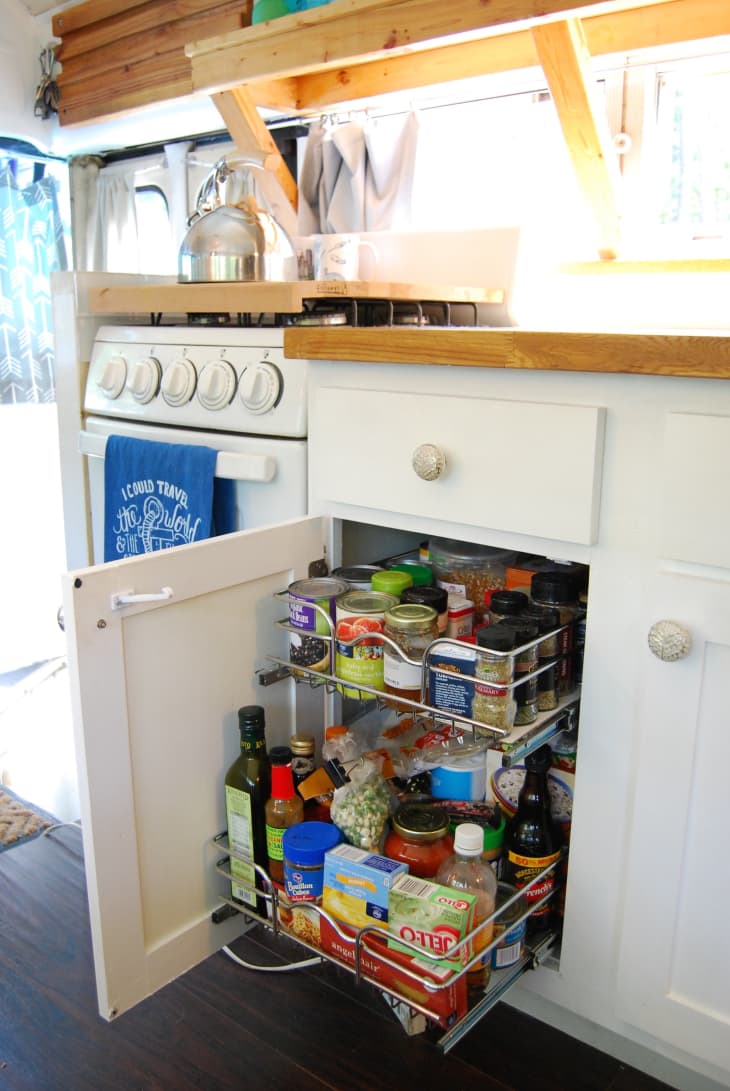
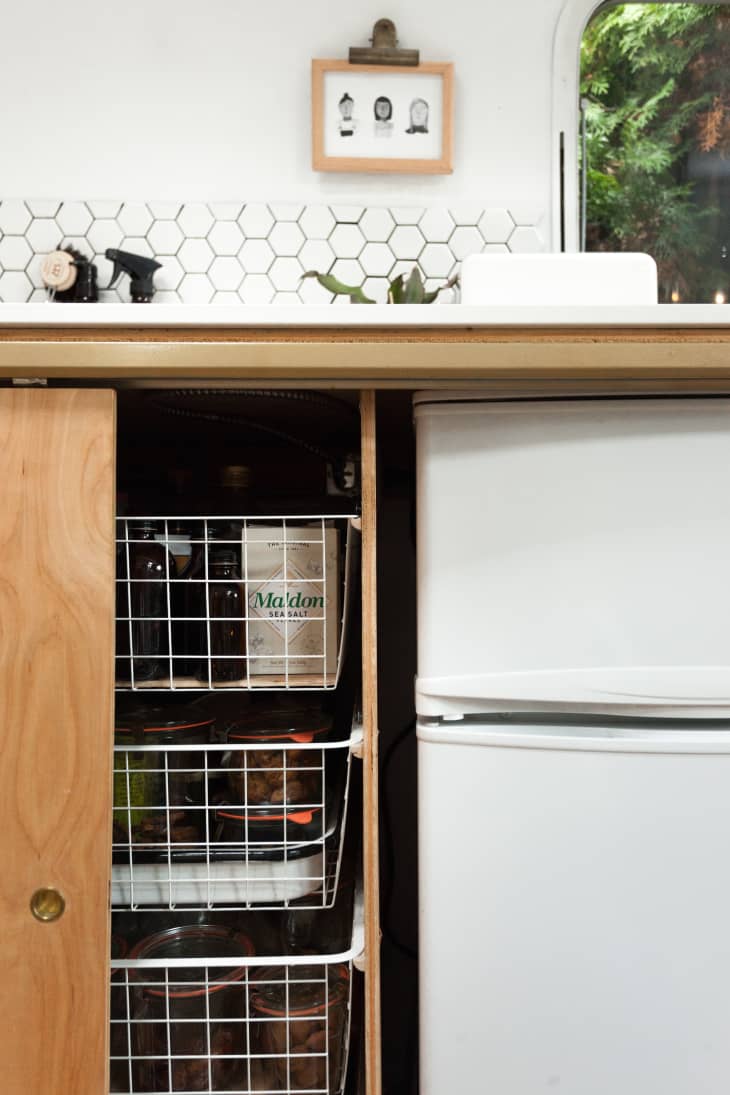
13. Create a pantry cabinet.
If you don’t have a dedicated pantry, you’ll need a way to store dry goods, oils, spices, and more without creating extra clutter. Installing pull-out drawers in a cabinet allows you to see everything you have while also maximizing your square footage.
For the Aesthetes
Turns out, an Instagram-worthy kitchen is within reach, no matter your budget. Use these ideas to showcase your personal design style and get organized for a satisfying kitchen.
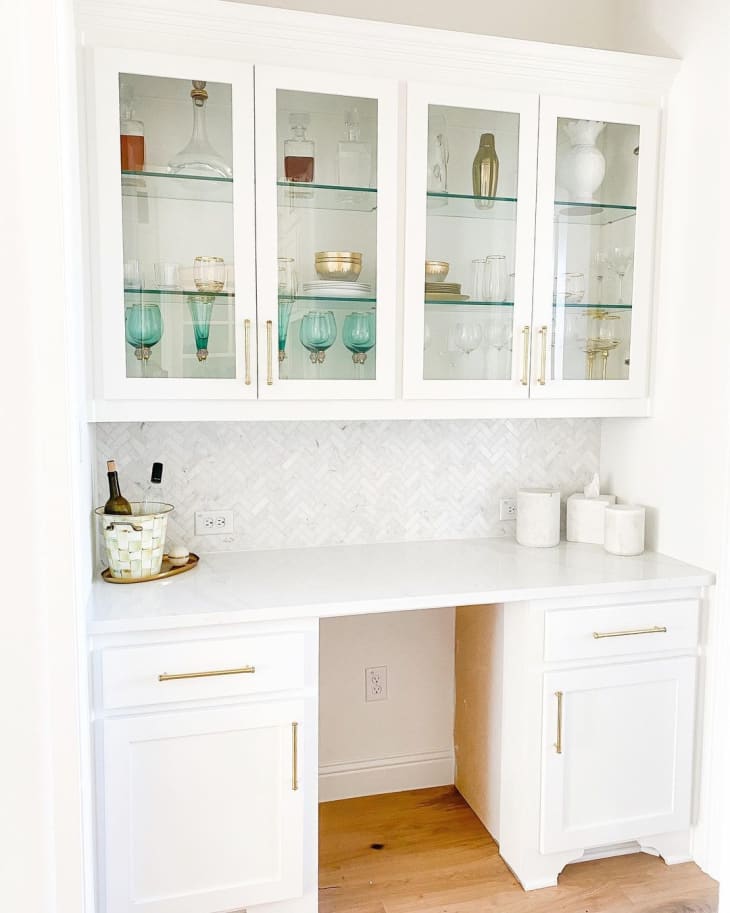
14. Declutter for happy hour.
Your butler’s pantry or home bar doesn’t have to display all your goodies. Select a few special glasses or prized items to highlight, like Taryn Newton did here, to create a clean, minimalist cabinet look that’s equally stunning and well-organized. Stash your more utilitarian items neatly behind non-glass-front cupboards.
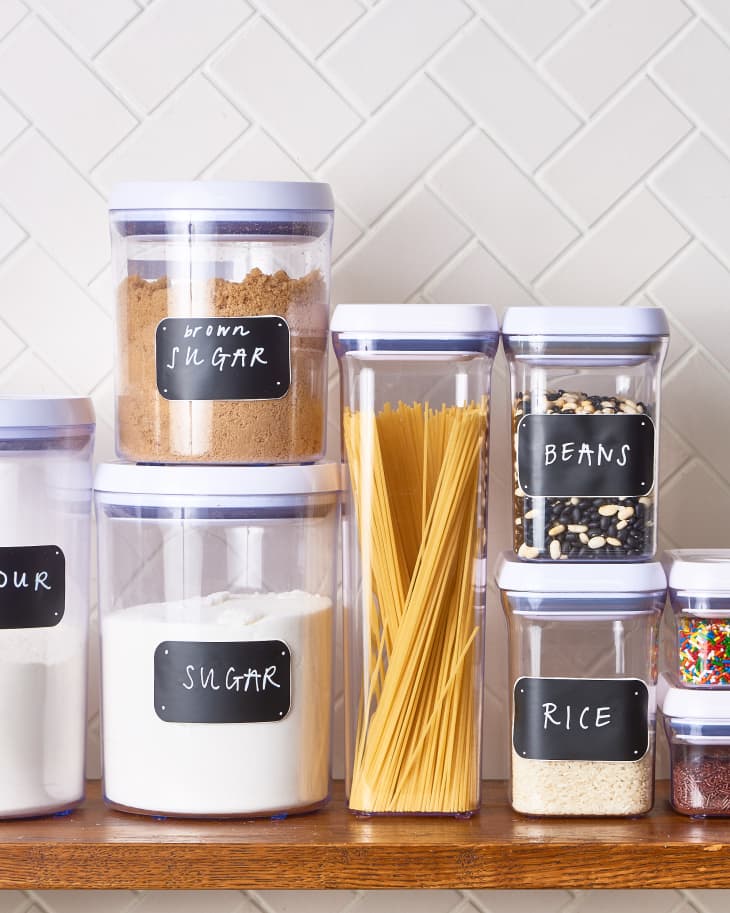
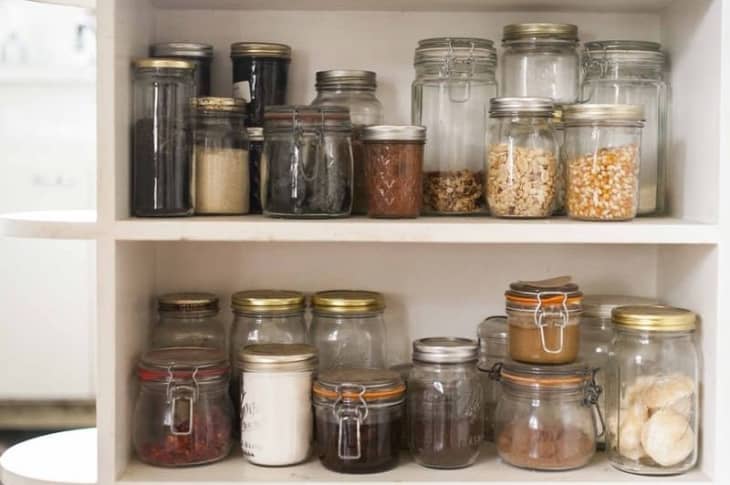
15. Decant your staples.
By pouring pantry staples like sugar, pasta, and grains into uniform containers, you’ll not only maximize storage space, but you’ll also be able to get rid of unsightly boxes and bags while keeping everything airtight and fresh to boot. Make sure to add labels!
16. Store like with like.
Storing similar things together serves aesthetic and practical purposes. It will please the eye, help you stay organized, and let you take inventory of what’s clean or missing.
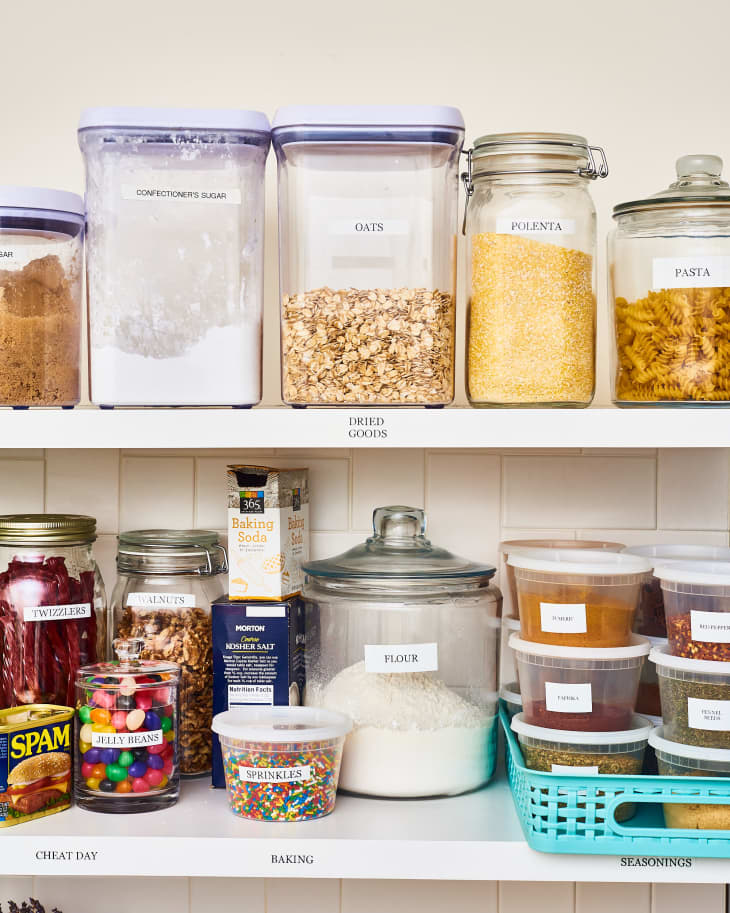
17. Label everything.
It can be visually and mentally overwhelming to look at a sea of disparate containers filled with all kinds of different contents in a cabinet or pantry. Investing in a label maker can restore calm and will ensure that you’re always well-stocked with the right grocery items.
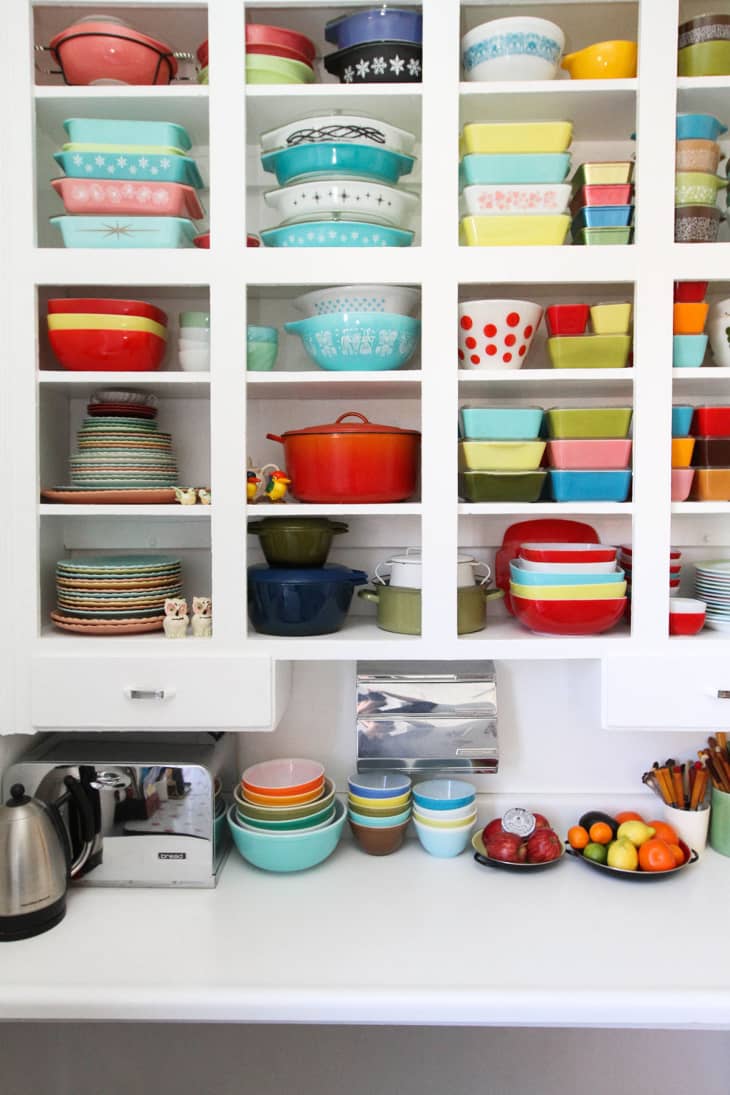
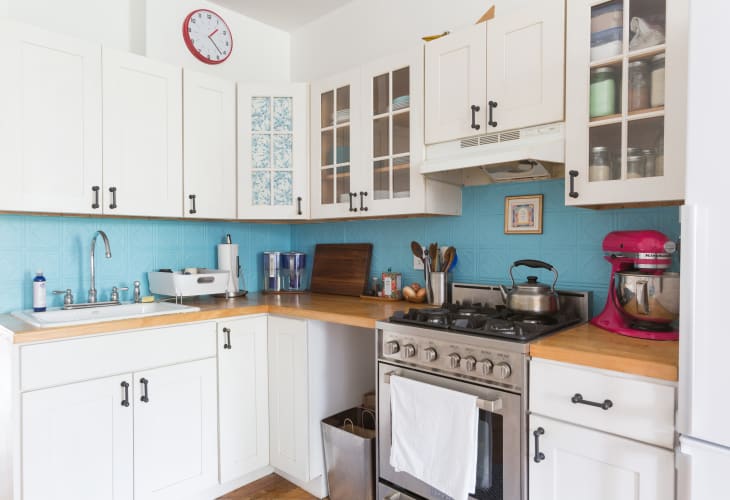
18. Or, embrace color completely.
This kitchen proves that utilitarian objects that are visible in a kitchen with open shelves can be beautiful. It’s just all about striking a balance between well-collected and kitschy clutter.
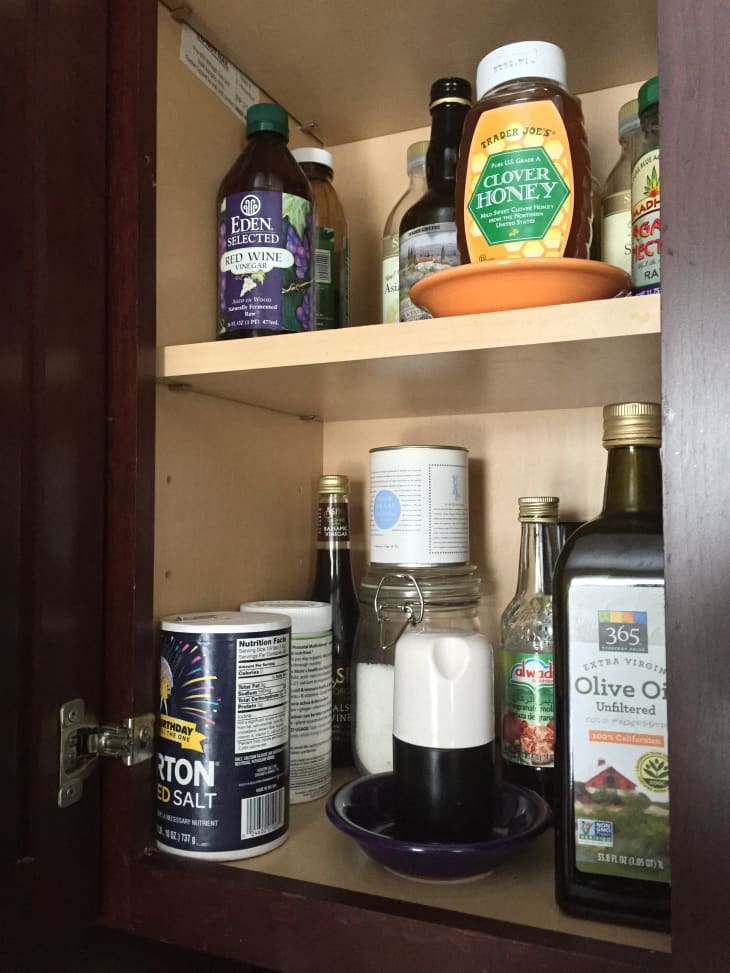
19. Store messy items on saucers.
If you store things that tend to drop debris or leave messes, set them on top of small plates or shallow bowls. This will keep messes from spreading all over your pantry or cabinet interiors and will keep neighboring items clean as well.
20. Employ the pantry “golden rule.”
The pantry golden rule says that you must be able to see everything that’s inside. This can be applied to the interiors of your cabinets and drawers as well. The benefit is that you’ll always know what you have in stock and be forced to edit what you keep — and it makes putting items away so much easier.
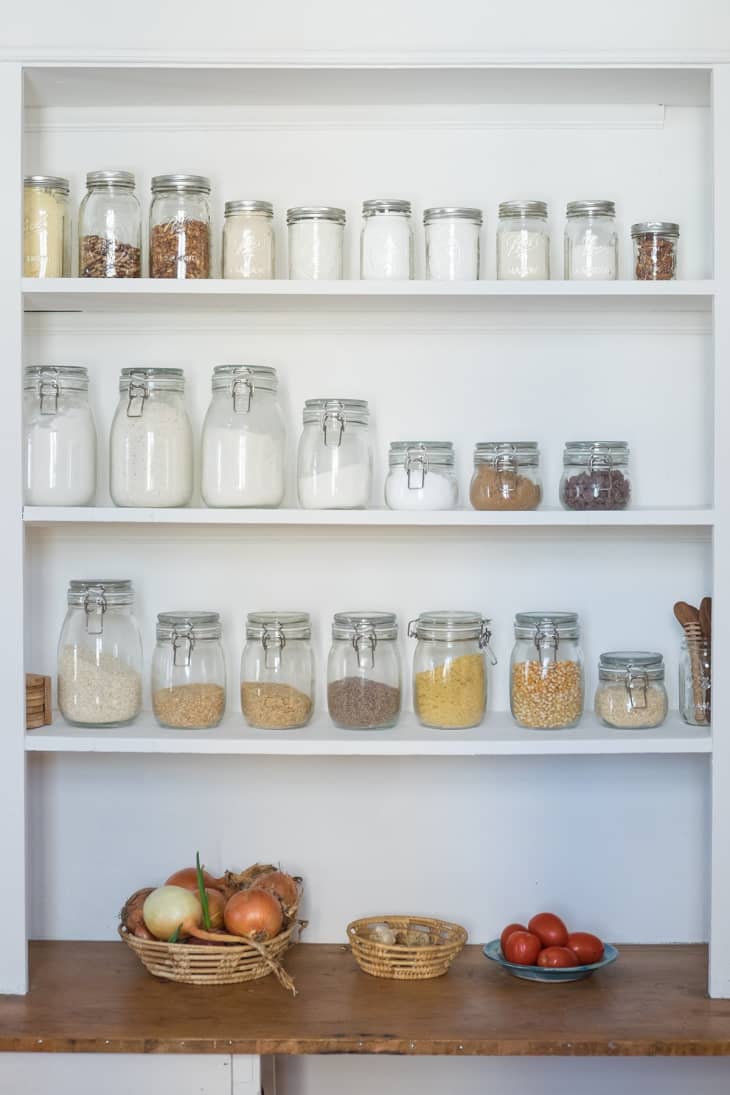
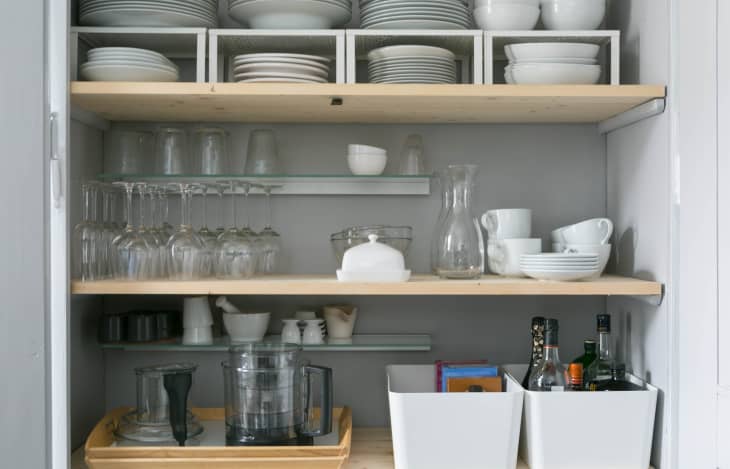
21. Arrange items by height.
Little changes can make a big difference when it comes to storing a collection of items. Just as children’s books arranged by height on a bookshelf look tidy, placing items in a cabinet or pantry according to height creates a pleasing sense of orderliness.
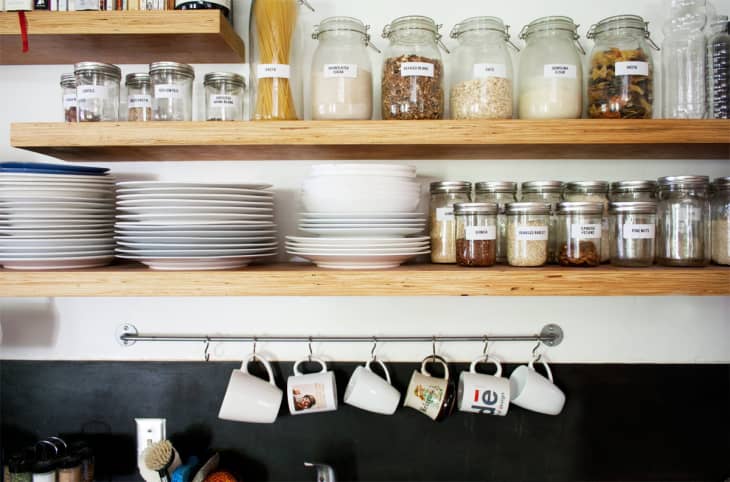
22. Line up your labels.
Not only can labeling make a difference in organizing the kitchen, but going one step further to line up your jars will make all the difference. In this open-shelving kitchen, the lined-up, uniform labels add to an overall sense of orderliness, even when many disparate objects are on display.
For a Five-Minute Fix
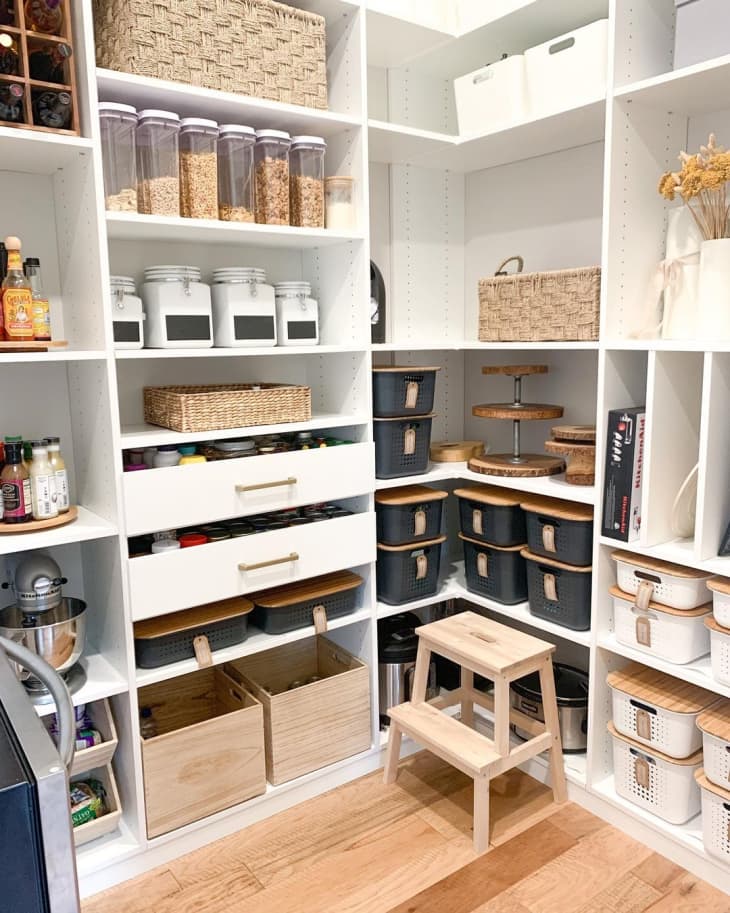
23. Swap out boring bins.
Cat of Modern Boho Cottage found a more stylish alternative to classic plastic bins, which can look a little plain to those that have an eye for design. She opted for opaque black and white storage containers to make her pantry pop and keep her snacks tucked away.
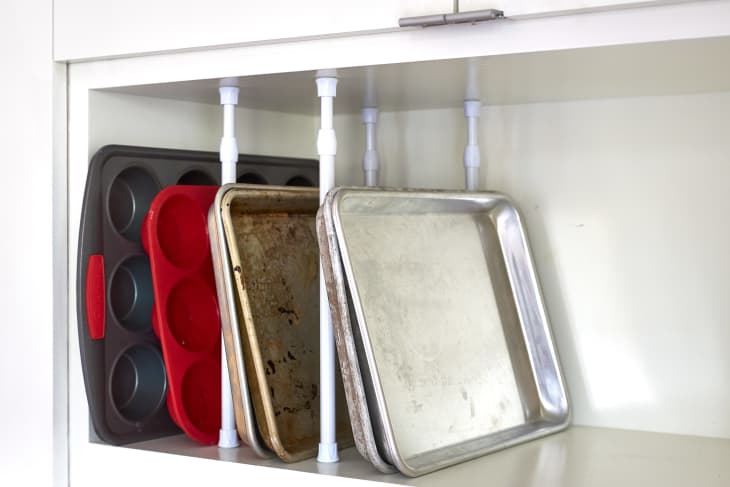
24. “File” your baking sheets and muffin tins.
No one wants to pull a cookie sheet out from under six others. Store your baking sheets vertically instead of piling them on top of each other with the help of a tension rod to give you instant, usable slots so you can slip bakeware in and out with ease.
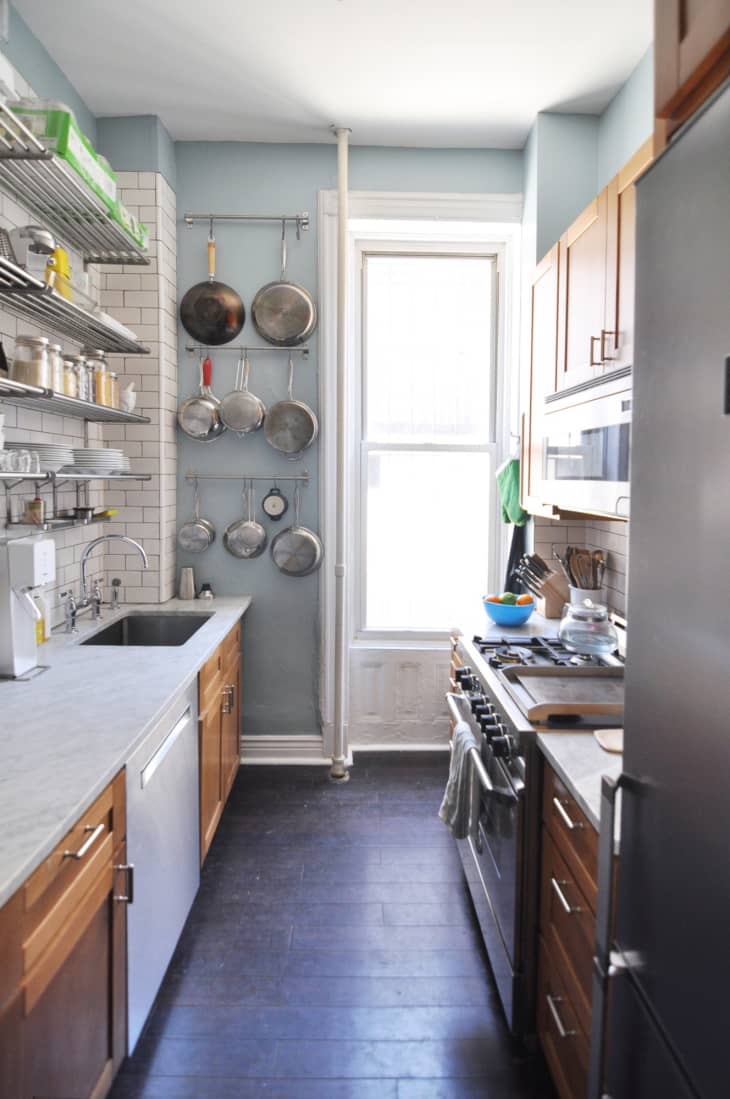
25. Take things out of the cabinets.
One of the keys to successful organizational systems that can actually be maintained is creating spaces that aren’t overcrowded. If you’re short on kitchen cabinet space, consider taking some items out of your cabinets and storing them elsewhere in your kitchen. Taking pots and pans out of your cabinets and hanging them frees up valuable cabinet space and will look pleasing to the eye.
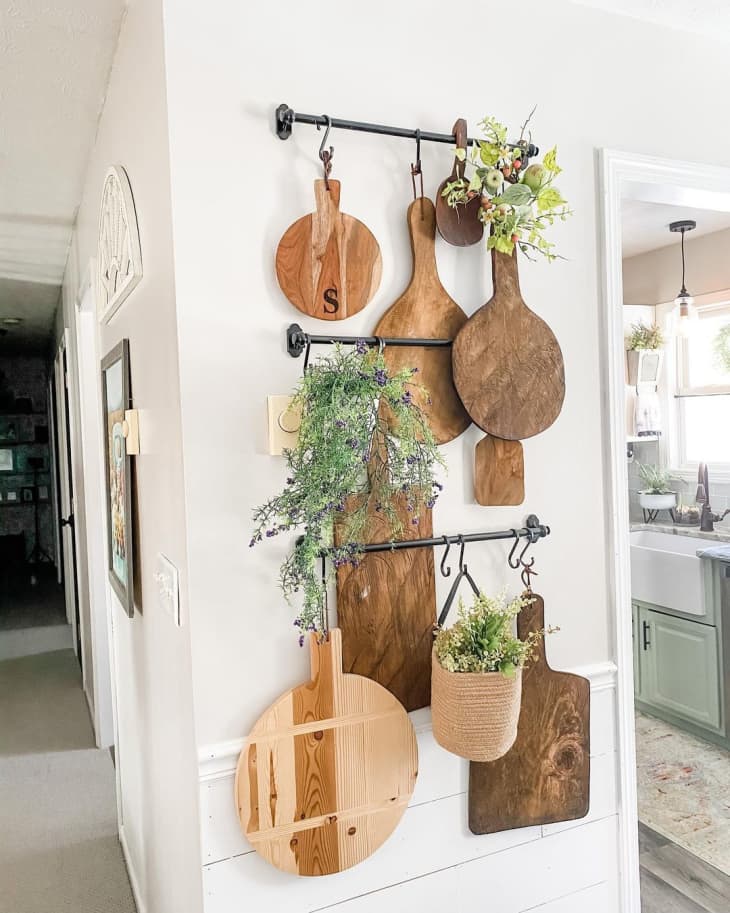
26. Forget classic cabinet storage.
Why, yes, cutting boards most definitely can be wall art! Just look at blogger Christine Sentz of The Gray House Design Co. and her wall of pretty wooden pieces. Not only does this free up space in your cabinets for other items, but it’s also a perfect way to organize your prep tools in a way that doesn’t feel basic.
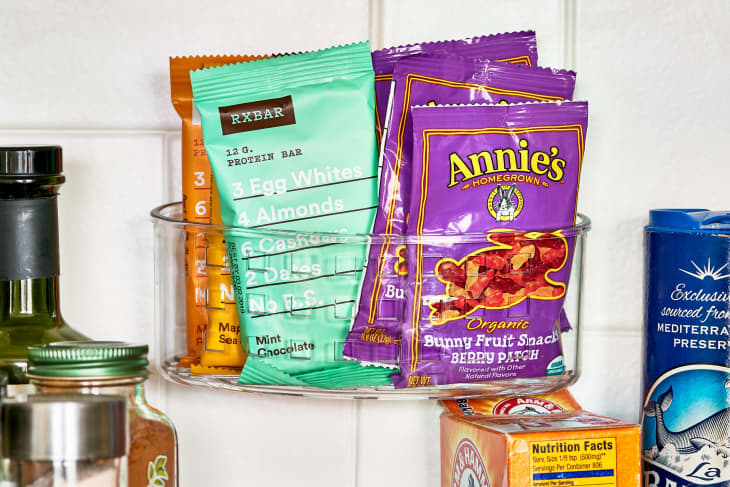
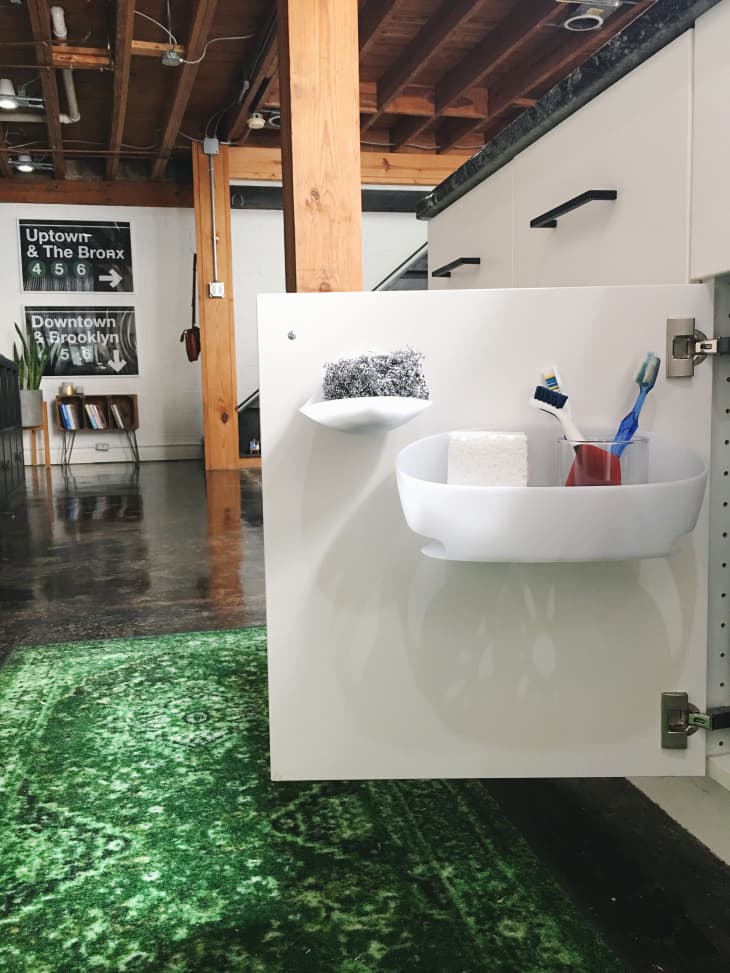
27. Store small pantry items in a sponge holder.
Those kitchen sponge holders that suction to the side of the sink can actually be a sneaky food storage hero. Simply stick those on the sides of your pantry storage or the back of a cabinet door with adhesive strips. We love how these adhesive sponge holders are wide enough to store items, but don’t interfere with fully closing the cabinet door.
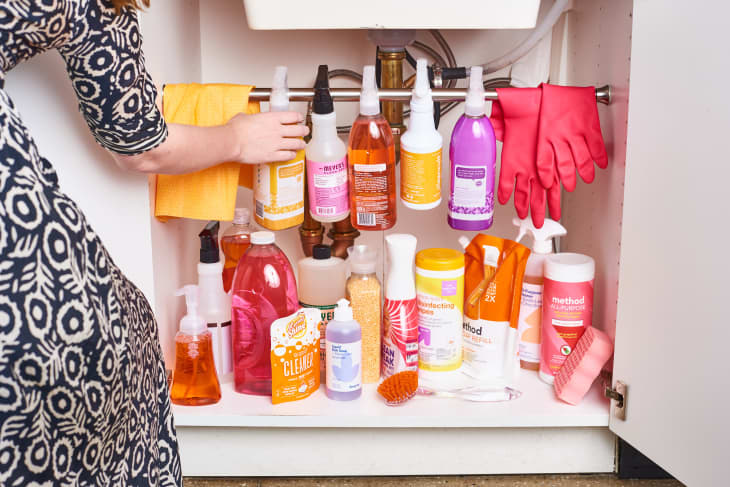
28. Hang cleaning sprays with a tension rod.
Maximize awkward cabinet space beneath your kitchen sink by hanging your cleaning sprays from a tension rod affixed across the cabinet. Now, all your go-to products will be both out of the way and within reach.
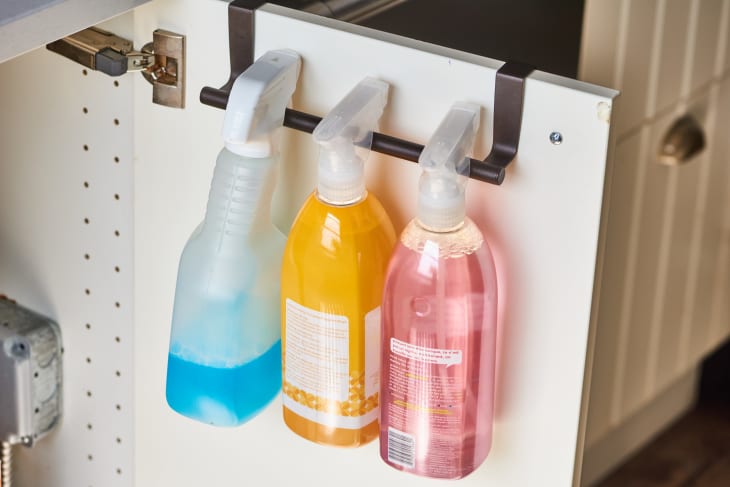
29. Or, try out an over-the-cabinet towel bar.
Those small cabinet door towel racks can be flipped around so the rung is on the inside of the cabinet instead. The rung, like the tension rod, provides a perfect handle for hanging your cleaning bottles.
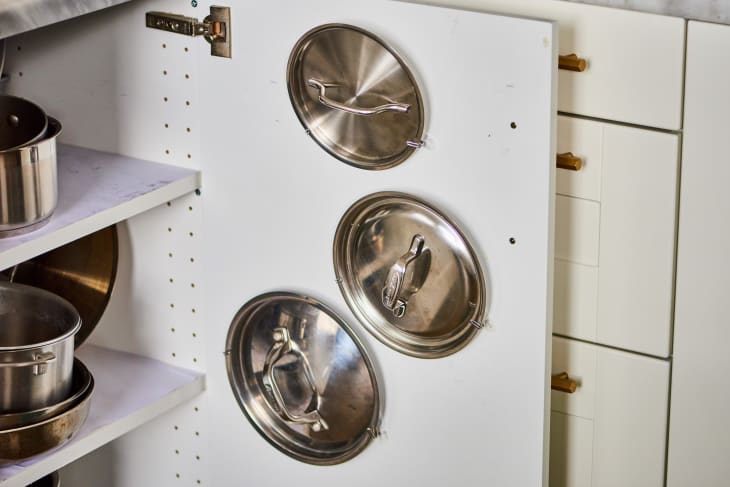
30. Make your own pot lid hangers.
Use Command hooks to make instant, custom pot holders that live on your cabinet doors. Hold each lid up to the cabinet door and place Command hooks at 8:00 and 4:00 (pretending your lid is a clock face). Easy as that!
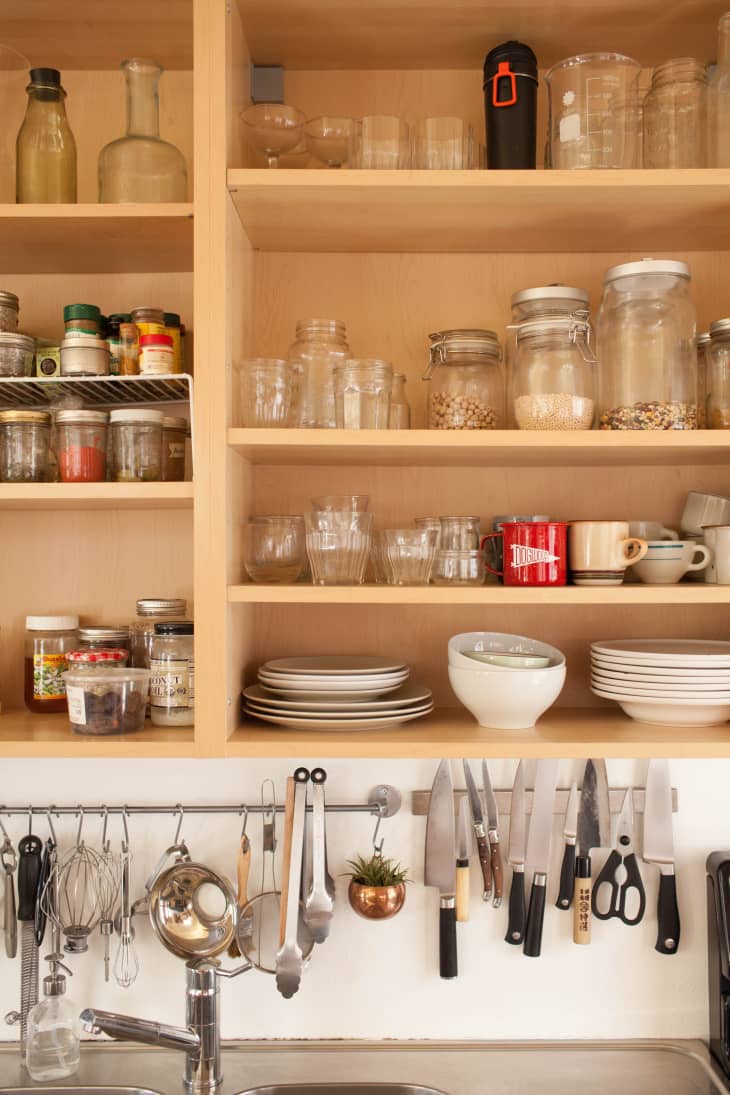
31. Hang a curtain rod below the cabinets.
Mount a curtain rod below your cabinets to hang your utensils (with S hooks or just hooked on) and free up a drawer or two. You can mount it to the backsplash or directly to the bottom of your upper cabinets.
32. Create instant storage with stick-on shelves.
For organizing small items that you need quick access to, Command strip-mounted caddies are an excellent solution. Just stick them on the inside of cabinet doors to streamline storage in seconds.
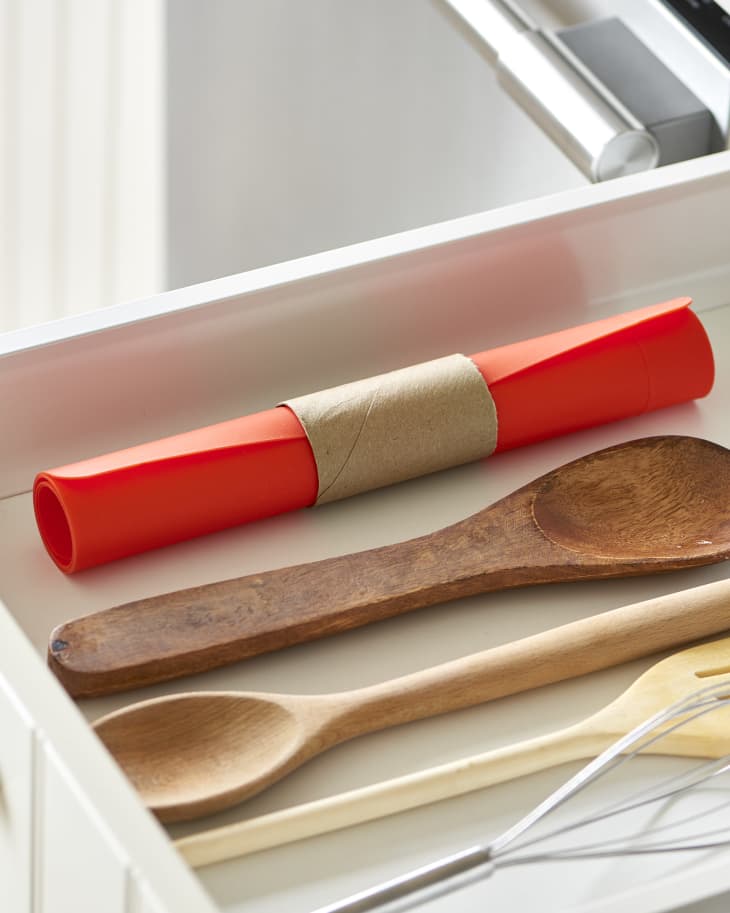
33. Use a toilet paper tube to keep baking mats tidy.
Baking mats prevent stuck-on cookies, and we love them. But they’re floppy and not so easy to store. Rolling mats and inserting them in a toilet paper tube allows you to store them neatly in just about any kitchen drawer or cabinet.
34. Install a magnetic knife strip on the side of your cabinets.
If there’s no room in drawers or on a countertop for a knife block, and no room on the walls for a knife strip, you can mount one on the side of your upper cabinets to keep important tools in easy reach of adult hands and away from little fingers.
35. Or, put a magnetic knife strip inside your cabinets
Shuffling around for sharp blades isn’t safe. A magnetic knife strip makes excellent use of otherwise wasted space and keeps blades stored safely.
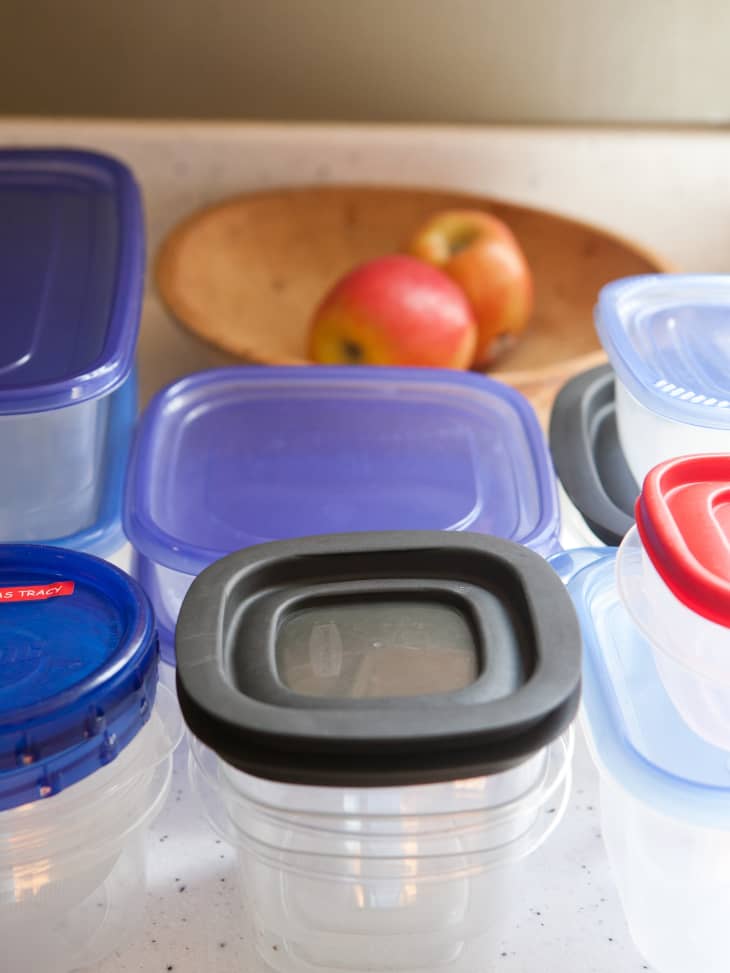
36. Go through your food storage containers.
Streamlining food storage container organization can be overwhelming. There are so many shapes and sizes to sort through, between the lids and containers themselves. Save yourself the extra hassle by going through your entire collection to see what you have, what you can get rid of, and what you might need to invest in.
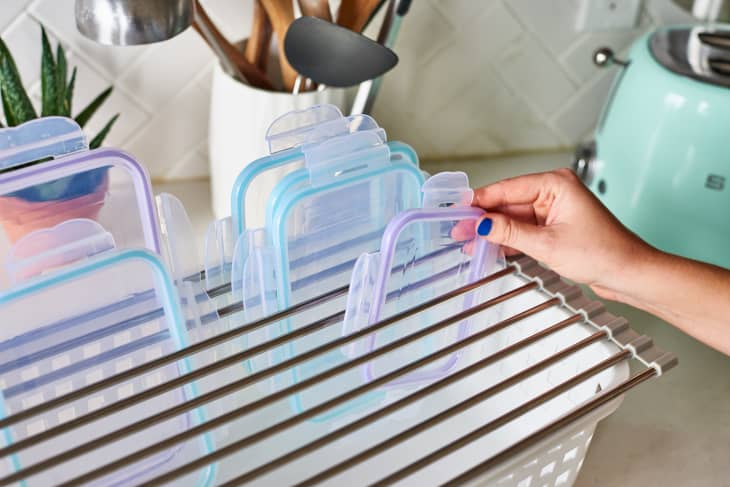
37. Then store the lids with a roll-up drying rack.
Combine a roll-up drying/cooling rack and a plastic storage bin to store all those messy, mismatched food storage lids in one tidy, easy-to-grab spot. We tried this roll-up drying rack and were amazing at how multipurpose and sturdy (it holds up to 70 pounds!) it was.
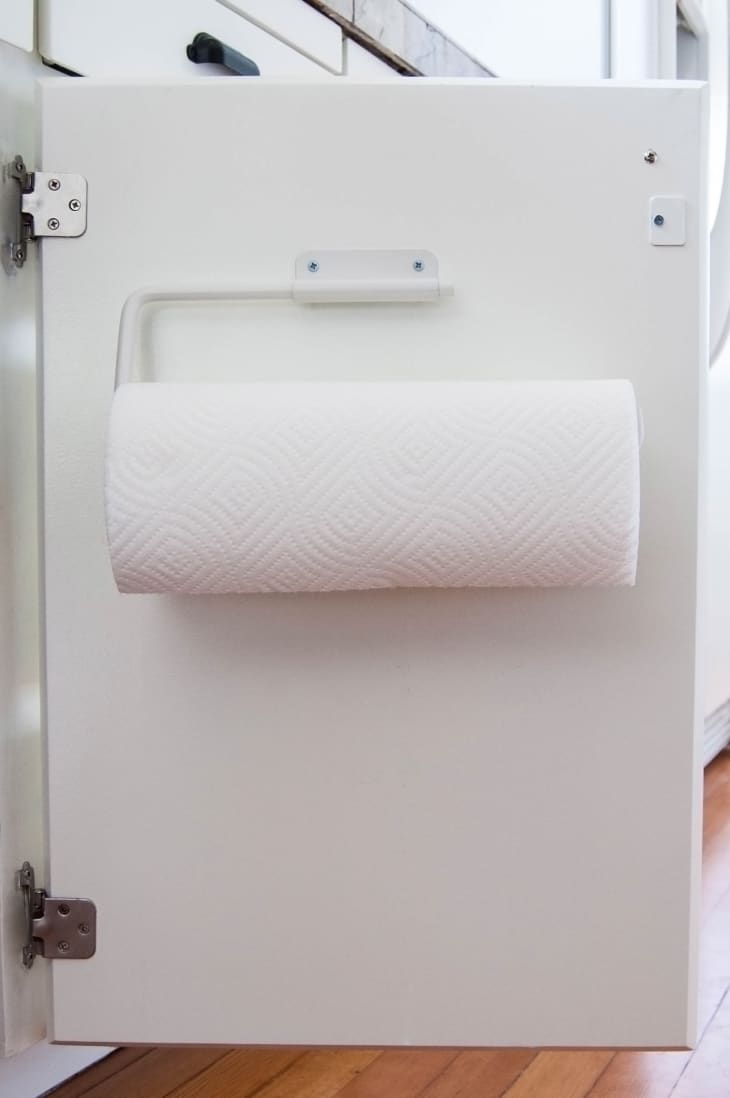
38. Use a cabinet door to hang paper towels.
The inside of a cabinet door is an excellent place to hang a paper towel roll. Get one that mounts more permanently to the door, like this stainless steel option that can actually be mounted using adhesive or a screw. Or try a paper towel holder that hangs off the top of the cabinet.